Here’s just a quick tutorial on how to install a second hard drive or solid state drive to your old Macbook Pro by replacing the optical drive with a SSD/HDD in case you need any extra storage place or boost your macs performance. It really is pretty simple as you can see in the video above or read in the detailed guide below.
What you will need for this is the following:
Caddy:
SSD:
All you have to do is, remove the backside of the unibody. Remove the battery connector by just slowly pulling upwards on the connector until it pops off:
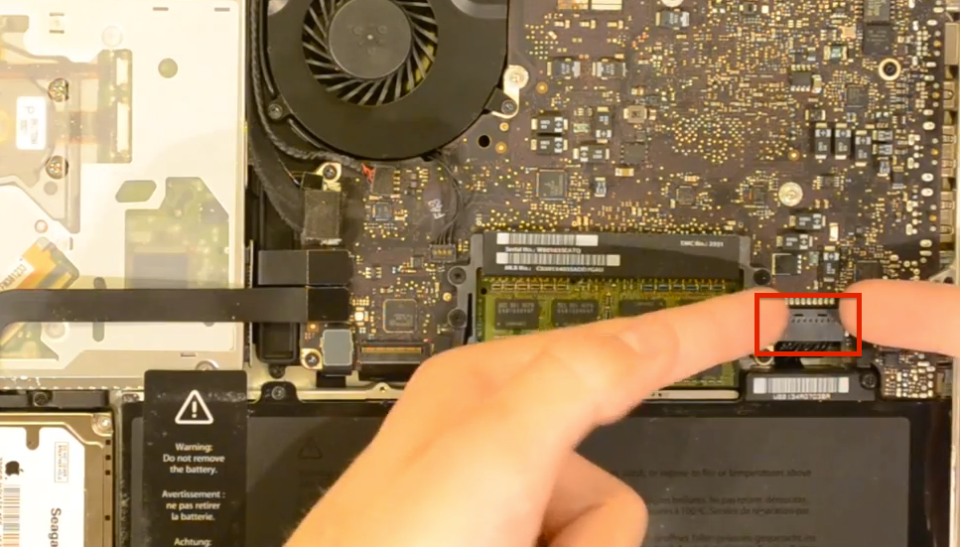
remove the battery clip to prevent shorts while replacing the optical drive
Now you want to remove the antenna/speaker module by unscrewing the two screws marked by red:
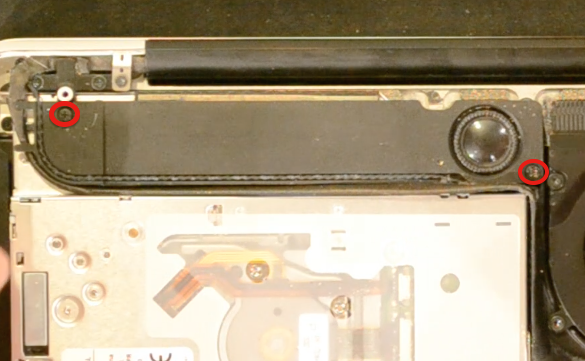
Unscrew the two screws to remove the antenna module
Next you’re gonne remove the connectors for the Hard drive (HDD), optical drive, antenna and speaker module. The connectors is mark by red on the following picture:
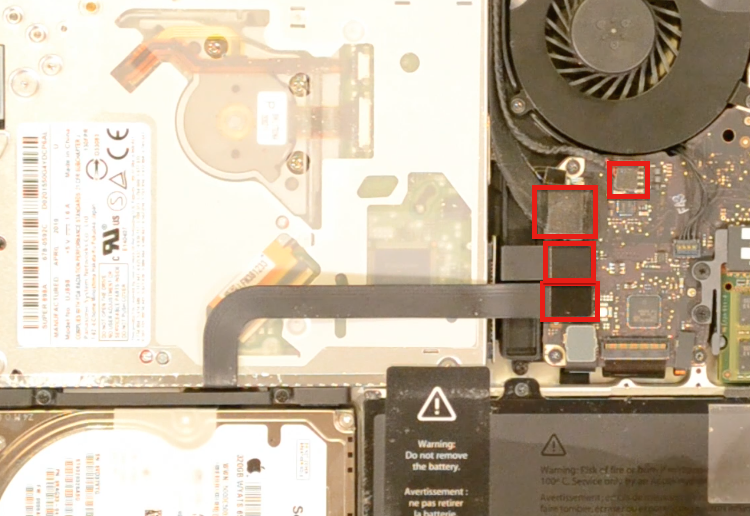
Remove connectors for HDD, optical drive, speaker and antenna module
This next step is optional, but i really recommend doing it to the HDD wire safe from bending/breaking. You want to remove the bracket that holds the HDD cable in to place by unscrewing the two red-marked screws:
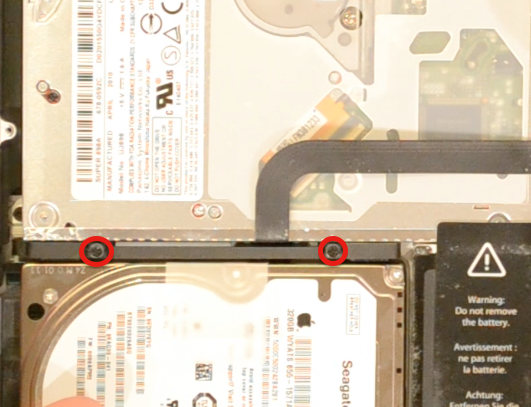
Remove the bracket to protect HDD cable
Now remove the screws holding the optical drive in to place. The screws are marked by red:
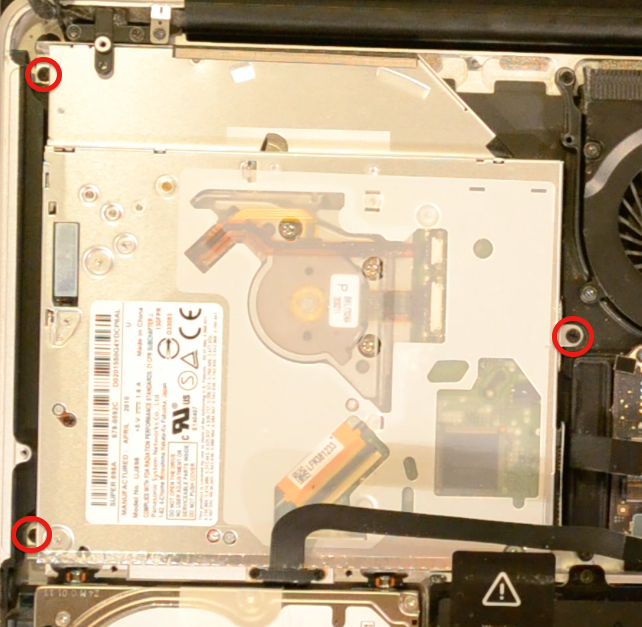
Remove the optical drive by unscrewing these 3 screws
Now just slowly pull out the optical drive by pulling towards the right. After that take the caddy you ordered (like the one linked at the start of this article), and switch the black connector/cable from the optical drive to the caddy. The same goes for the bracket on the optical drive. Move that to the caddy by just undoing the two screws that holds it into place, and screw the bracket on the caddy like illustrated below:
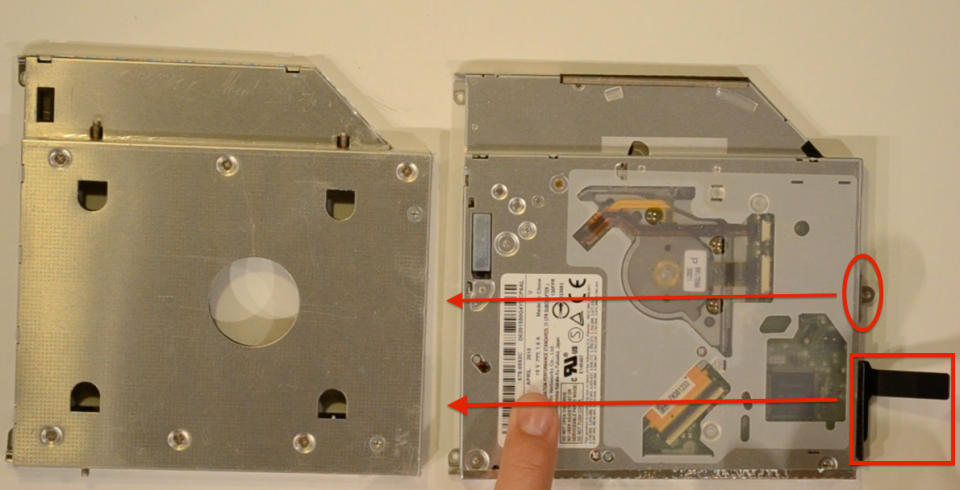
Move the socket and bracket from optical drive to caddy
After that you want to insert the HDD/SSD into the caddy and screw the 4 screws into the HDD/SSD from the side of the caddy. When that’s done simply read this article again from the bottom, because to install the caddy simply reverse the process we just did, and watch the video in the start of this article for further information. Thank you for reading and watching along. Good luck with the upgrade :-)
/Martin
PS. If you want to use the new HDD/SSD to boot from, you will need to download the OSX software and install it on the 2nd HDD/SSD you just installed and make that the primary boot drive.


This is brilliant.