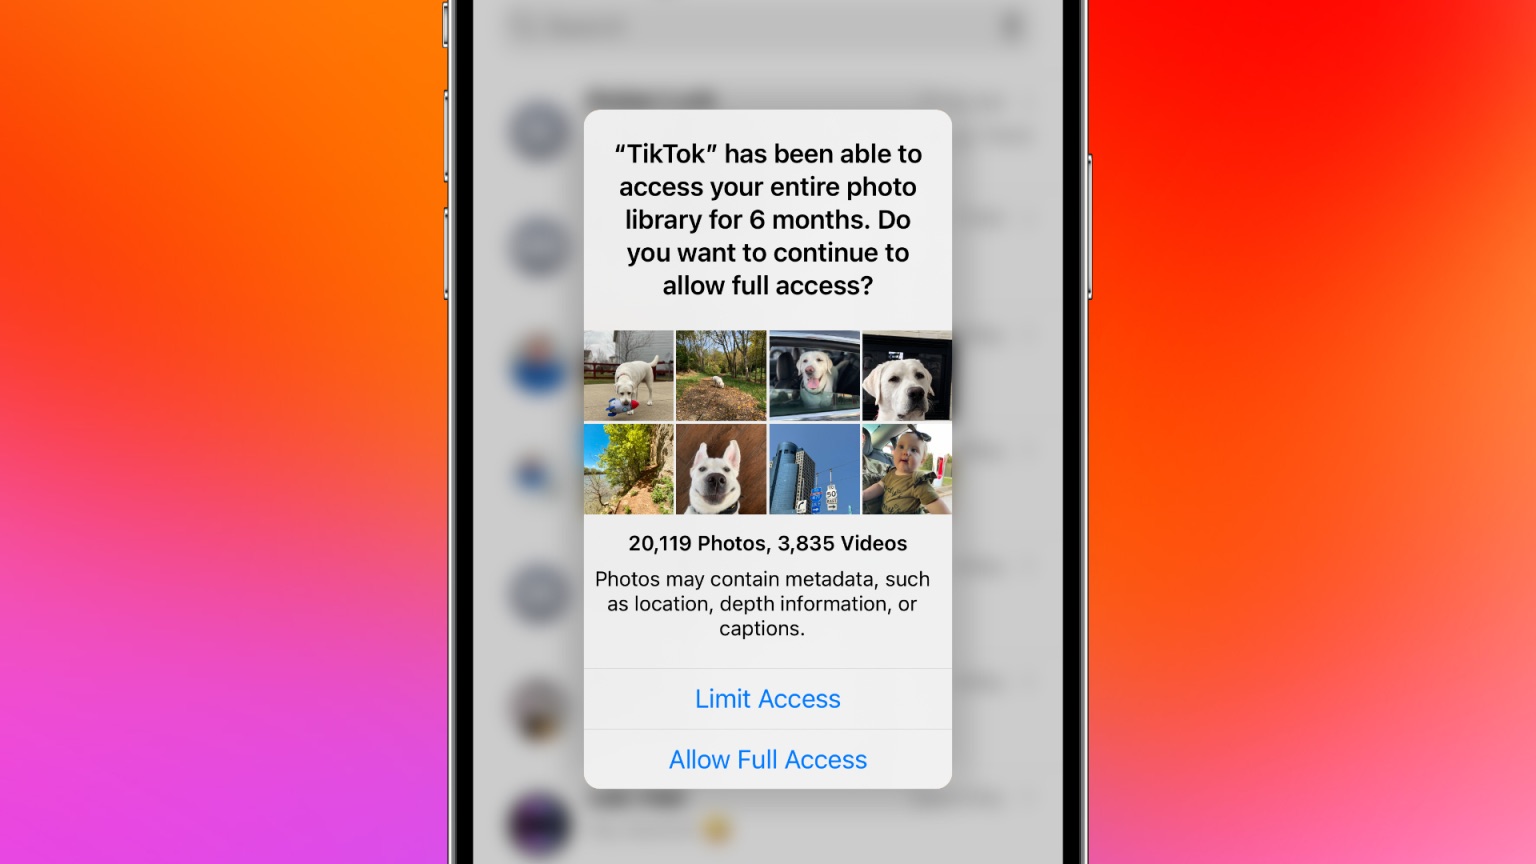
One of the new privacy improvements with iOS 17 is a fresh embedded Photos picker for third-party apps plus alerts about which apps have full access to your photo library. Follow along for how to limit iPhone Photos app access for apps with iOS 17.
While Apple includes the ability to limit third-party photo and video access to selected content with iOS 16, there are several upgrades to improve awareness and privacy in this area with iOS 17.
Along with the new Photos picker and alerts about apps with full access to your iPhone camera roll, Apple says when apps ask for Photos app privileges in iOS 17, users will “be shown more information about what they’ll be sharing…”
That includes reminding users that apps may be able to see location data and image captions, explaining why an app wants Photos app access, and the current amount of photos and videos in your library.
How to limit iPhone Photos app access for apps with iOS 17
- After installing iOS 17 on your iPhone, look out for automatic alerts about apps that have had full access to your Photos app library and decide if you want to continue to allow it
- You can choose between Limited Access, Allow Full Access, or Don’t Allow
- You will also see the alert when an app asks for Photos app permissions for the first time
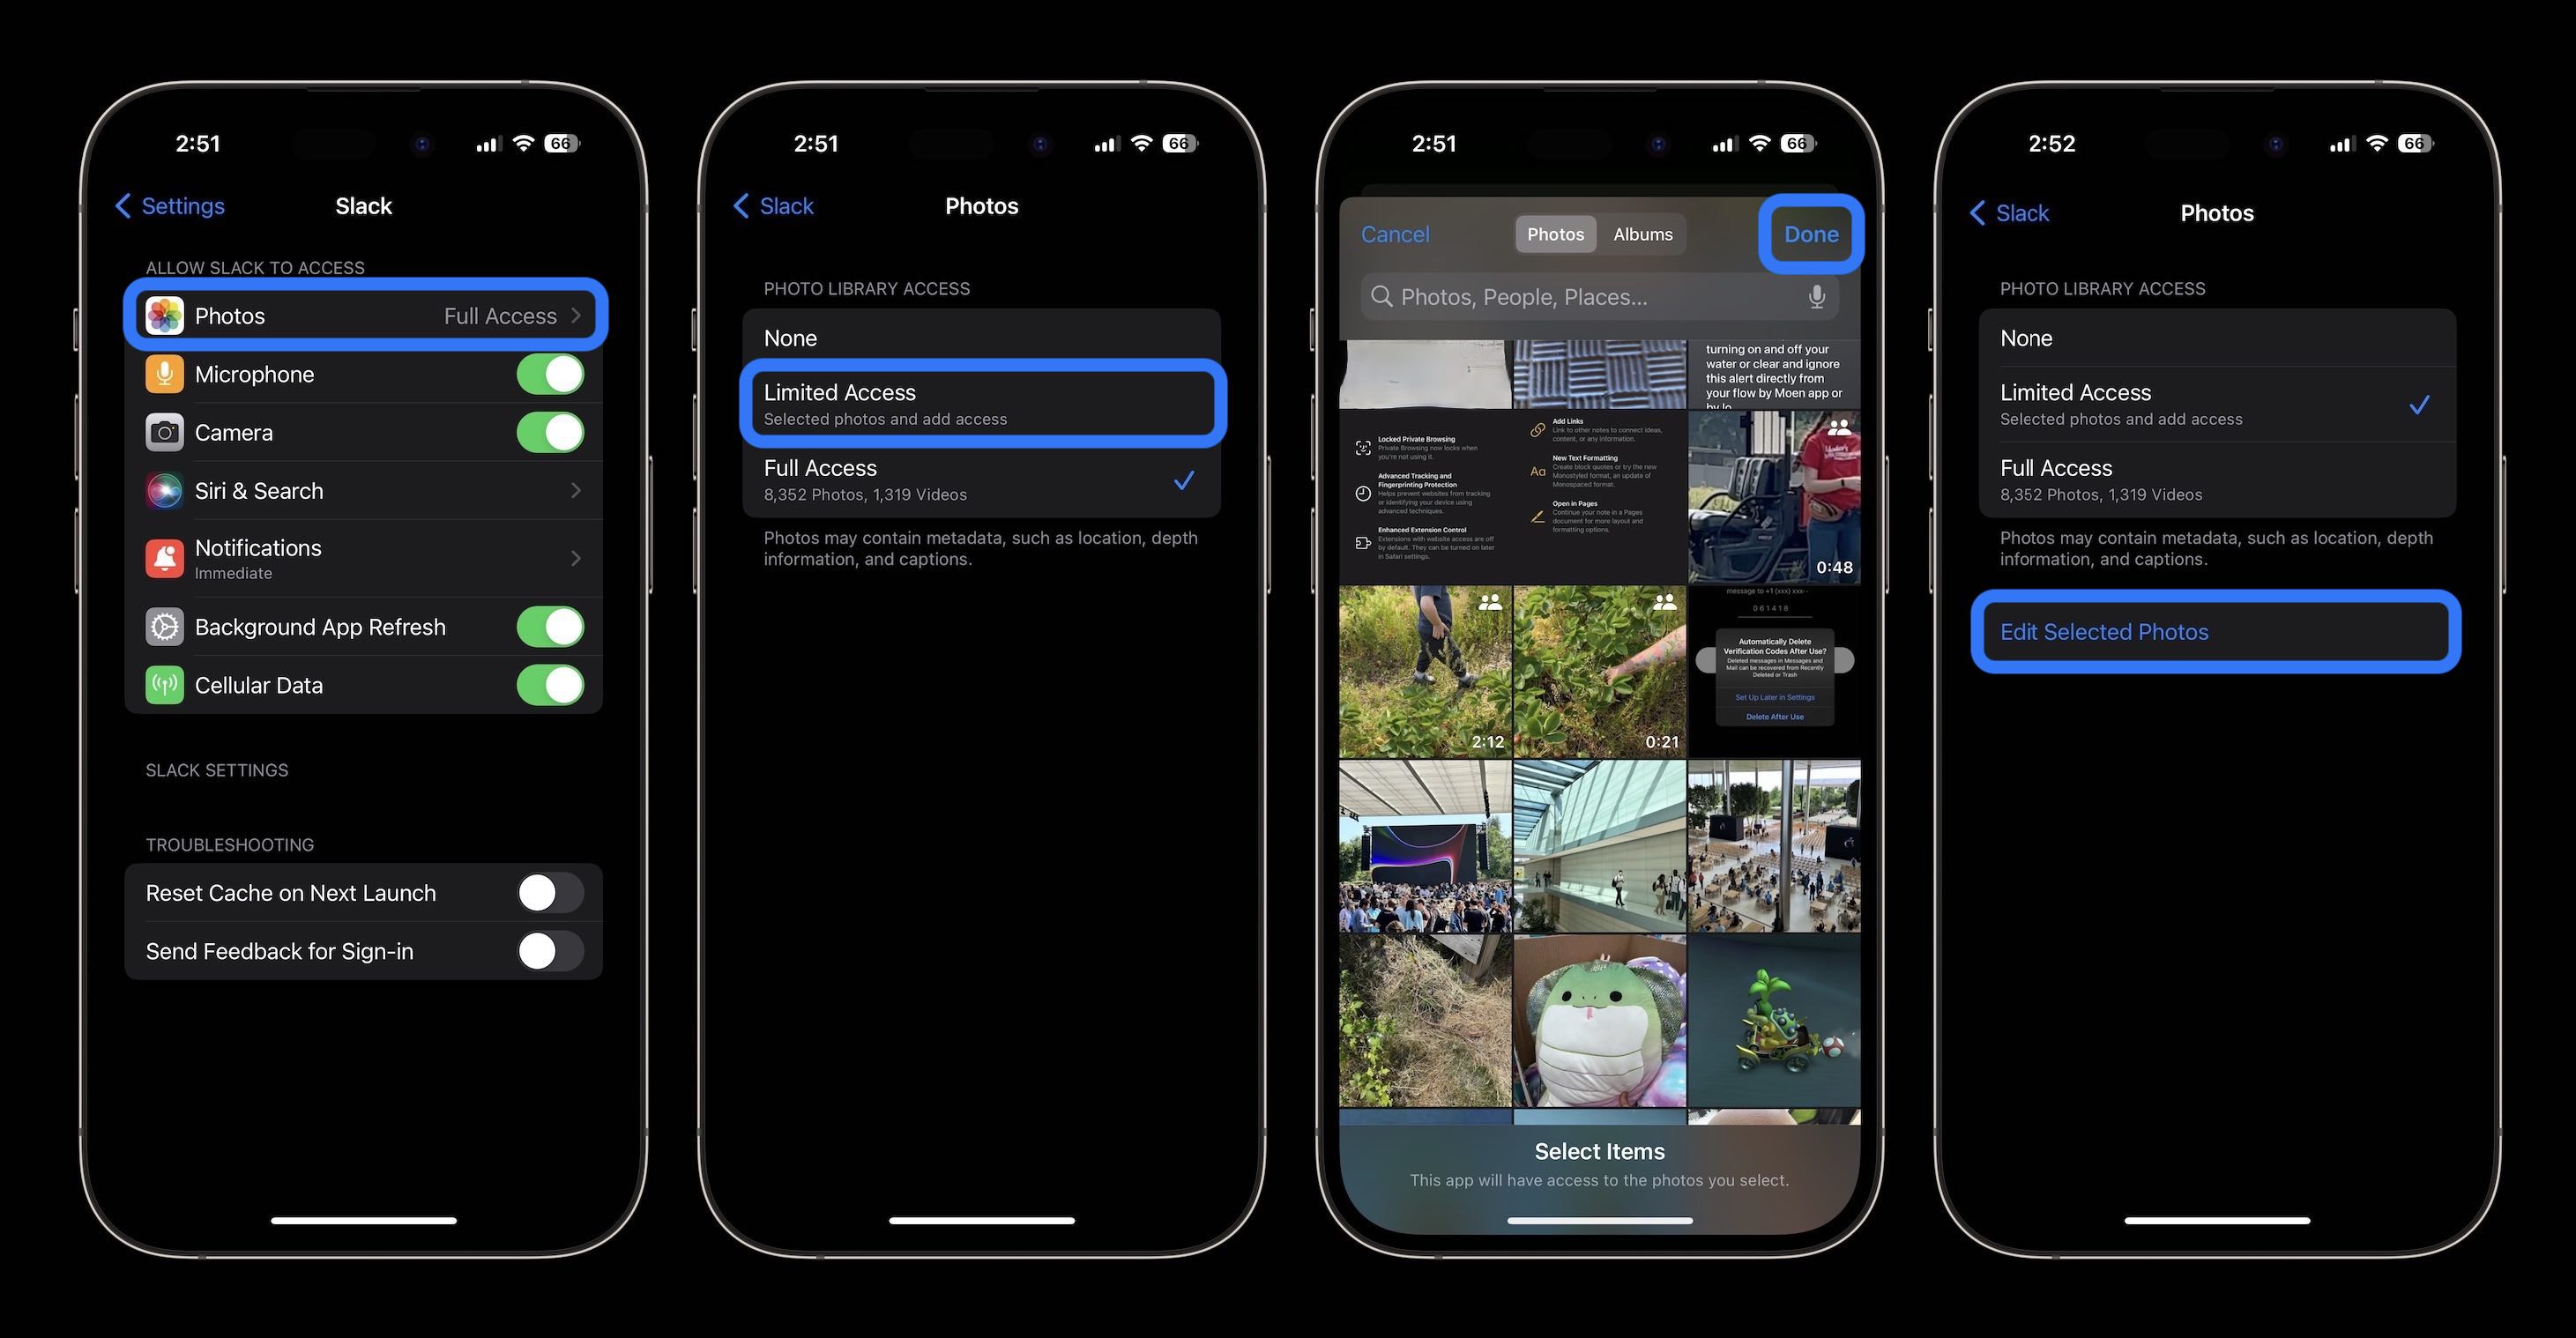
- To limit iPhone Photos app access at any time, head to Settings > swipe down and find the app you want to restrict > choose Photos > tap None or Limited Access
Here’s how it looks to limit iPhone Photos app access when you open iOS 17 Settings > pick a third-party app:

After you switch an app’s access from full to limited, you’ll see the iOS 17 Photos picker. You can use the Photos or Albums toggle at the top, use the search bar, or just swipe and select.
Tap Done in the top right corner when you’re finished.
After you set up limited Photos app access for an app, you can revisit to change it at any point by heading back to Settings > app > Photos > Edit Selected Photos.
Note: There is a lower level of Photos app access in iOS 17 that some apps use. In Settings, just two options will appear: “None” and “Add Photos Only” with the latter being where you manually select content to use/send with the app.
More 9to5Mac tutorials:
- iPhone Screen Distance in iOS 17 protects your eyes, here’s how it works
- Here’s how the all-new Apple Watch Weather app in watchOS 10 looks and works [Gallery]
- How to turn on AirPods Pro Adaptive Audio, how it works, more
- iPhone Live Voicemail: How to use and turn off/on in iOS 17
FTC: We use income earning auto affiliate links. More.


Comments