Apple has unveiled two new iPhones, the 4.7-inch iPhone 6 and the 5.5-inch iPhone 6 Plus. Along with larger screens and a completely new iPad-style design with an ultra thin body and rounded corners, the two new phones offer faster processors, better cameras, and Apple’s new Apple Pay payment system.
When you want to go out and have a walk, just take your iPhone 6 (Plus) with you for movie entertainment! If you transfer iTunes movie purchases from Computer to iPhone 6 (Plus), it’s much easier. But for iTunes movie rentals, once you transfer them to your iPhone, they may be moved from the computer. And when you start to watch one copy of the movie the 24h countdown will begin but the availability of the other copy will remain untouched for the rest of the 30 days.
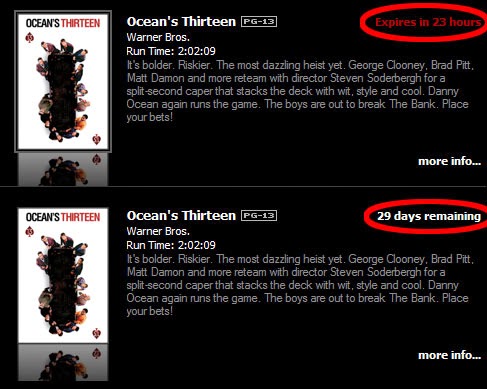
Why are there so many restrictions for iTunes movie rentals? Because they are limited due to the DRM protection. Before transferring iTunes movie rentals from Computer to iPhone 6 (Plus), it’s sensible to remove iTunes DRM protections first.
TunesKit iTunes DRM Removal for Mac is a highly recommended software to help us remove the Fairplay DRM protections from iTunes movie rentals. If you are using a PC, you can’t miss Aimersoft DRM Media Converter. After DRM removal, you can extend the 24h limit of iTunes movie rentals and backup them in your computer forever.
Know more about how to extend the 24h limit of iTunes movie rentals:
http://remove-drm.blogspot.com/2014/08/unlock-limitation-from-itunes-rentals.html
In case you may have encountered with iTunes Sync issues, here offer some tips for you to sync iTunes movies from computer to iPhone 6 (Plus).
Method 1. Sync movies to iPhone 6 via iTunes
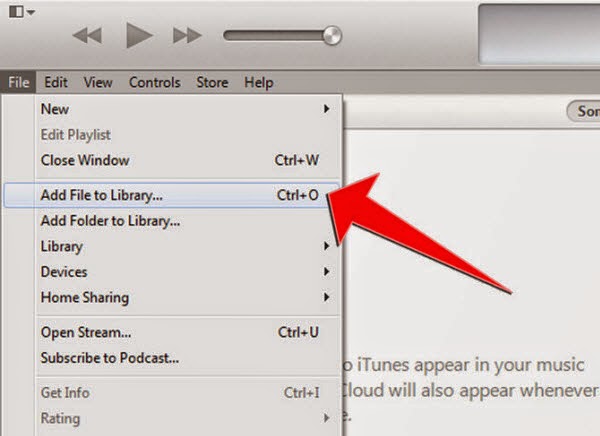
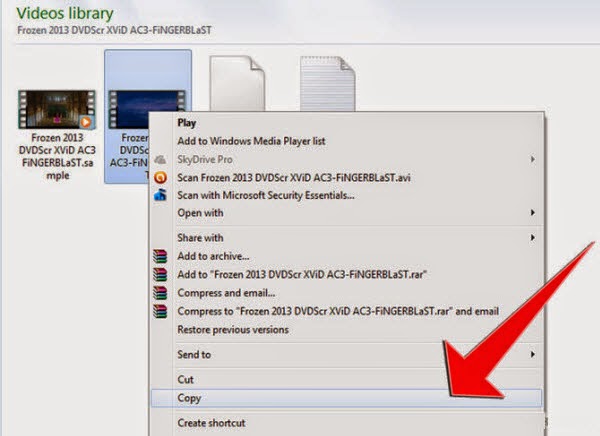
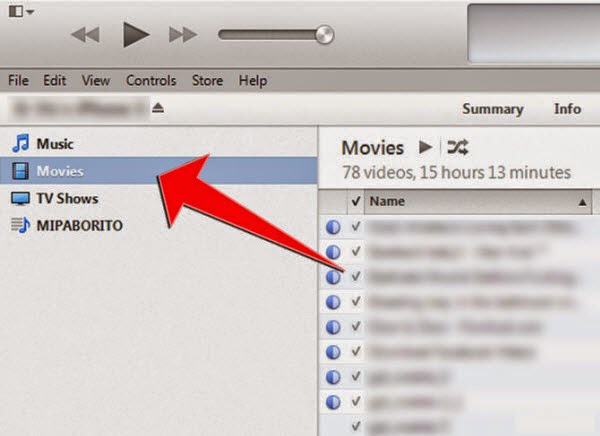
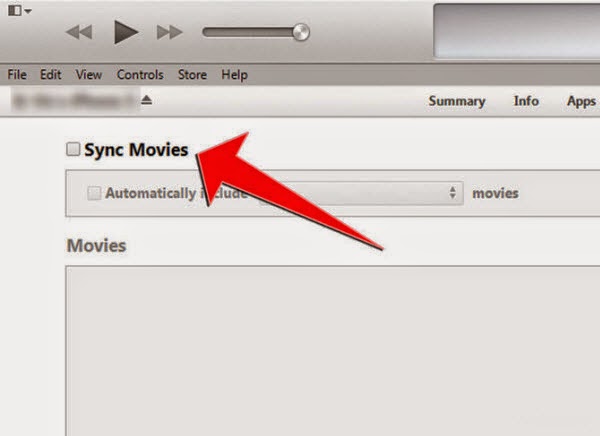
Step 5: Click on your iPhone name in iTunes, choose Video tab and click on Sync Movies, choose the movies you want to sync to your iPhone 6 (Plus). Then click Sync.
Method 2: Transfer your media files from Computer to iPhone 6 (Plus) via iCloud
If you have other iOS devices running iOS 8 and have iCloud backups, you can log in iCloud on your new iPhone 6 (Plus) (go to Setting -> iCloud -> Enter your Apple ID info -> then you will get a iCloud terms doc, agree it) and restore the iCloud backup on the device.
Now you can successfully enjoy viewing media files transferred from computer on your iPhone 6 (Plus)!


Good info. Easy to follow and I’ve successully transfer movies using iTunes. An besides the above guide, I bro suggested me to use FonePaw iOS Transfer, which he had used. It can transfer stuff between device and computer.
http://download.cnet.com/FonePaw-iOS-Transfer/3000-18551_4-76219979.html
Thank you for providing such informative tutorial. It works well on my iPhone. In the daily time I also learn ways on how to download free movies from web and then transfer them to my iOS devices. After searching, I believe this guidance is the best one:
http://www.apowersoft.com/transfer-movies-from-pc-to-iphone.html
I’ve tried to look for a best program to transfer my videos from PC to iPhone, after much research, trial and error, I finally found an app named AnyTrans by iMobie, it has simple UI and is very easy to operate. Not only your movies, but also all the files inside your iDevice can be transferred, and vice versa. Highly recommend to those people who have the same demand. http://www.imobie.com/anytrans/
Good guide. I have know more about the restrictions about iTunes rentals form another article on 9to5mac: http://9to5mac.com/community/5-things-you-dont-know-about-renting-movies-from-itunes-store/ ,and I have downloaded NoteBurner for a try, it works smarter than Tuneskit.