
 As a serious photographer, I do as much as I can to make my daily shots excellent, using cameras with low-noise sensors and fast lenses — then trying to keep them as steady as possible in low light. But even the latest and best cameras can’t snap perfectly clean images in dark surroundings. Grainy noise is basically inevitable in darkness, and the more basic the camera you’re using, the more likely it is to appear in a wider variety of pictures. To reduce noise, you can either shell out thousands of dollars for new camera gear, or try to fix your noisy photos with software.
Having spent years trying to fix noisy photos with software, including the noise reduction filters included with fully-featured photo editing applications such as Adobe’s Photoshop, I can tell you that the results typically aren’t great. Unless you’re willing to invest in an expensive noise-reduction plug-in, you’ll spend a lot of time trying to clean your image up, and it probably won’t be beautiful when you’re done. So when I learned about MacPhun’s Noiseless ($18), an app designed to do only one thing — eliminate noise — I was simultaneously skeptical and intrigued. Given that standalone noise-reduction apps often sell for 4 to 8 times as much, could an affordable single-purpose app meaningfully improve some seriously messed-up photos? The answer is “yes,” and at a far lower price than buying a comparably noise-free camera…
|
Key Details:
|
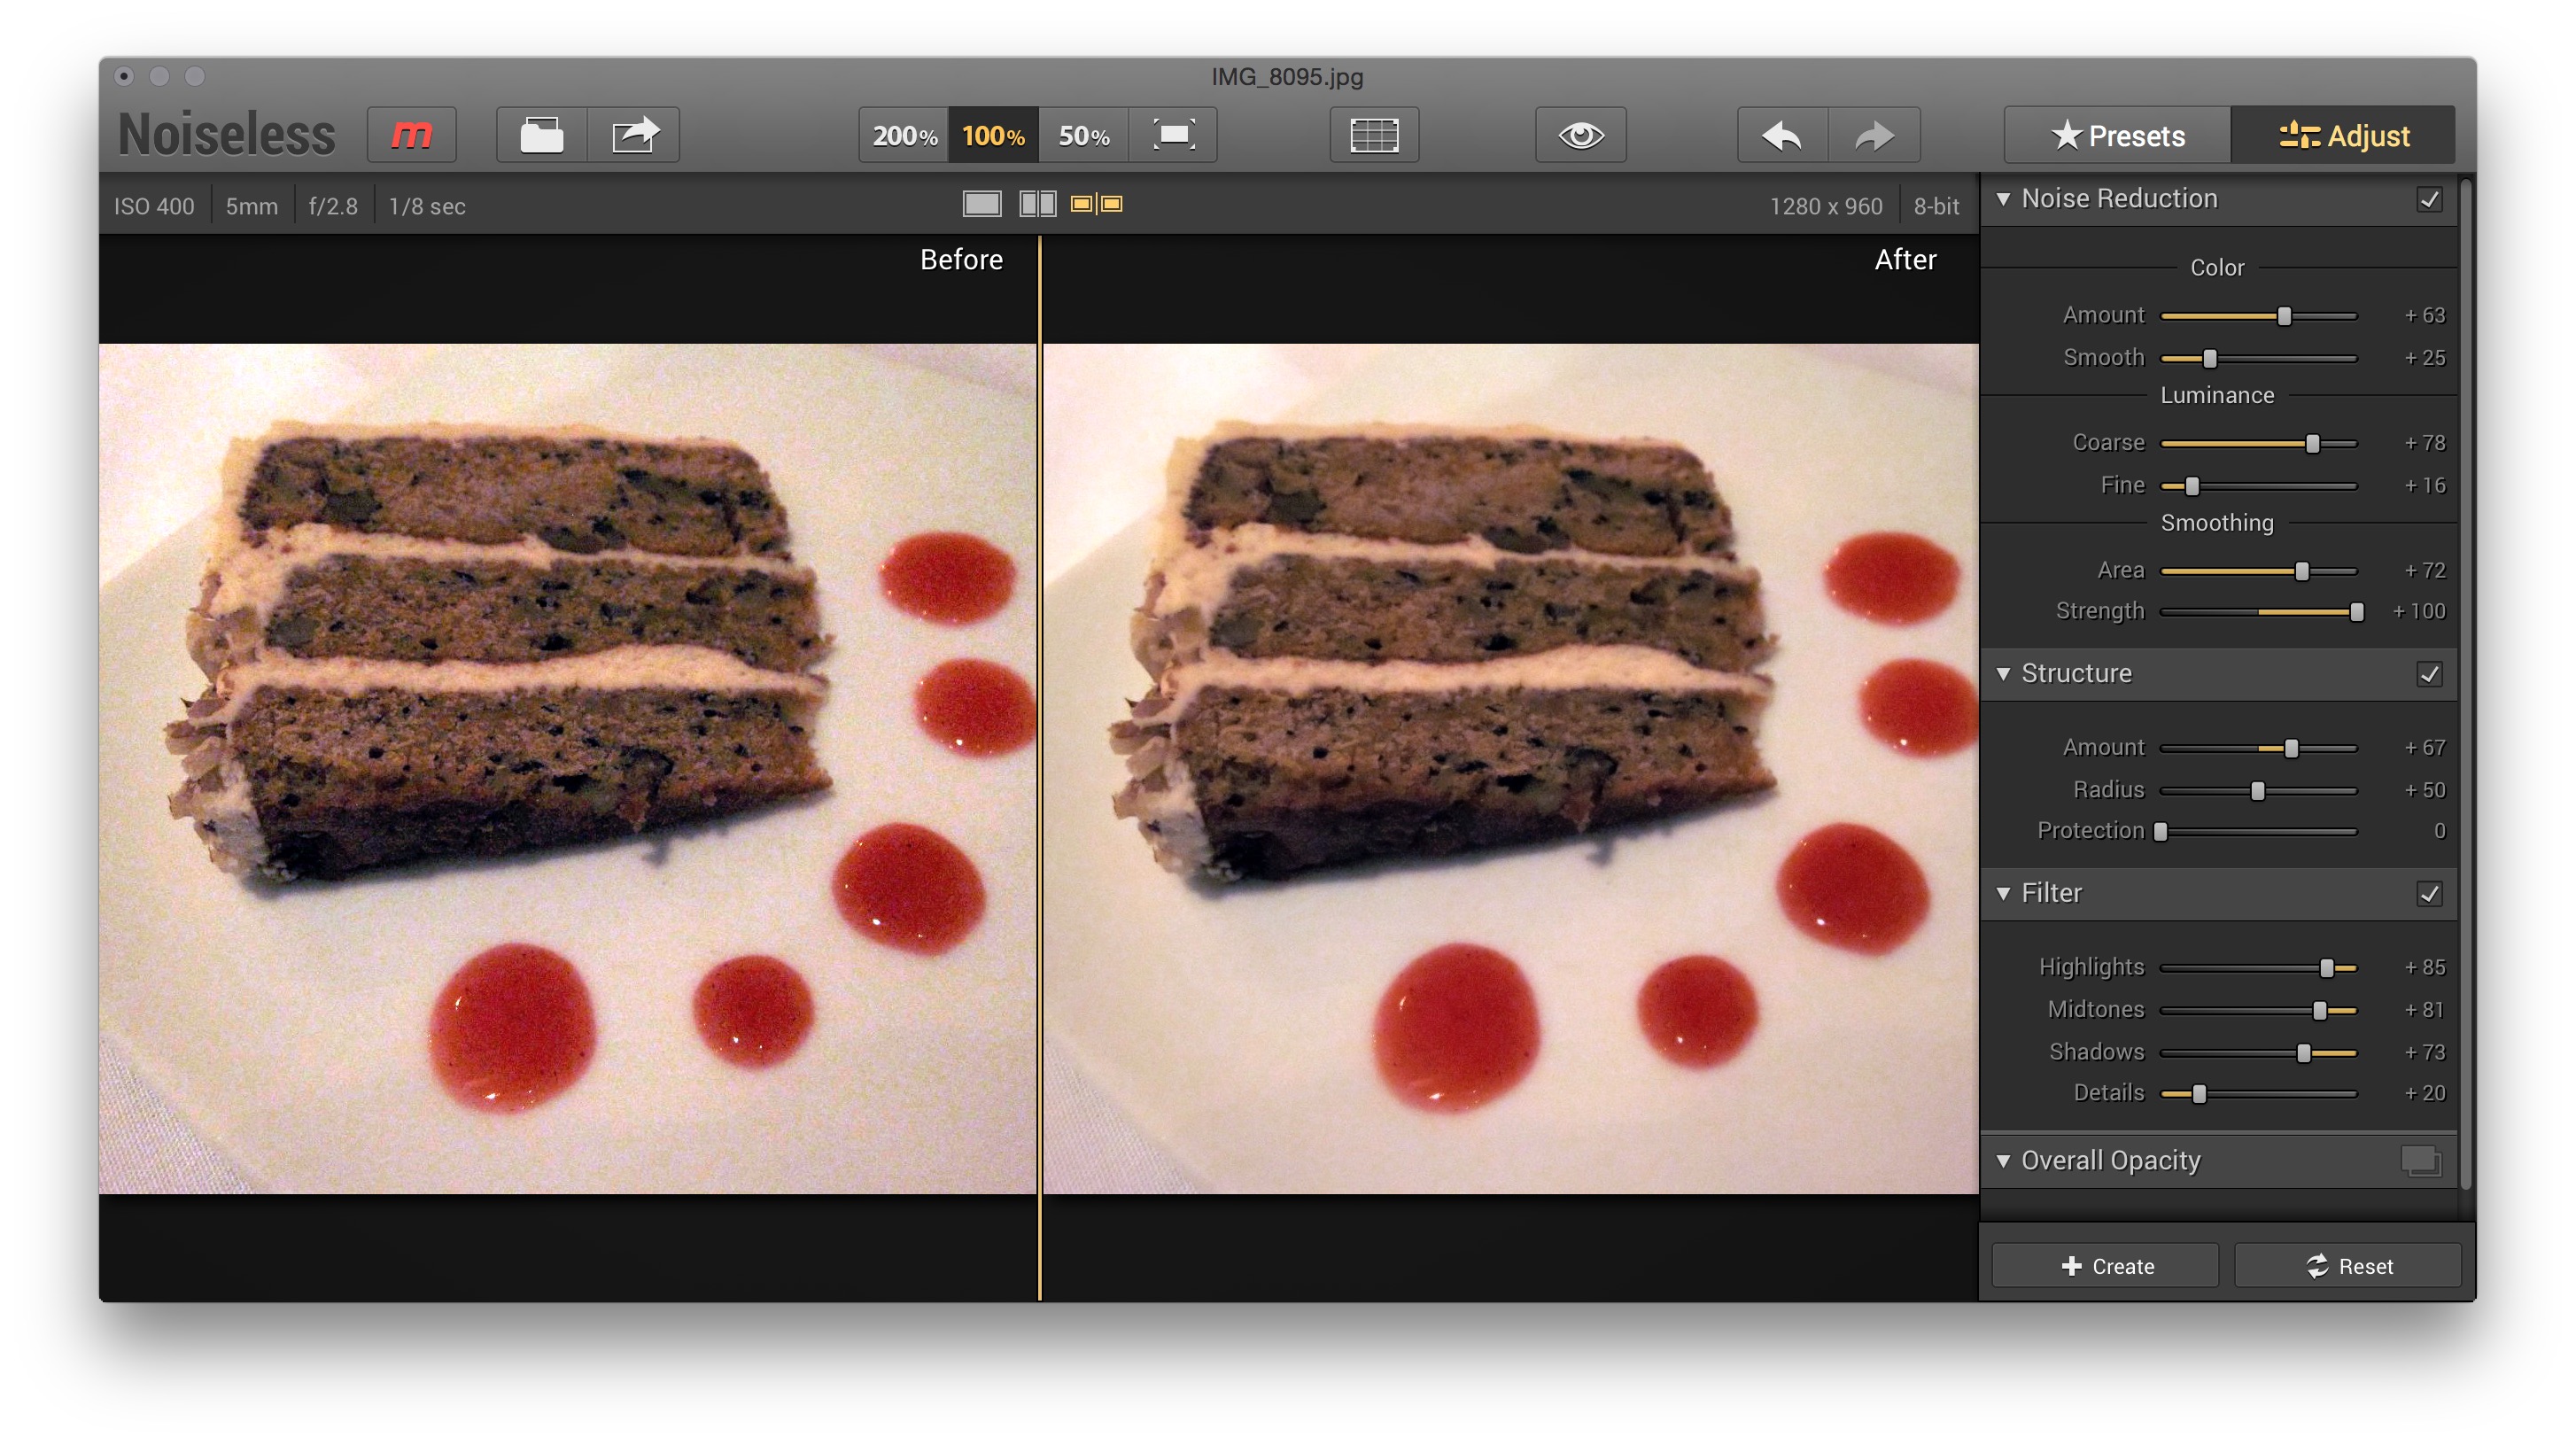
There are two critical elements to Noiseless’s appeal: its dead-simple user interface, and its price. The UI is designed to be extremely straightforward, initially presenting you with your choice of a bisected version of the photo you select — old noise on the left, cleaned up on the right — or a before and after comparison using the same split window pane.
All of the app’s key settings are on the right side of the window, and Macphun makes the default adjustments very easy to figure out. It presents you with eight different lighting scenarios your photo might have been taken in, ranging from pitch black darkness (“extreme”) to super bright light (“lightest”), letting you choose the one that seems best-suited to the image. You then get a slider that moves from 0 to 100, applying a combination of effects to preserve as much detail as you prefer. If you don’t want to dive any further into the settings, the defaults let you achieve dramatically better results, as shown in the two full-sized sample images below.
-

- Original Image
-
- After Noiseless
Click on Adjust, however, and the simple default presets are replaced by a more complex panel that provides granular controls over noise reduction, structure (sharpening characteristics), filtering (highlight/midtone/shadow/detail), and the opacity of the noise-reduced image. You may find that small tweaks preserve more of the pixel-level detail in your original image, or do a better job of blending splotchy noise away into the shadows.
If you contrast Noiseless’s tool with Photoshop’s Reduce Noise filter, you’ll find Noiseless’s UI and results to be markedly better. Although it shouldn’t be hard to smooth out noise, Photoshop’s “basic” interface does very little for large photographs, and its “advanced” interface leaves it to you to sort through separate red, green, and blue channel noise reduction filters. No average user will want to take the time to figure the advanced per-channel interface out, let alone achieve great results with it.
You can see the difference between Photoshop and Noiseless yourself below (click on the full-sized images and consider downloading them for deeper comparisons). Photoshop’s Reduce Noise filter does in fact “reduce the noise” a little, but Noiseless effectively eliminates it. While the Noiseless image could be brightened a little to bring back some lost detail in the shadows, or adjusted with settings to preserve more detail in the first place, the Photoshop image’s coarseness isn’t fixable without resorting to other, better tools. Rival noise reduction apps such as Topaz DeNoise and PictureCode’s PhotoNinja sell for $80 to $150, prices high enough to deter a lot of people from possible purchases.
-

- Original Image
-
- Photoshop Filtered
-
- After Noiseless
That’s the other key thing about Noiseless: the price. While there’s certainly some demand for professional-class, high-end noise reduction solutions for use with expensive DSLRs, there’s arguably an even larger group of people who would be willing to pay a smaller amount for an easy-to-use, effective noise reducer that works with their pocket cameras and iPhones.
Noiseless is certainly a great tool for the latter audience, and will satisfy quite a few people in the former, as well. The image below was snapped with an iPhone 4 and had virtually all of its noise removed just by selecting a lighting profile and moving a slider around.
Here’s one more set of large, clickable examples that show off what Noiseless can do with an image full of noise. Be sure to click on the images to see the difference; it’s striking.
-
- Before Noiseless
-
- After Noiseless
At the current $18 asking price, I’d consider Noiseless to be an easy recommendation to mainstream photographers: it’s easy to use, more powerful than some of the professional photo editing tools I’ve tested, and certainly makes grainy photos look 100 times better than they started. It’s not a cure-all app and can’t fix motion blur, improper focus, or color issues — all of which you may encounter when snapping low-light images — but if you commonly shoot images that are sharp and noisy, you’ll love the improvements Noiseless will deliver. If the app’s price goes up as its Mac App Store description suggests that it might, you’ll have to decide whether the extra dollars are worth paying for a good solution.
| Developer: Macphun |
Price: $18 |
Compatibility: Mac OS X 10.8+ |
|---|
FTC: We use income earning auto affiliate links. More.

i think you need some better real world application examples. low light portraits, landscapes etc. the examples given are not critical in the sense that most anything could be acceptable or you could just retake them. portraits and group shots you don’t have that option.
I totally disagree. The examples are spot on. Mainly indoor when you have to crank up the ISO to get the shot. Maybe astrophotography is another one.
The examples here look no better, and in most cases actually worse. Denoting a photo removes detail, so you end up with a smeary mess instead of a noisy one. But I’d rather have the noisy one.
No, I think a lot of people would say the exact opposite, namely that the denoised pictures look a lot better overall. Any of the Noiseless “after” images would make a far cleaner print or on-screen image than the “before” image.
Obviously, a noise removal tool isn’t right for you. Some people prefer high-contrast splotches over softened or eliminated noise. But for people who want to get rid of splotches of unnatural color, the tool does a great job.
That’s fine if they say the opposite. But they’d be wrong. And no, the before image would make a better print, with better textures and detail. I should know, I’m a photographer.
Chad. How can you say someone would be wrong about what THEY like. Just because in your opinion pictures with lots of distracting noise looks better than a cleaned up photo does not make it the right choice.
I’m with Chad here, Jeremy. If you were a serious photographer, these could not be your best low light images which need help. With such low value examples, it’s impossible to determine much about the value of the software.
Either Noise Ninja or Lightroom do a much better job of cleaning up noise while leaving texture. Your results are very smeary, Jeremy.
All you’ve proven with these examples is that a poor photographer can semi-rescue hopelessly high noise shots with Noiseless.
Chad, has anyone every told you that you do not have a discerning enough eye to tell when a picture looks cleaner than another? It was easy for me to tell which picture looked cleaner, and I’m glad there’s software in existence that corrects the limitations of everyday phone cameras and middle-tier DSLR cameras. Your opinion is totally fine, but don’t go telling everyone else (and I’m serious here, you are in the minority) that theirs is wrong.
Agreed… those examples all show noise being replaced with awful blurring and smearing.
Thanks for the review, I’ve been hearing about this app lately, was curious if it would just be a waste of money since I already have Photoshop CC, after reading your post that does not seem to be the case, I get lots of cell phone images from clients to use at my work, app sounds very helpful, thanks again
Awesome! We are very glad to see you like the app so much, Jeremy. Fantastic examples, they exemplify real world instances when Noiseless can come in and save the day. Lot’s of folks will find Noiseless very useful in rescuing images from common, everyday situations, from low lit selfies, to that awesome food shot in a moodily lit restaurant. In addition, the app is powerful enough for some of the most demanding shooters, even the astro-photographer. We invite anyone who as ever taken a picture to try it out, simply visit http://www.macphun.com/noiseless to learn more.
Reblogged this on Geek/Husband/Dad/Catholic and commented:
A $20 program that’s better for image noise reduction than Photoshop.
The biggest problem is not Noiseless. The biggest problem is iPhotos. iPhotos doesn’t allow you to open your photo in an external editor – like Aperture did. Instead, you have to export your photo, load it onto Noiseless, then re-import it back into iPhotos. This is a huge pain and needs to be corrected by Apple.
One of the coolest apps in years. Bought it, love it.
I downloaded Super Denoising from Appstore at very low price, only $0.99. The description claimed that original price is $ 29.99.
I didn’t use Noiseless before but Super Denoising is good enough which is really great to instantly remove noise from photo.
I could recreate the before and after by simply shooting the before at a high ISO and the after at a low ISO.