
Making a bootable macOS Big Sur USB drive is a quick and clean way to install a fresh copy of macOS on your Mac. This hands-on tutorial is valid for both the public and developer beta versions of macOS Big Sur, and will also work with the final version of Big Sur upon its release later this year. Simply follow our step-by-step guide for the full details.
USB Flash drive
Before you begin, you’ll need to acquire a USB flash drive. Because every modern Mac supports USB-C, and some Macs only feature USB-C, I recommend purchasing a USB drive with a USB-C connector.
The second thing to keep in mind is that you’ll want to get a USB drive with at least16GB of storage space. Of course, having more storage won’t hurt. I still recommend this SanDisk Ultra Dual Drive USB Type-C Flash Drive. Not only is it super-affordable, but it comes both USB-A and USB-C connections, which allows the drive to connect to any Mac with ease.
Make sure that there’s nothing important that you need on the drive, because the full contents will be deleted. I recommend checking the contents, and then formatting the drive as macOS Extended Journaled (HFS+) via Disk Utility. Keep in mind that APFS-formatted drives cannot be used to create the macOS Big Sur USB installer.
macOS Big Sur USB installer video tutorial
Subscribe to 9to5Mac on YouTube for more videos
How to create a bootable macOS Big Sur USB install drive
Step 1: Download macOS Big Sur. After Big Sur launches later this year, you’ll be able to download it directly from the Mac App Store. Until then, you can download the macOS Big Sur developer beta from Apple’s developer portal, or download the macOS Big Sur public beta via Apple’s public beta website.
Step 2: After downloading macOS Big Sur, the installer will automatically launch. Close the installer.

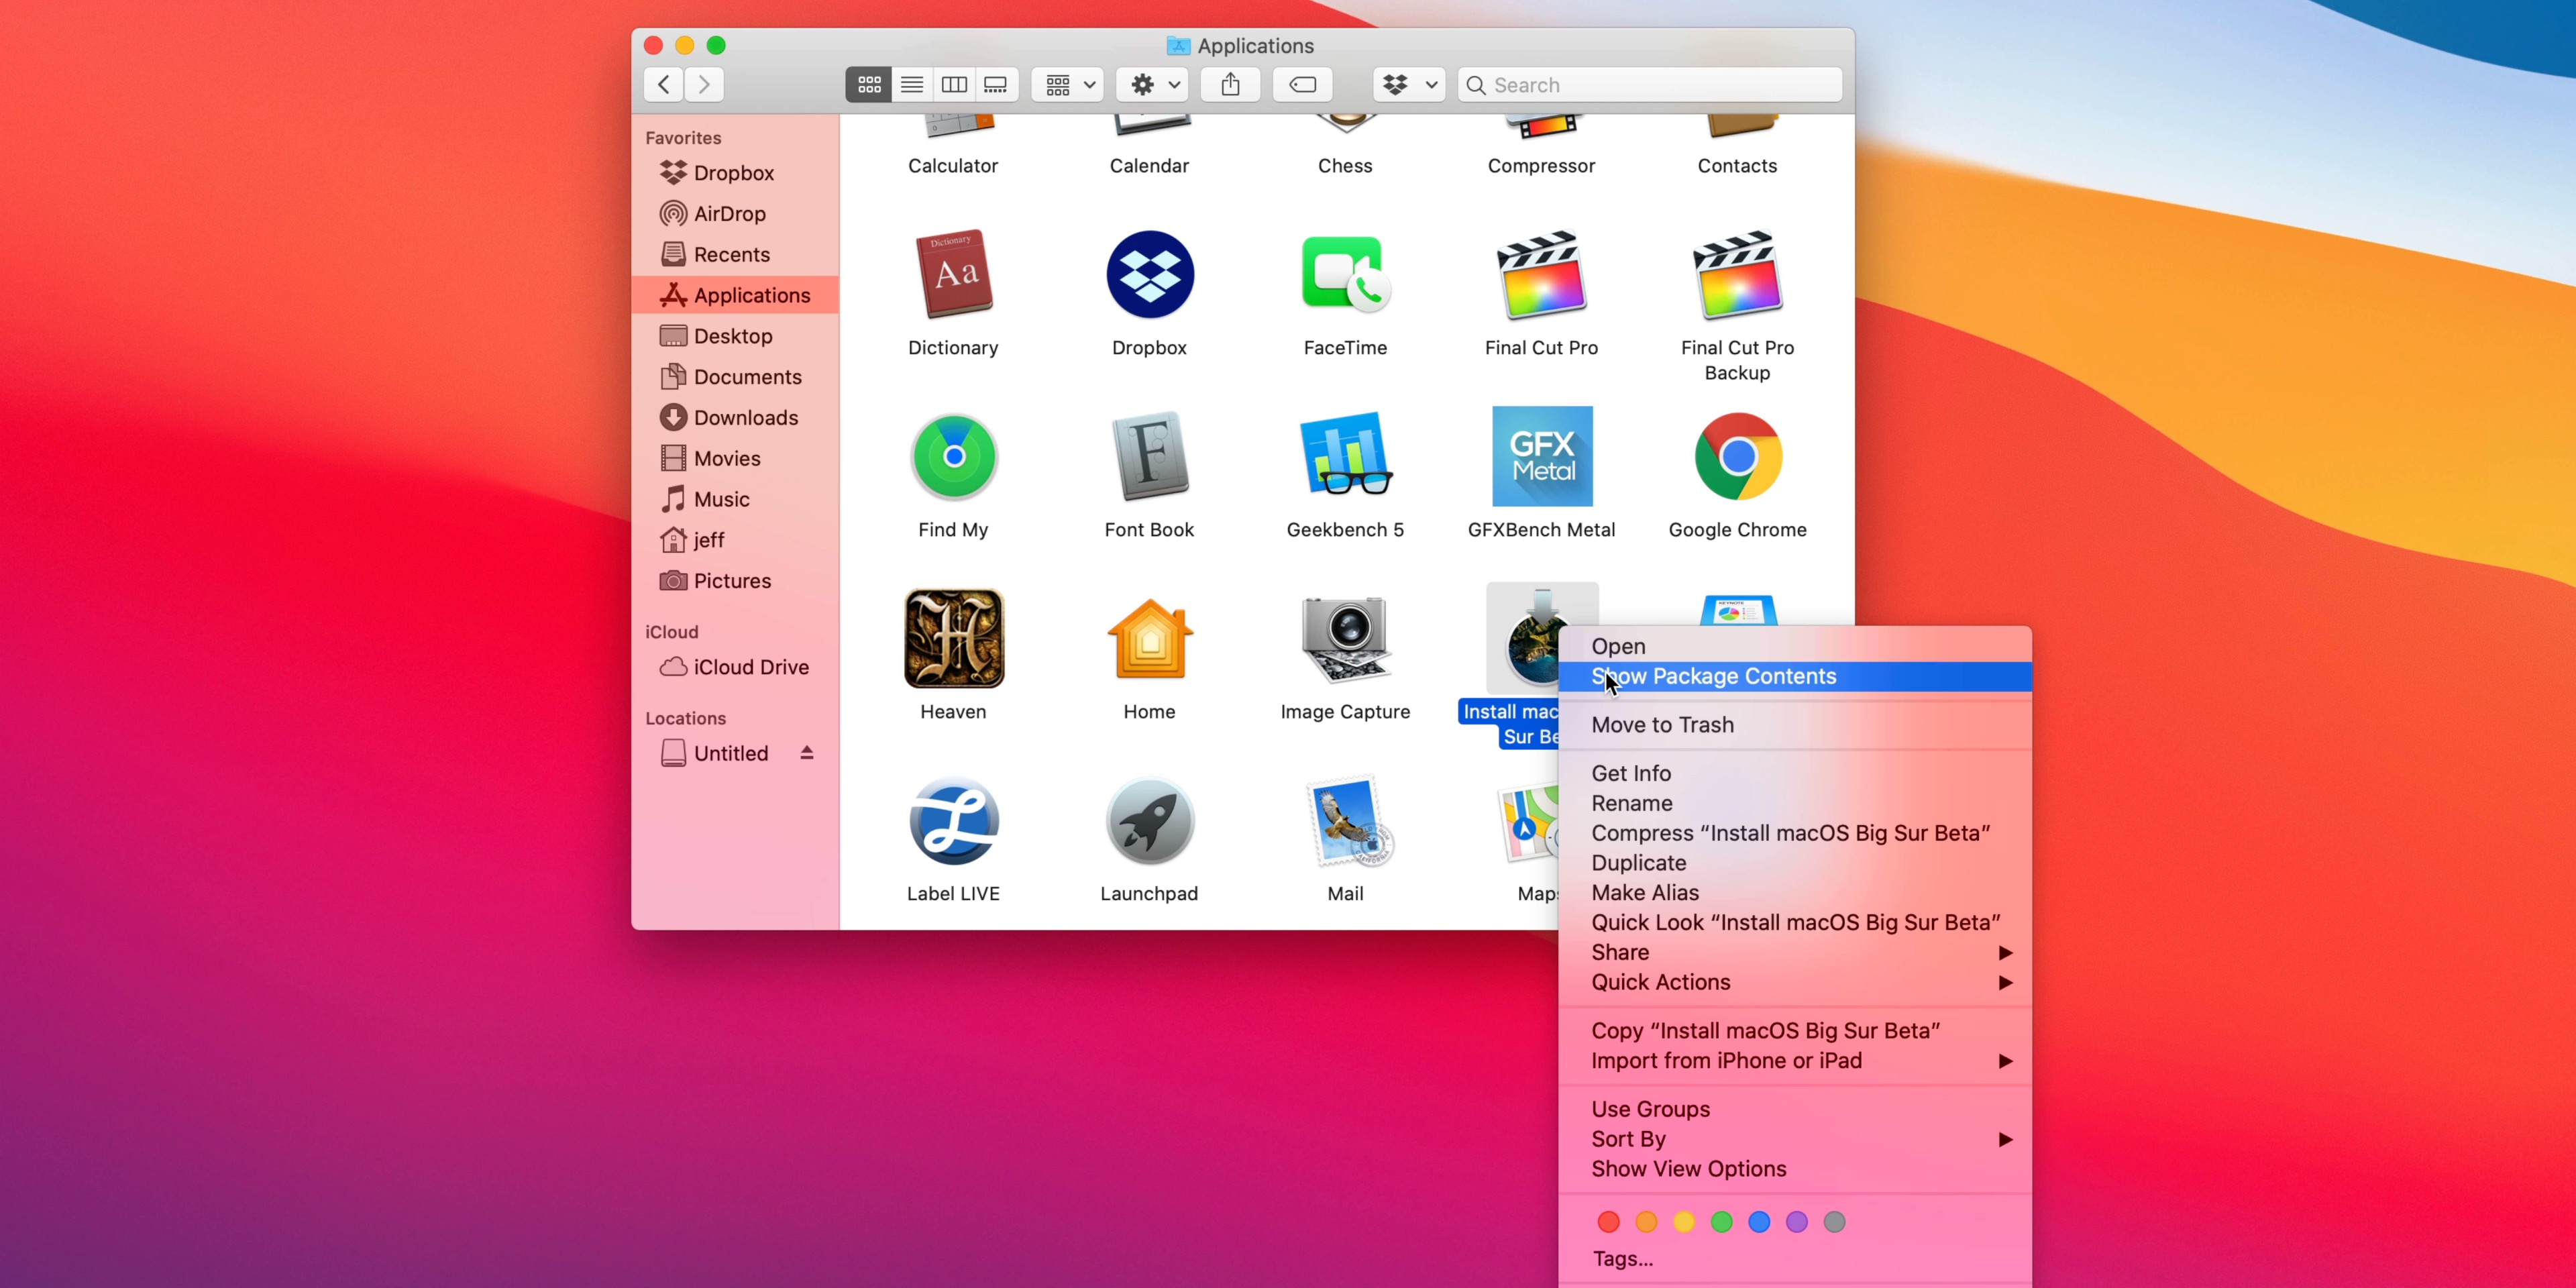
Step 3: Open Finder → Applications. Right-click on Install macOS Big Sur → Show Package Contents.
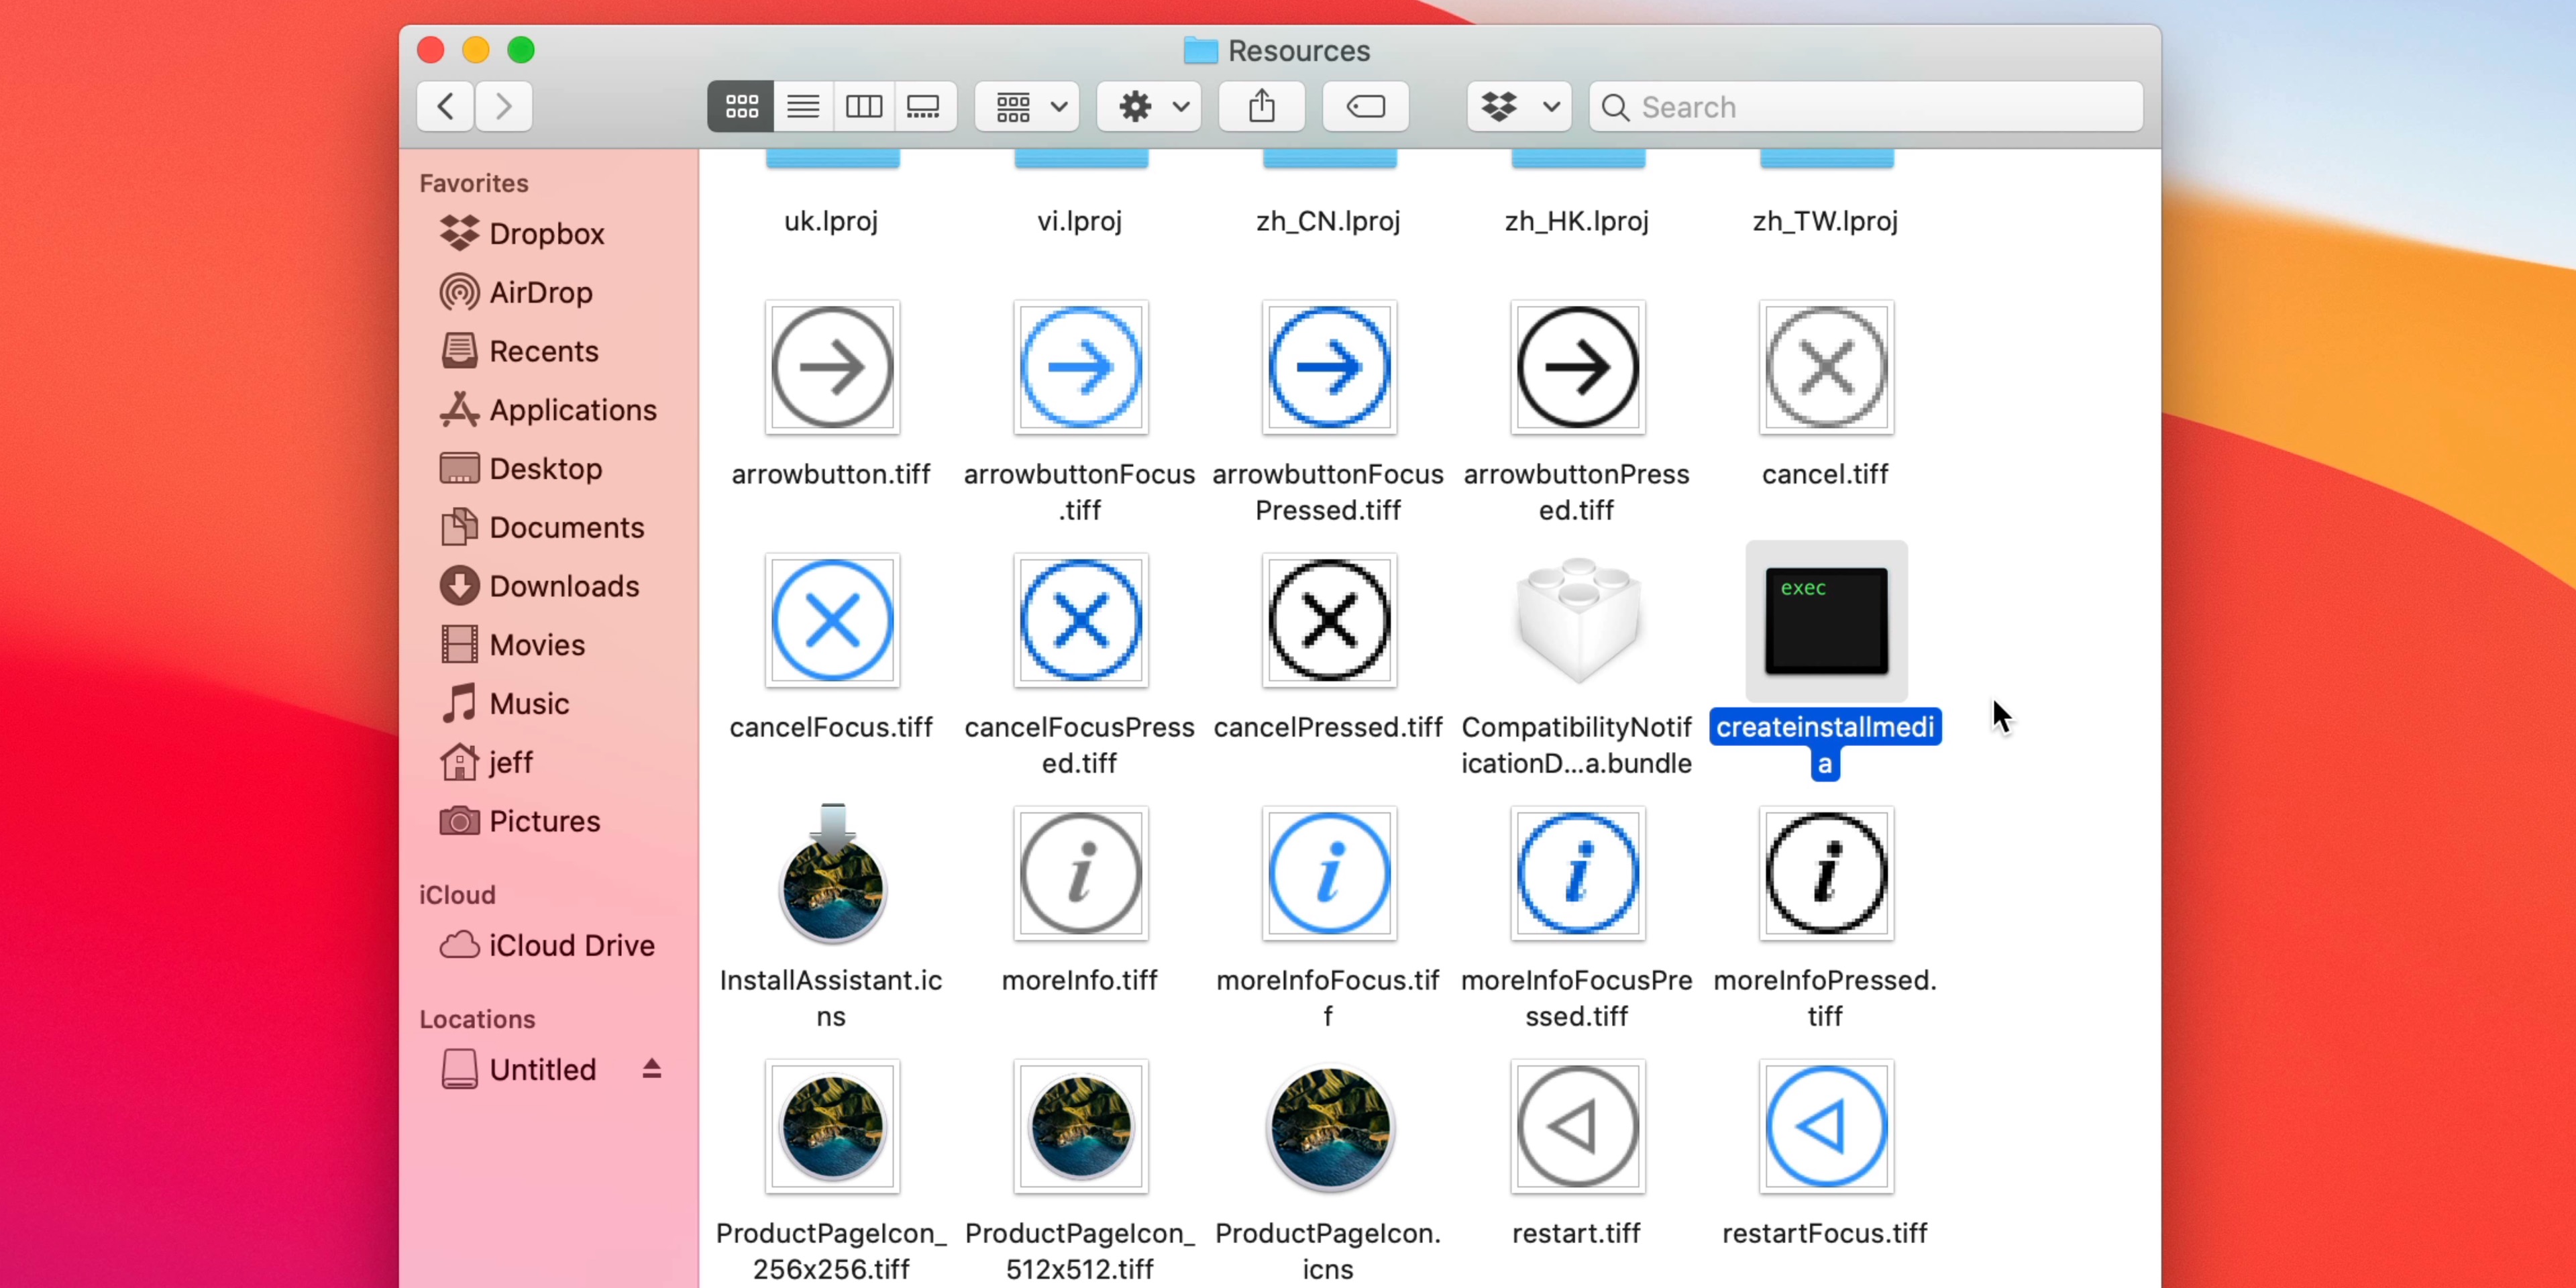
Step 4: Open Contents → Resources.
Step 5: Launch a new Terminal window by going to Applications → Utilities → Terminal.
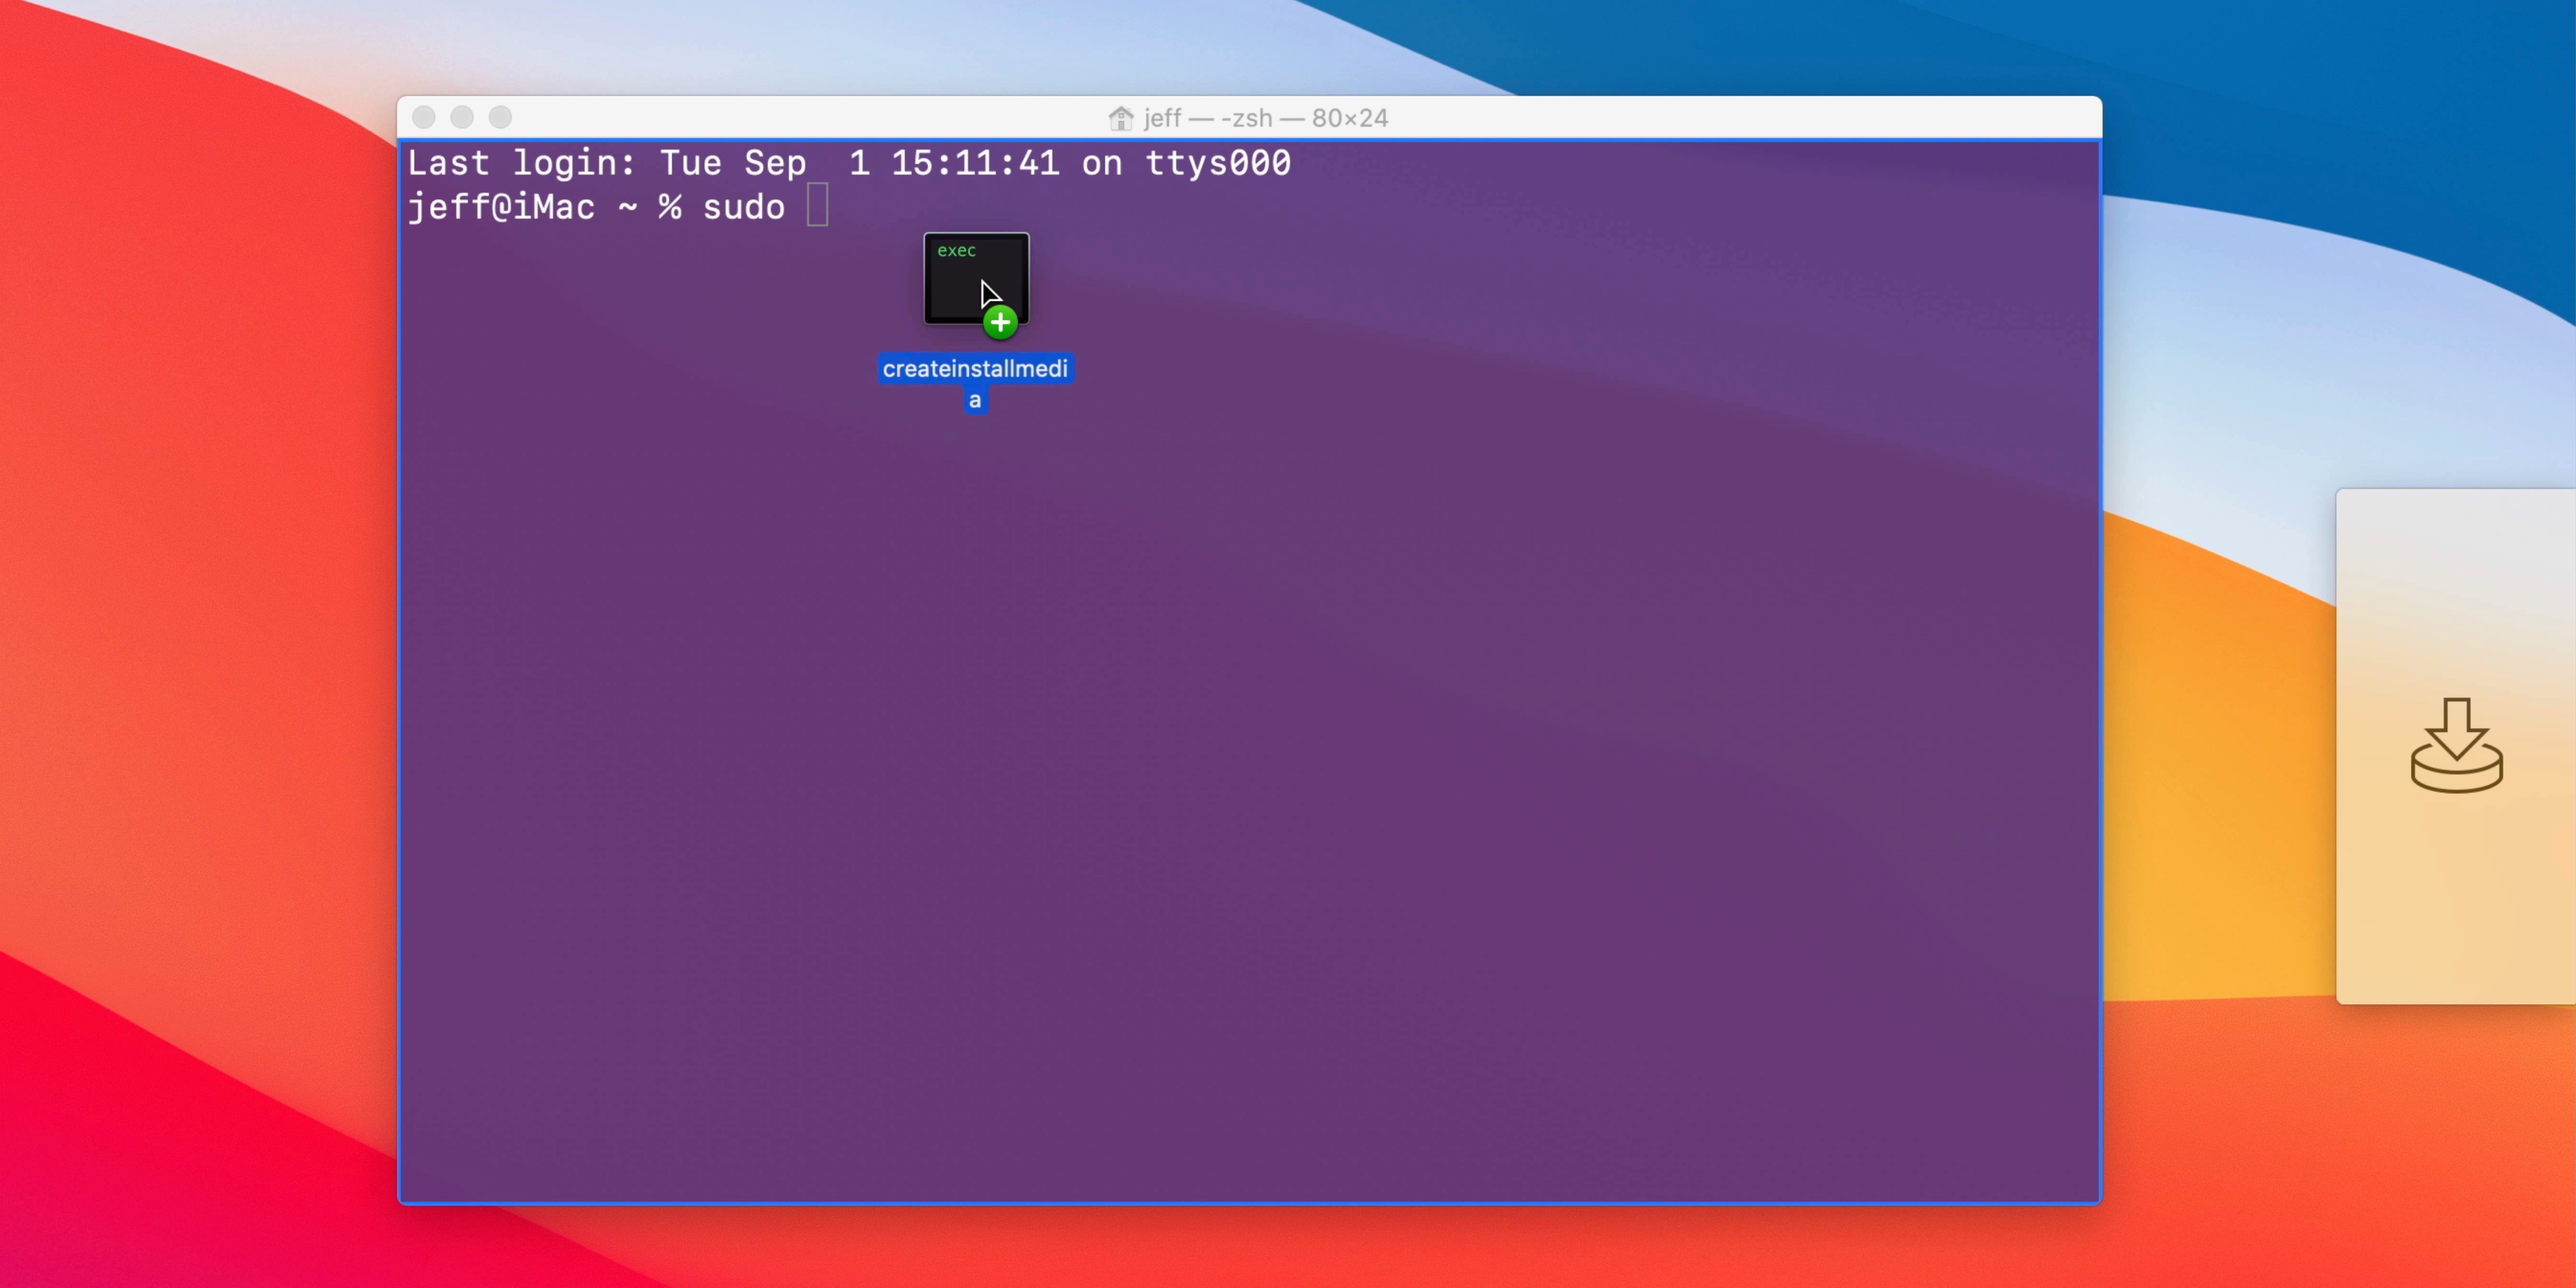
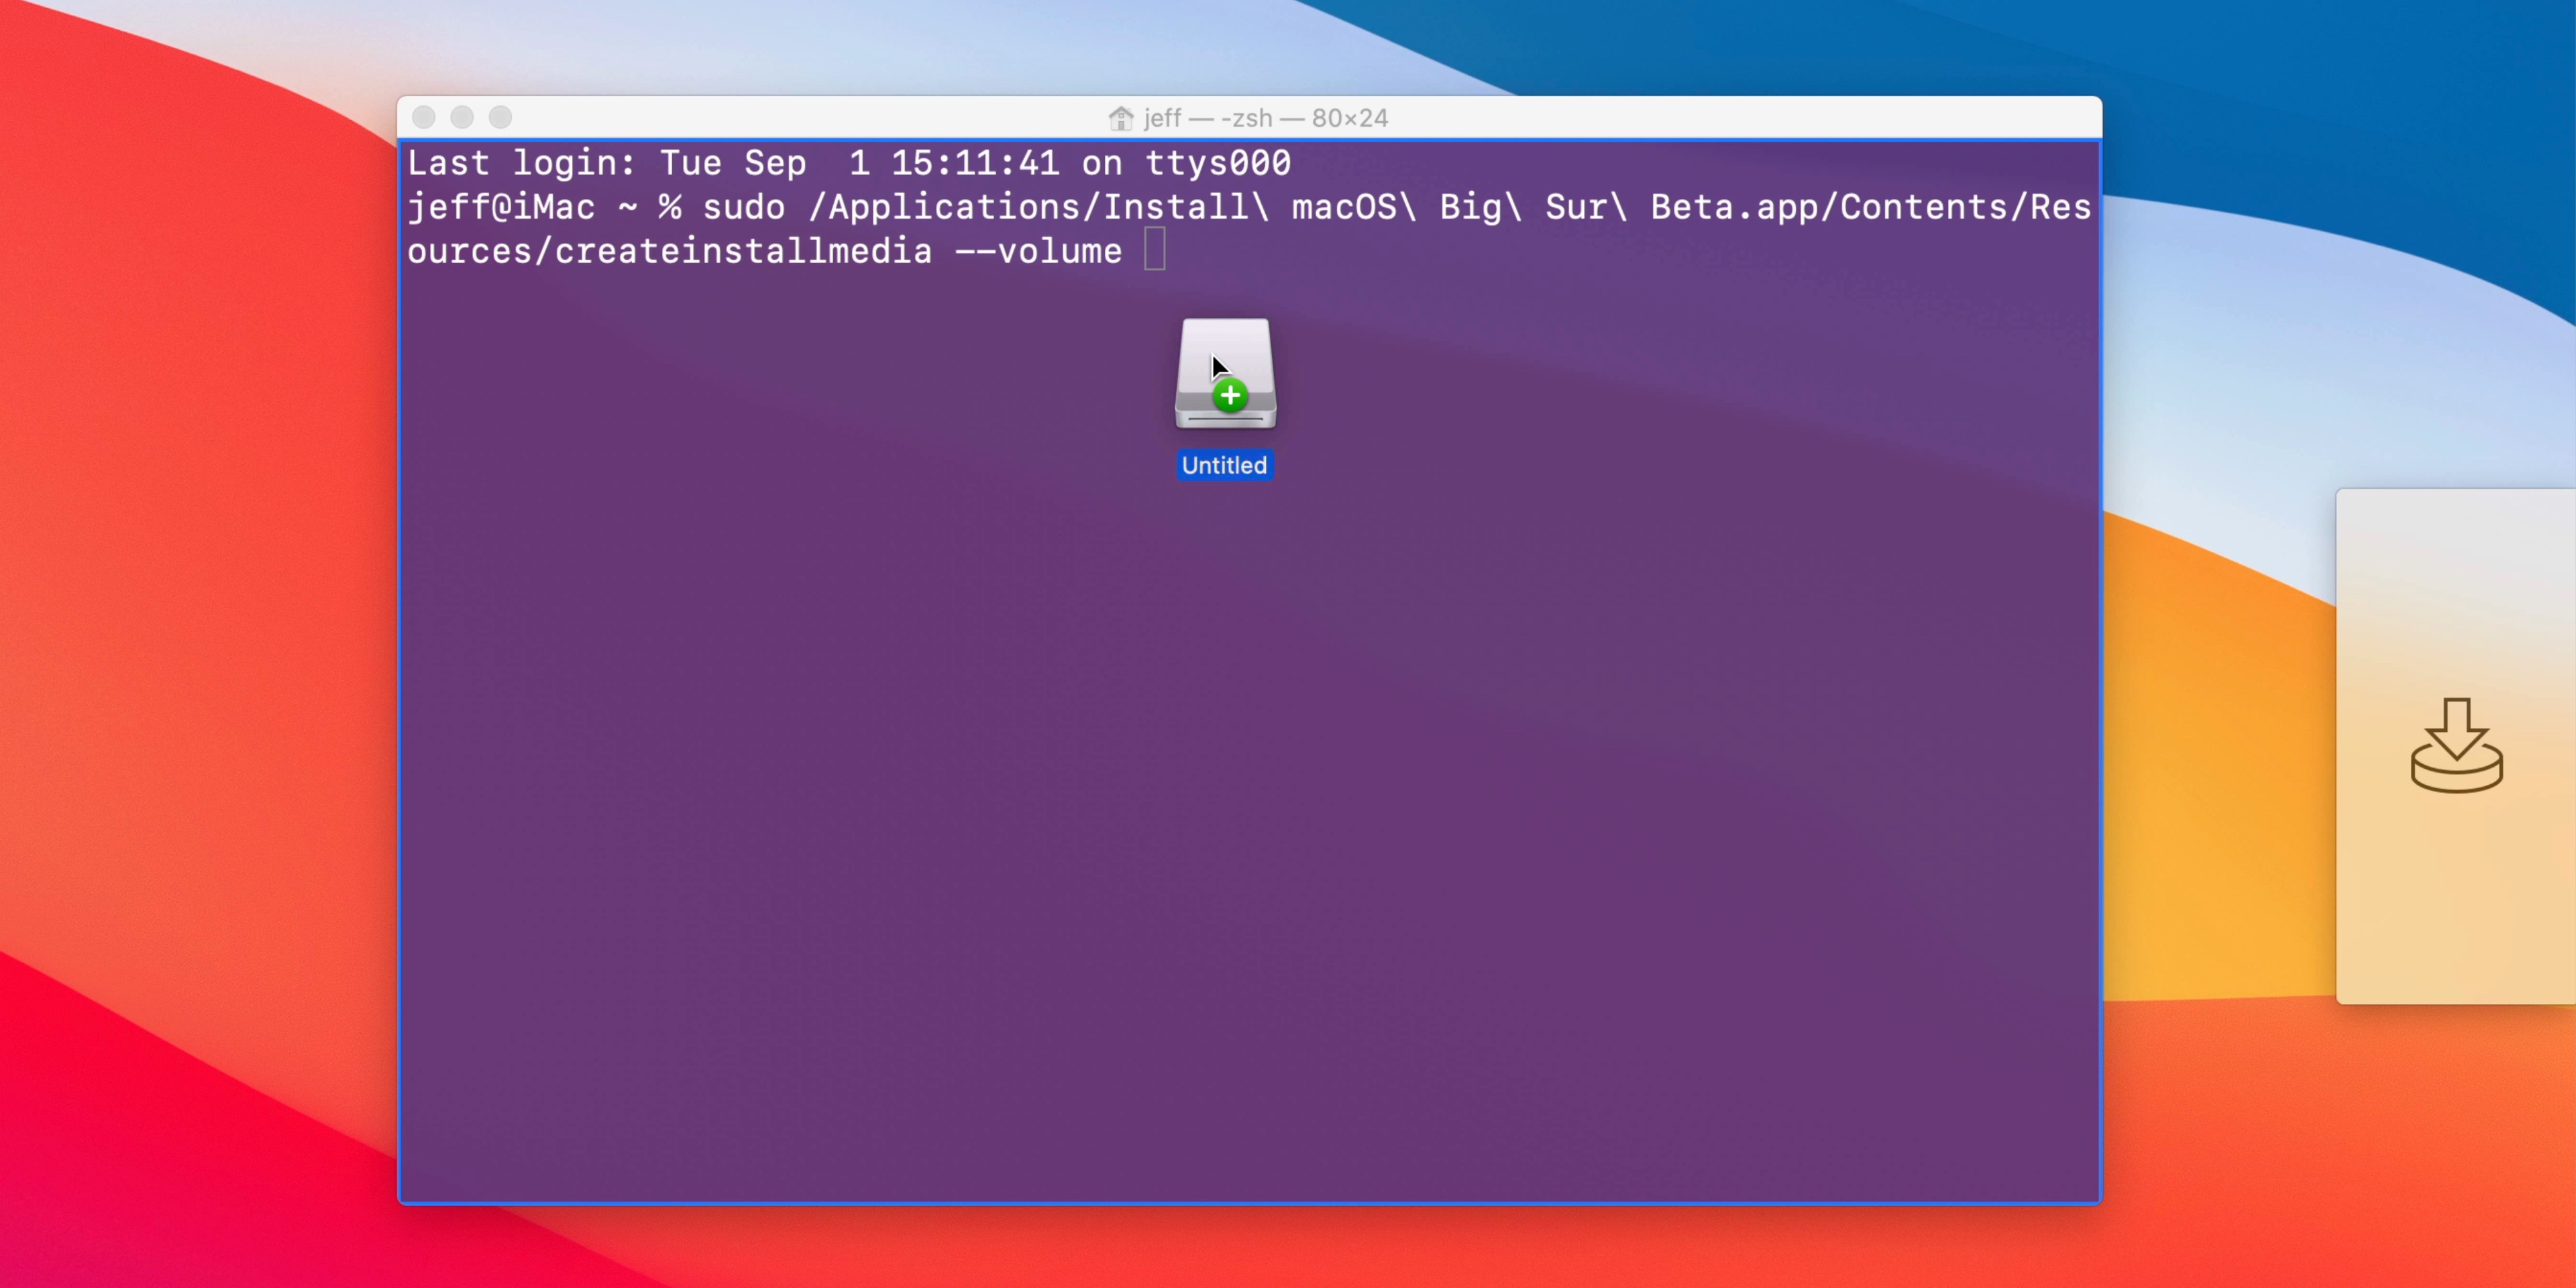
Step 6: Type sudo followed by a space in the Terminal window.
Step 7: Drag createinstallmedia to the Terminal window from the Resources folder noted in Step 4.
Step 8: Type --volume followed by a space.
Step 9: Open Finder → Go → Go To Folder…
Step 10: In the ‘Go to the folder’ box type /Volumes and click the Go button.

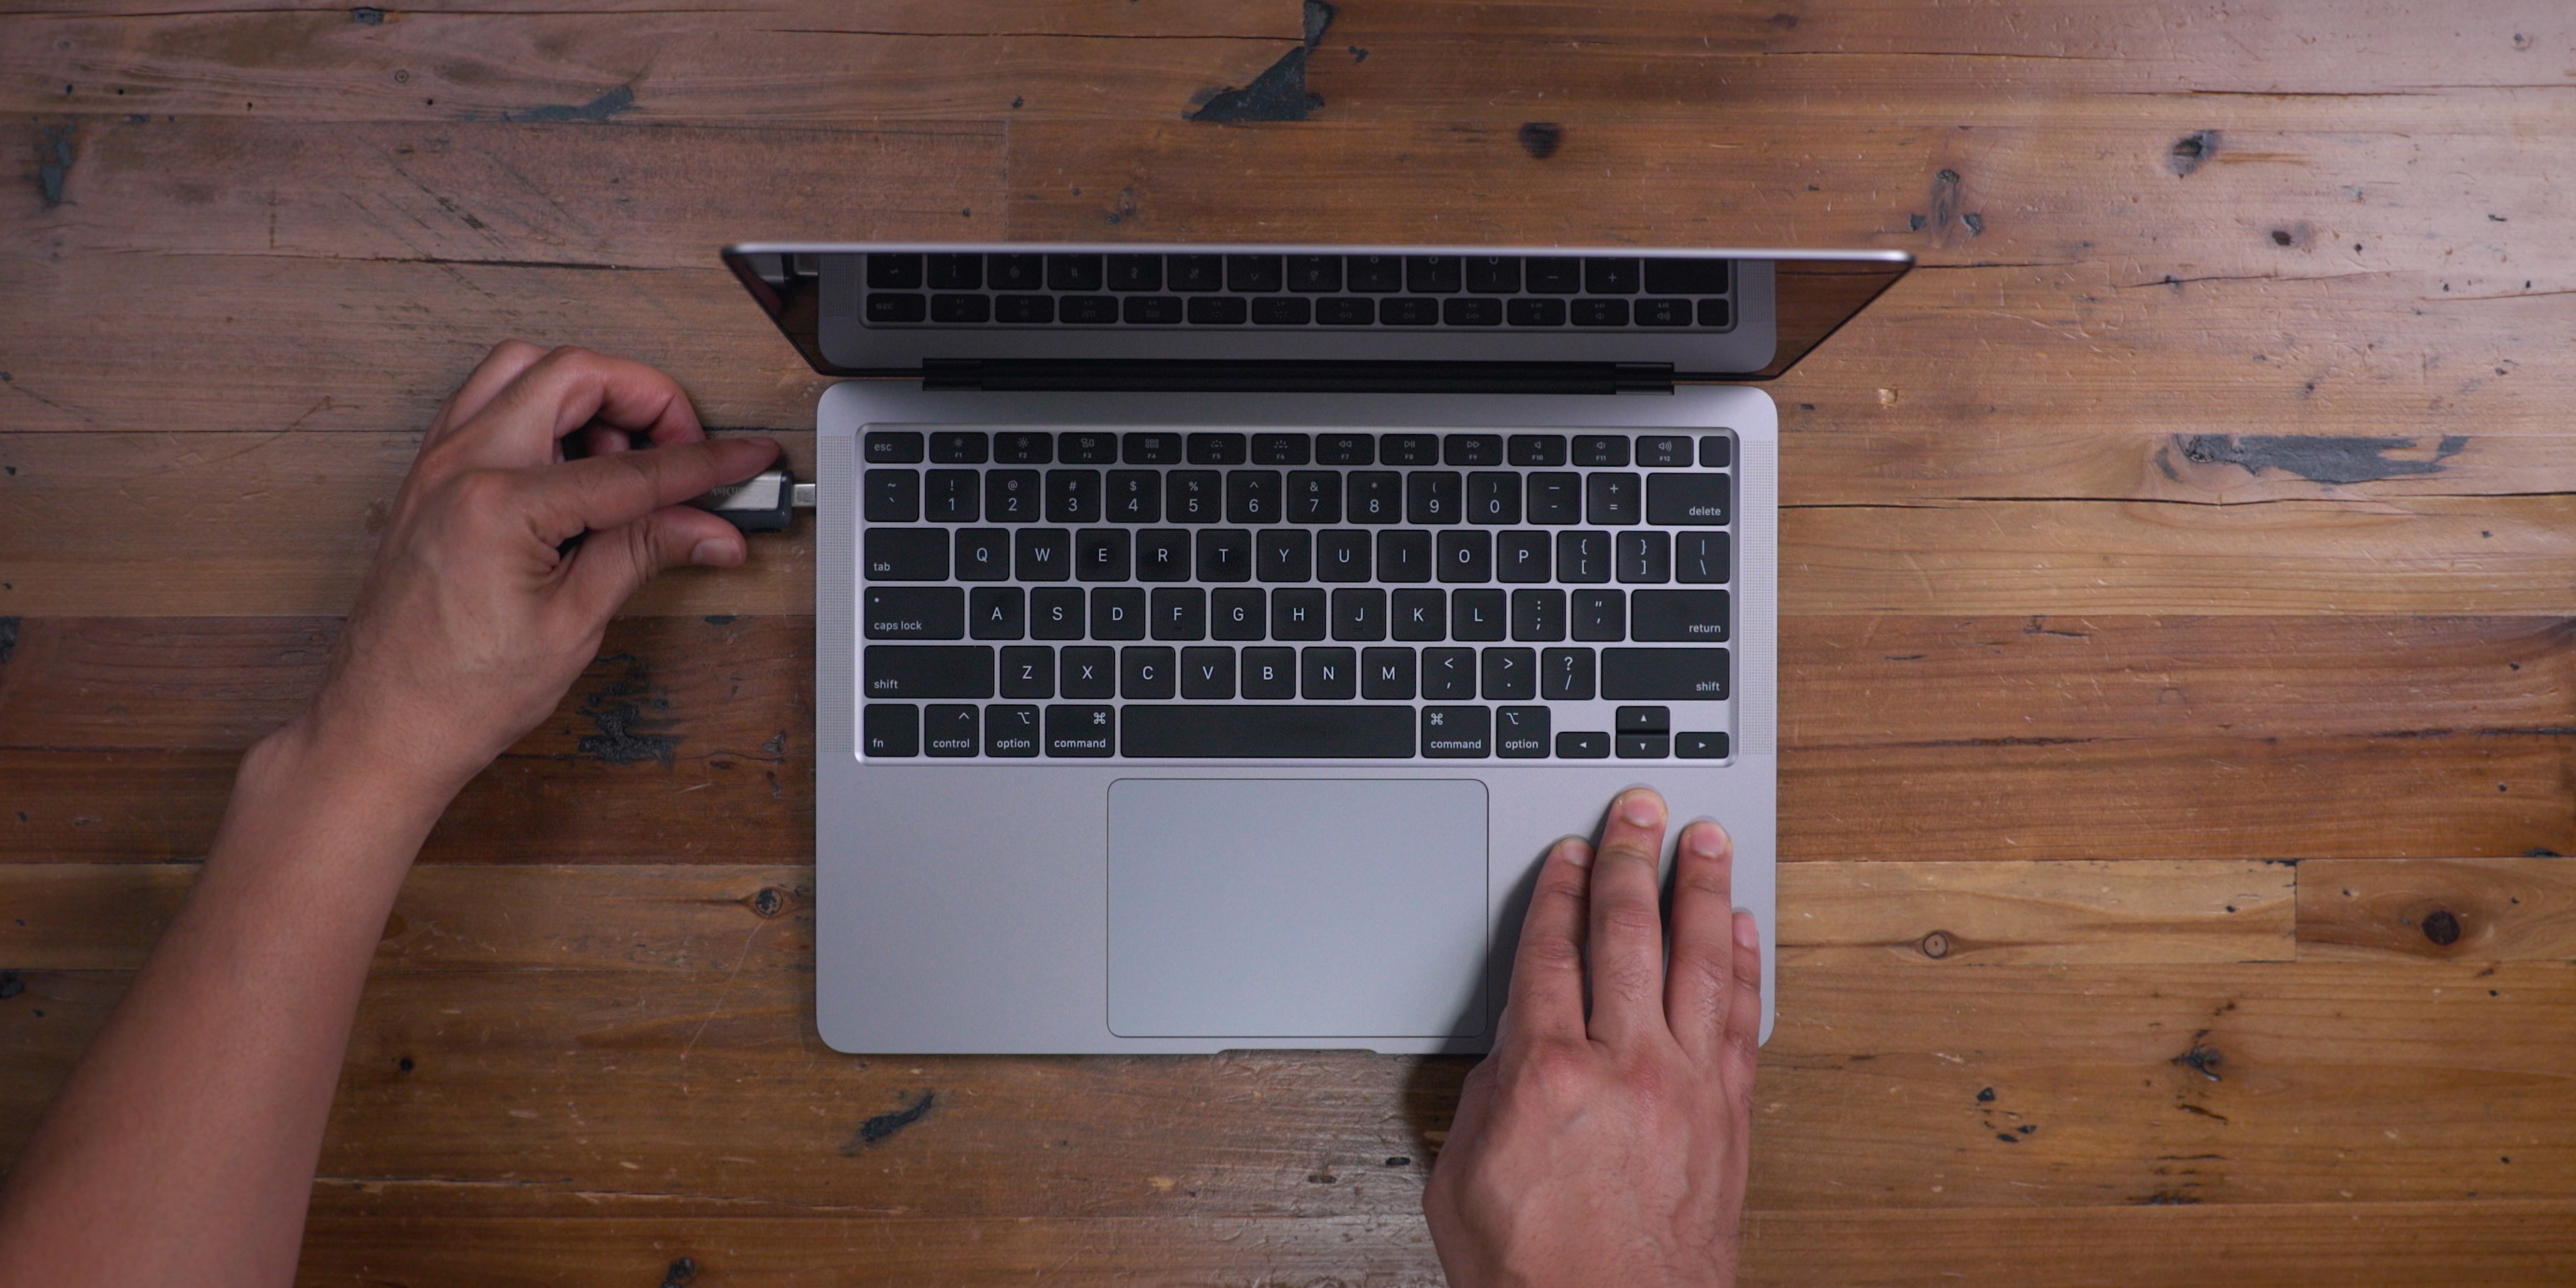
Step 11: Connect a USB flash drive to your Mac; it should appear in the Finder window.
Step 12: Drag the USB flash drive volume into the Terminal window.
Step 13: Press the Return key on the keyboard to submit the full Terminal command and when prompted, enter your password.
Step 14: When prompted type a “y,” and press the Return key on the keyboard to submit.
Terminal may ask for access to files on the removable volume.

Step 15: The install process will begin by purging the contents of the connected USB drive. Afterward, the installer files will be copied to the drive. Because this process takes a few minutes to complete, you’ll need to exercise patience throughout the install process.

Using the macOS Big Sur USB installer
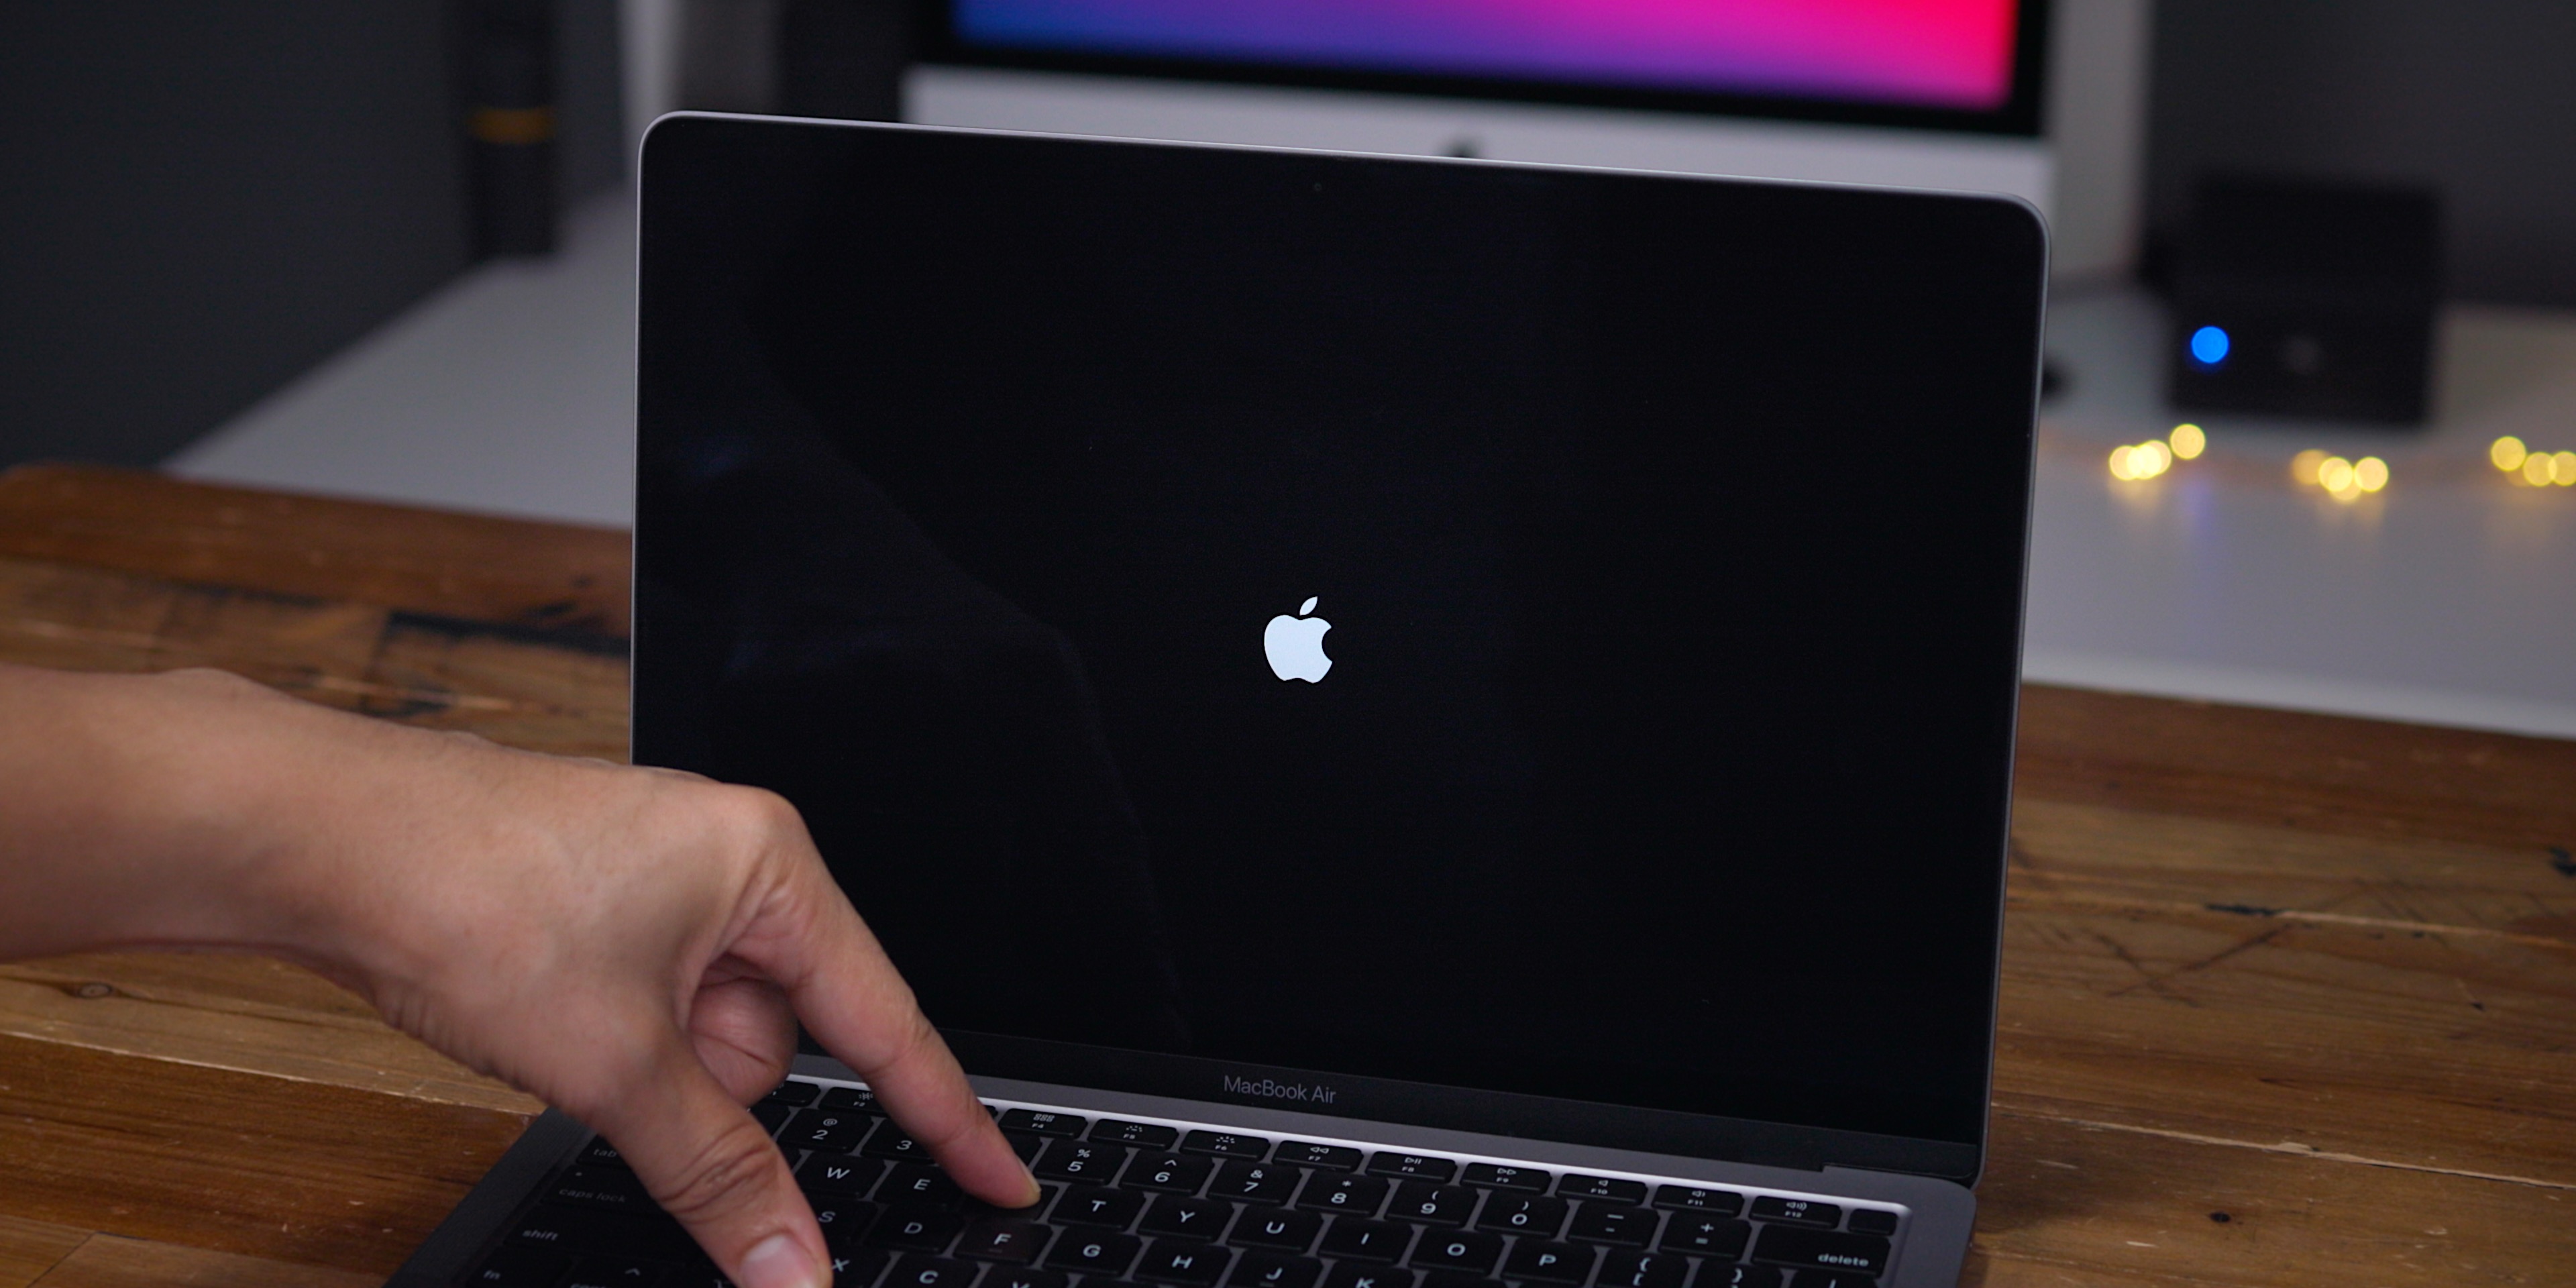
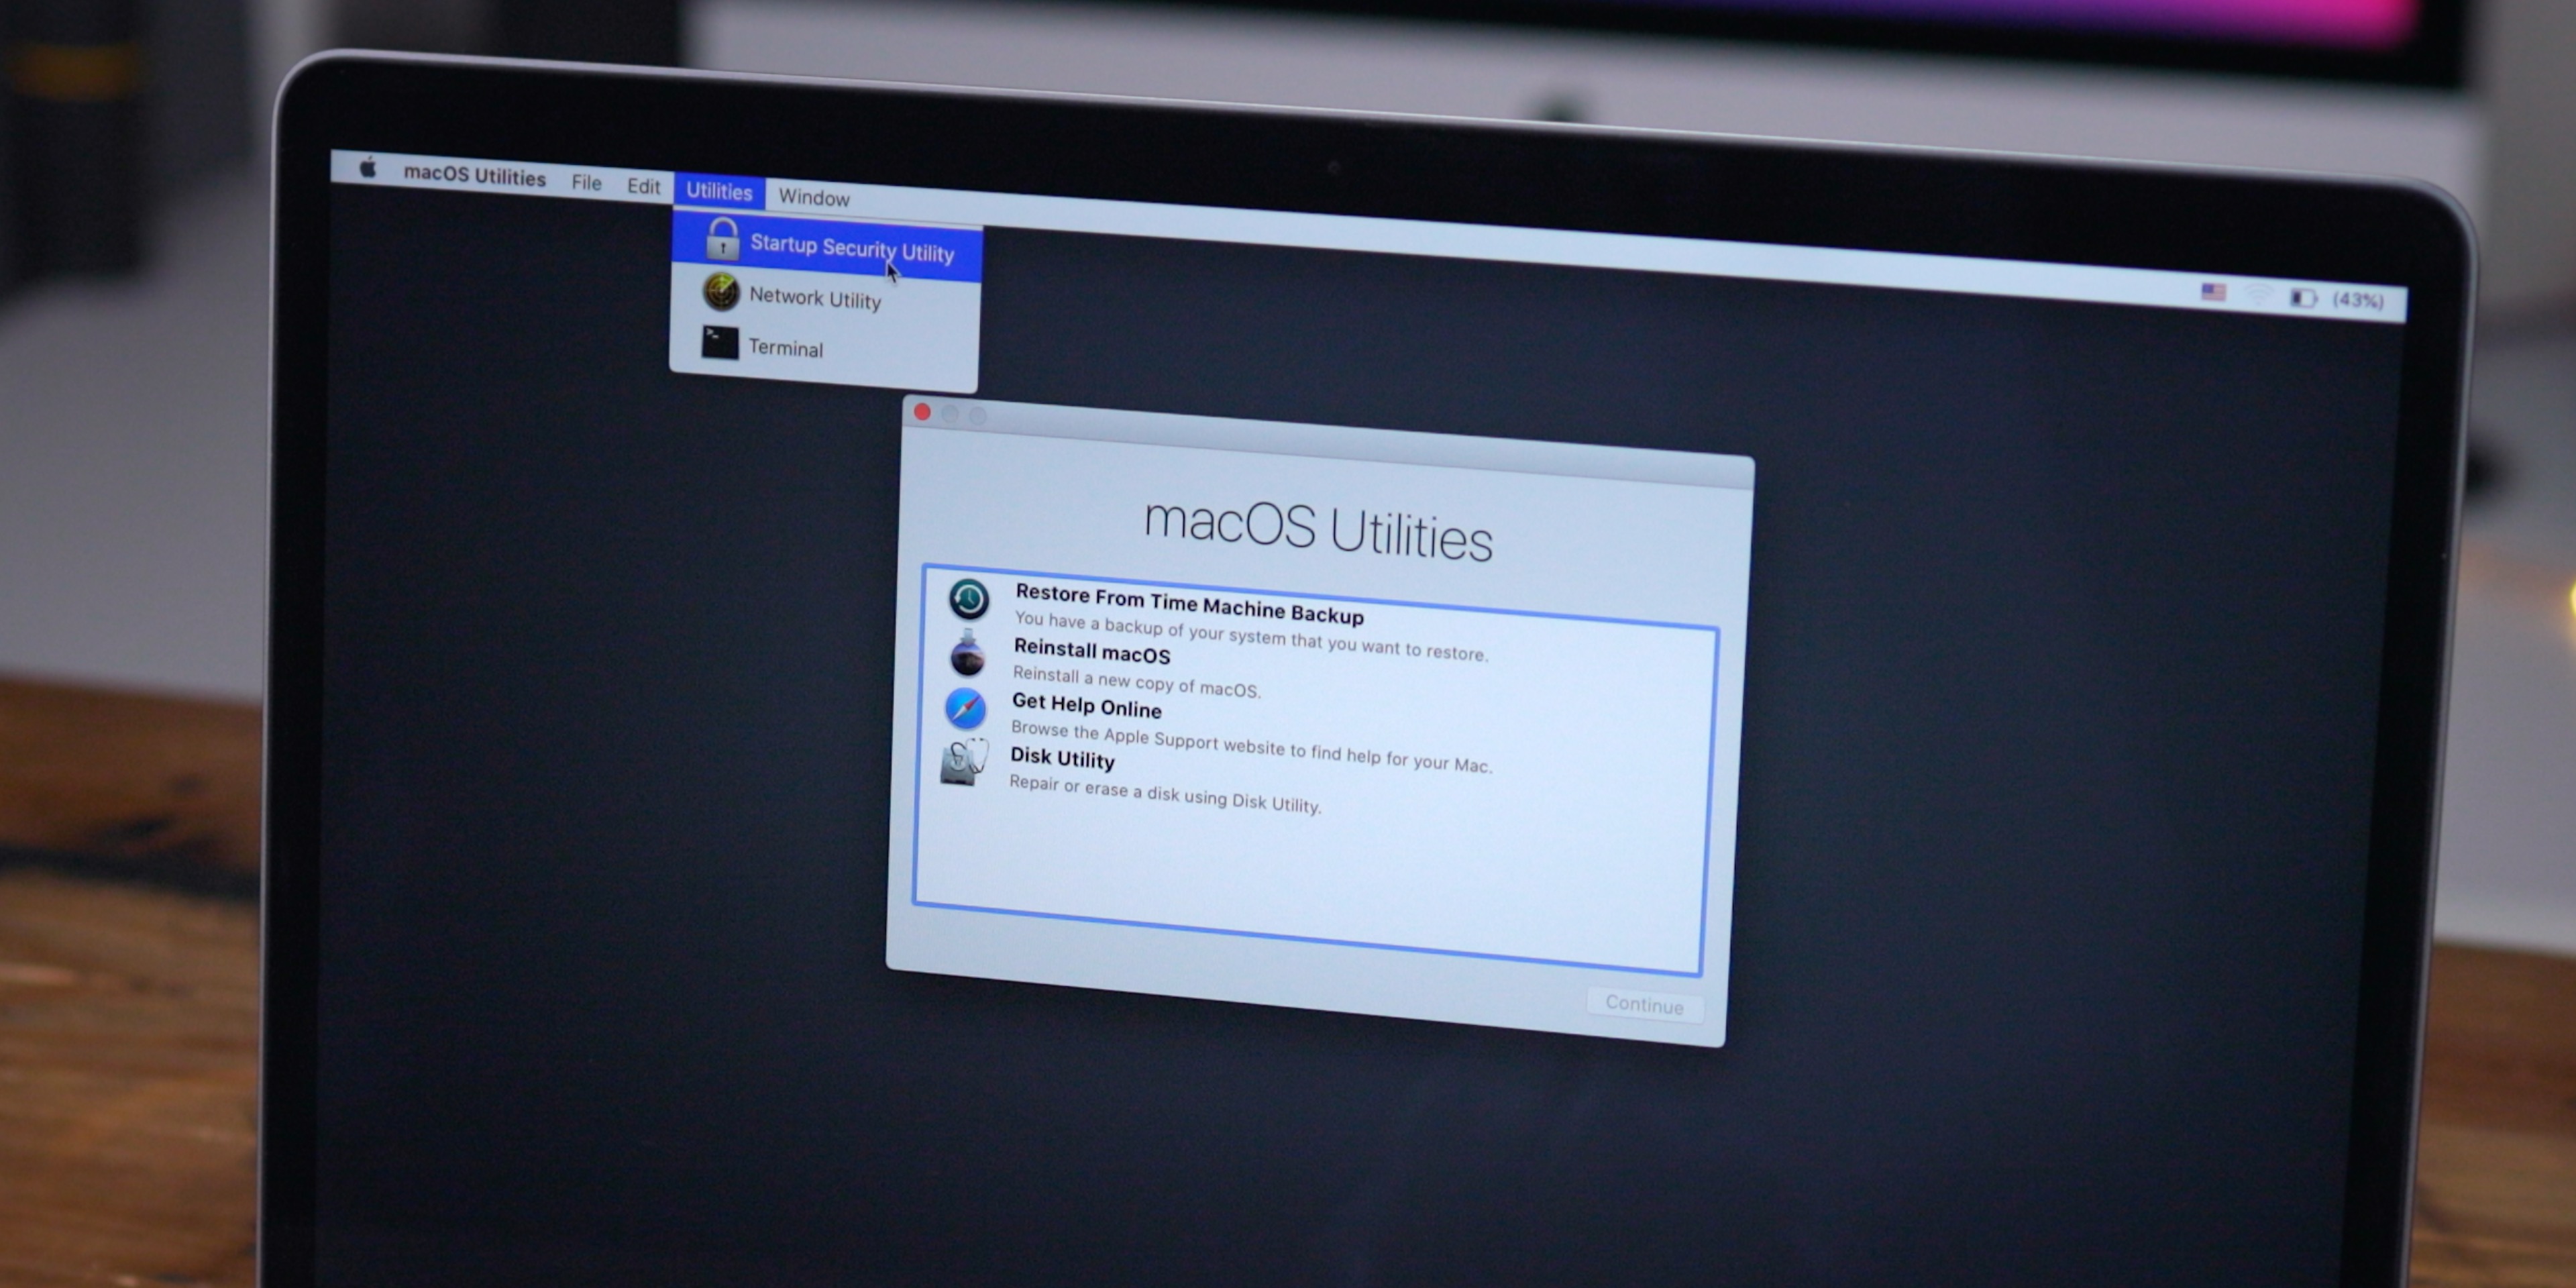
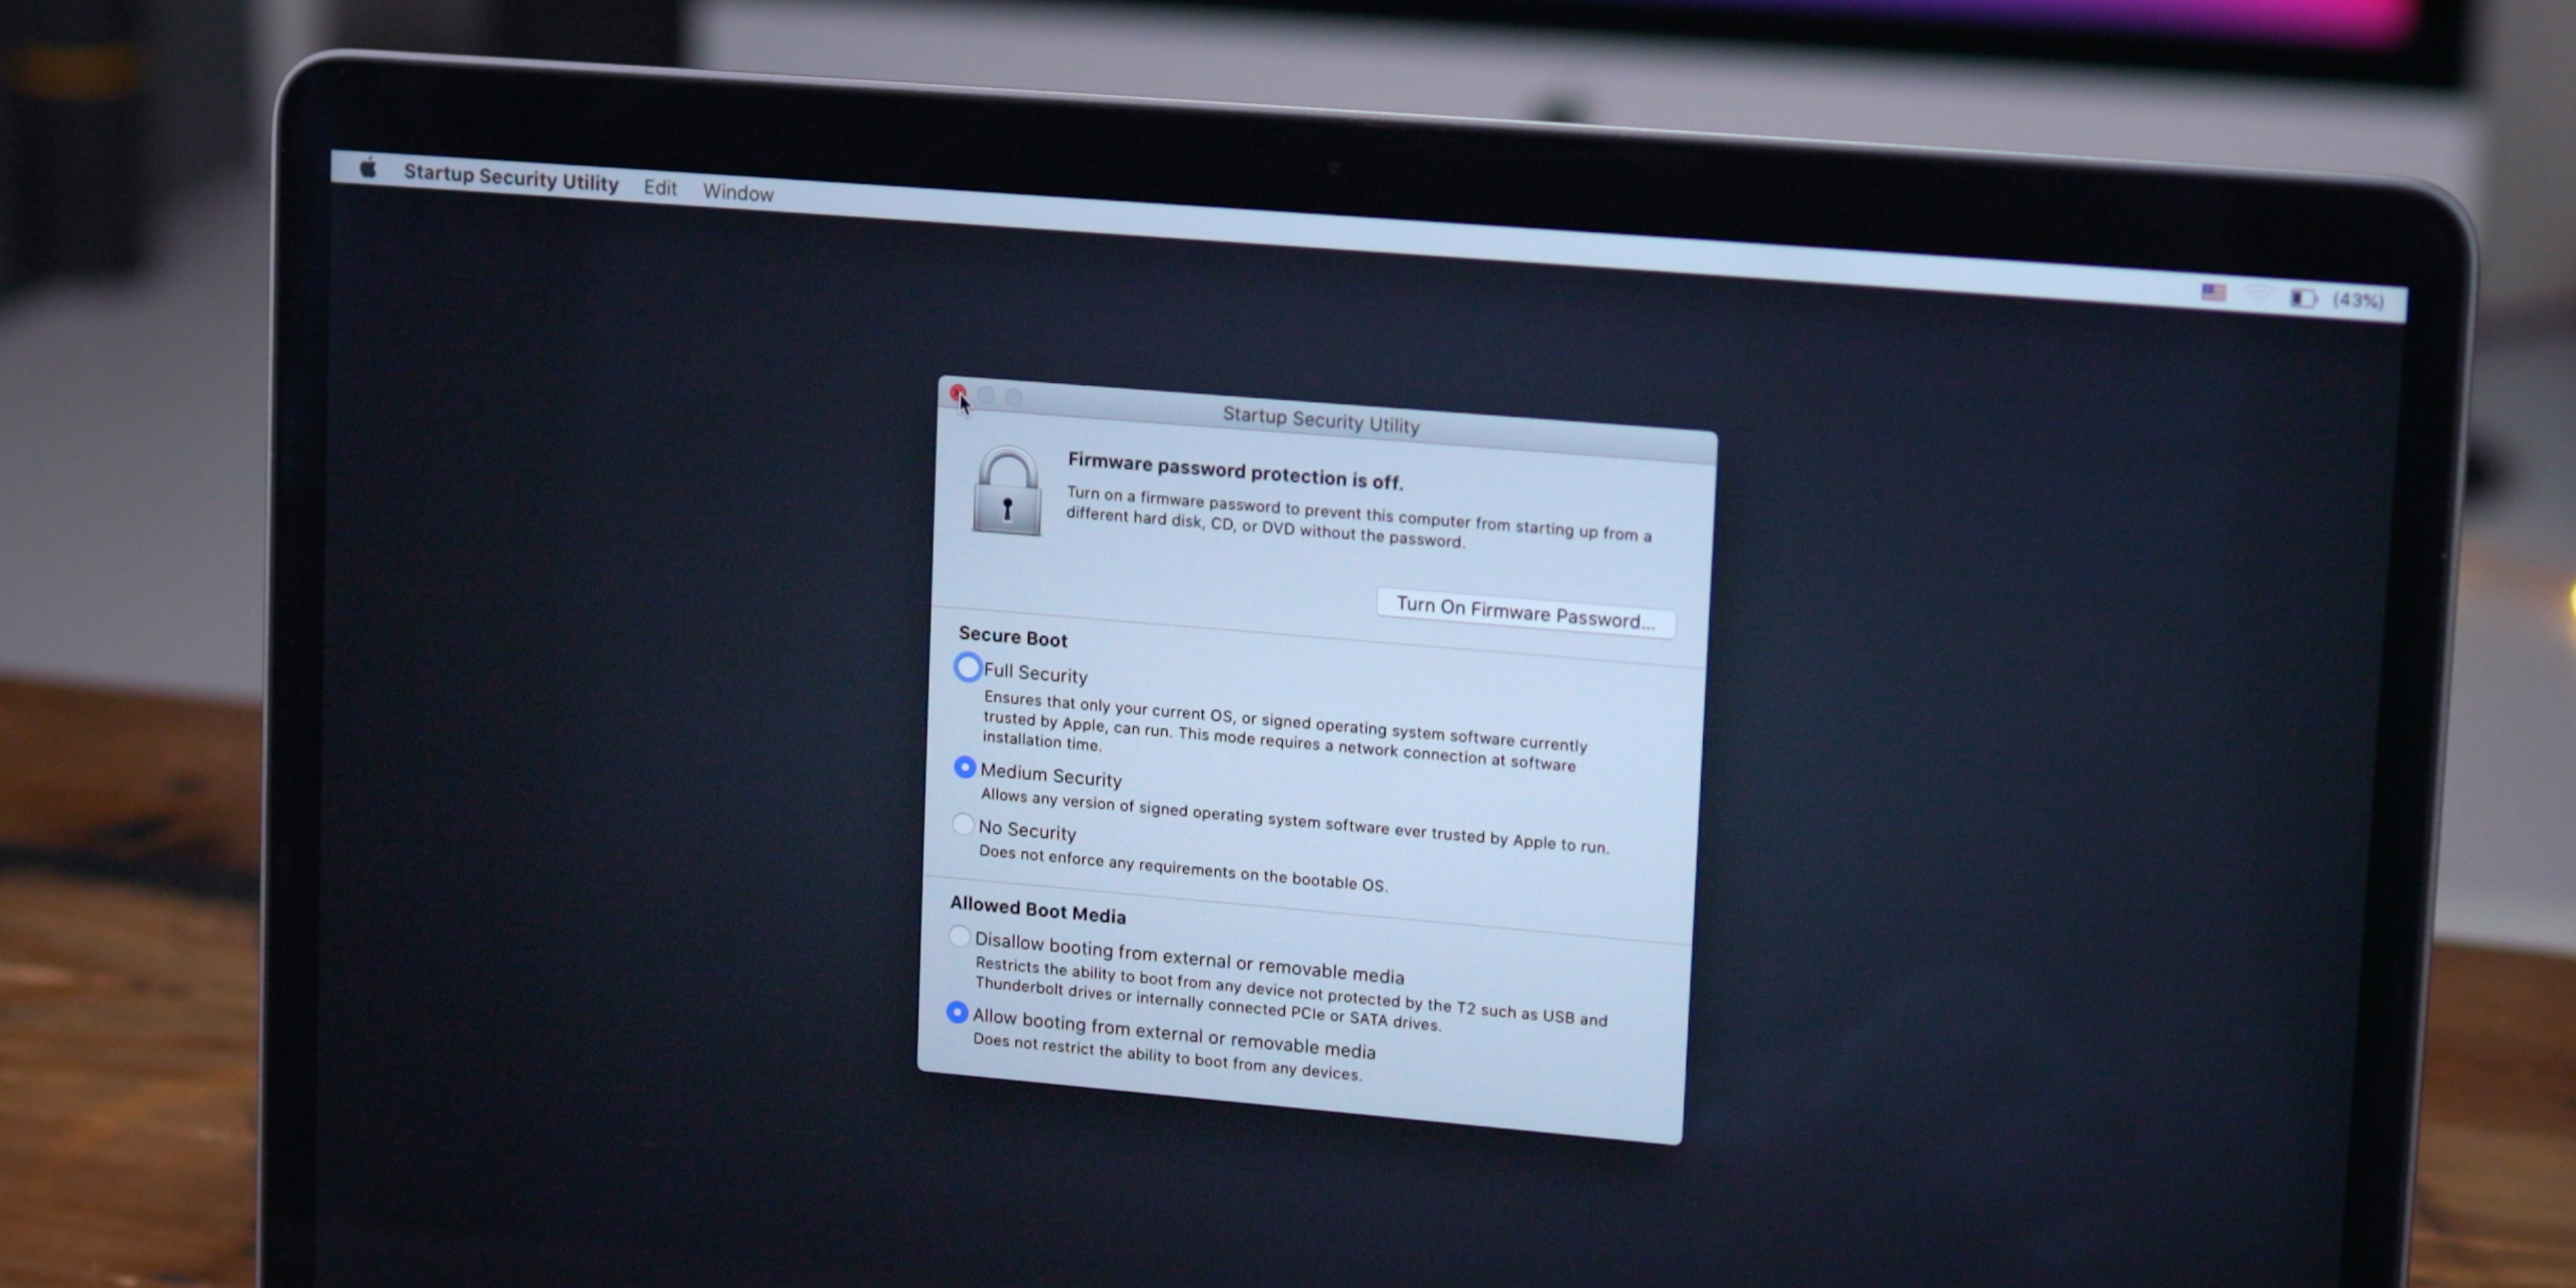
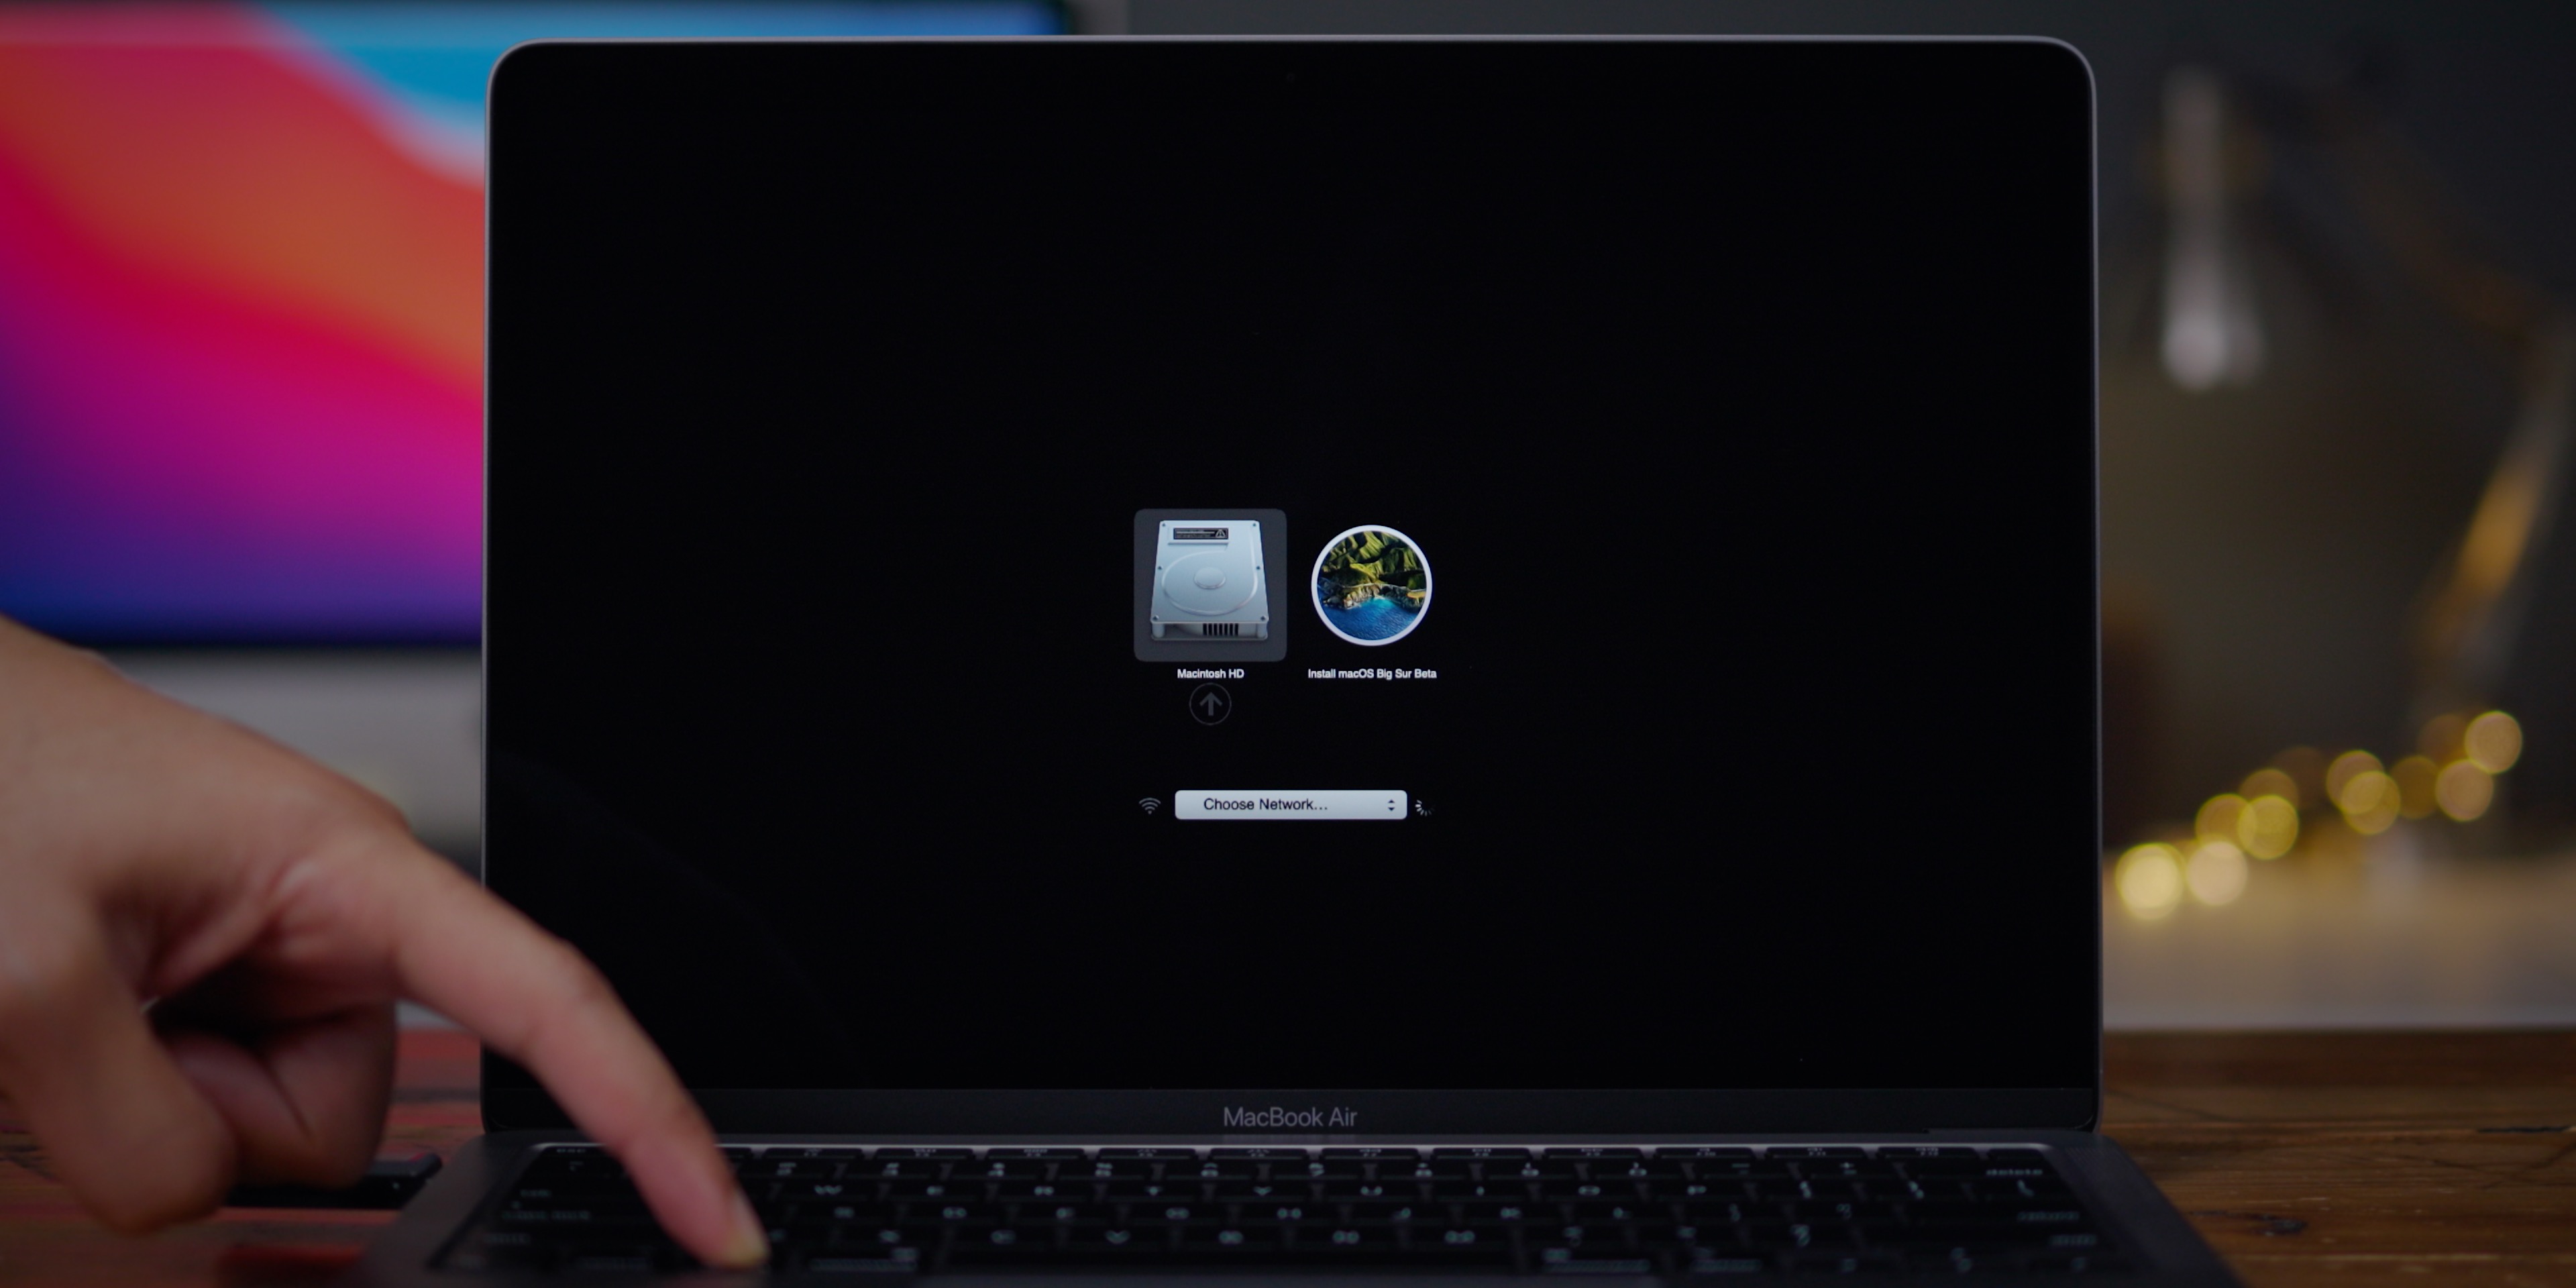
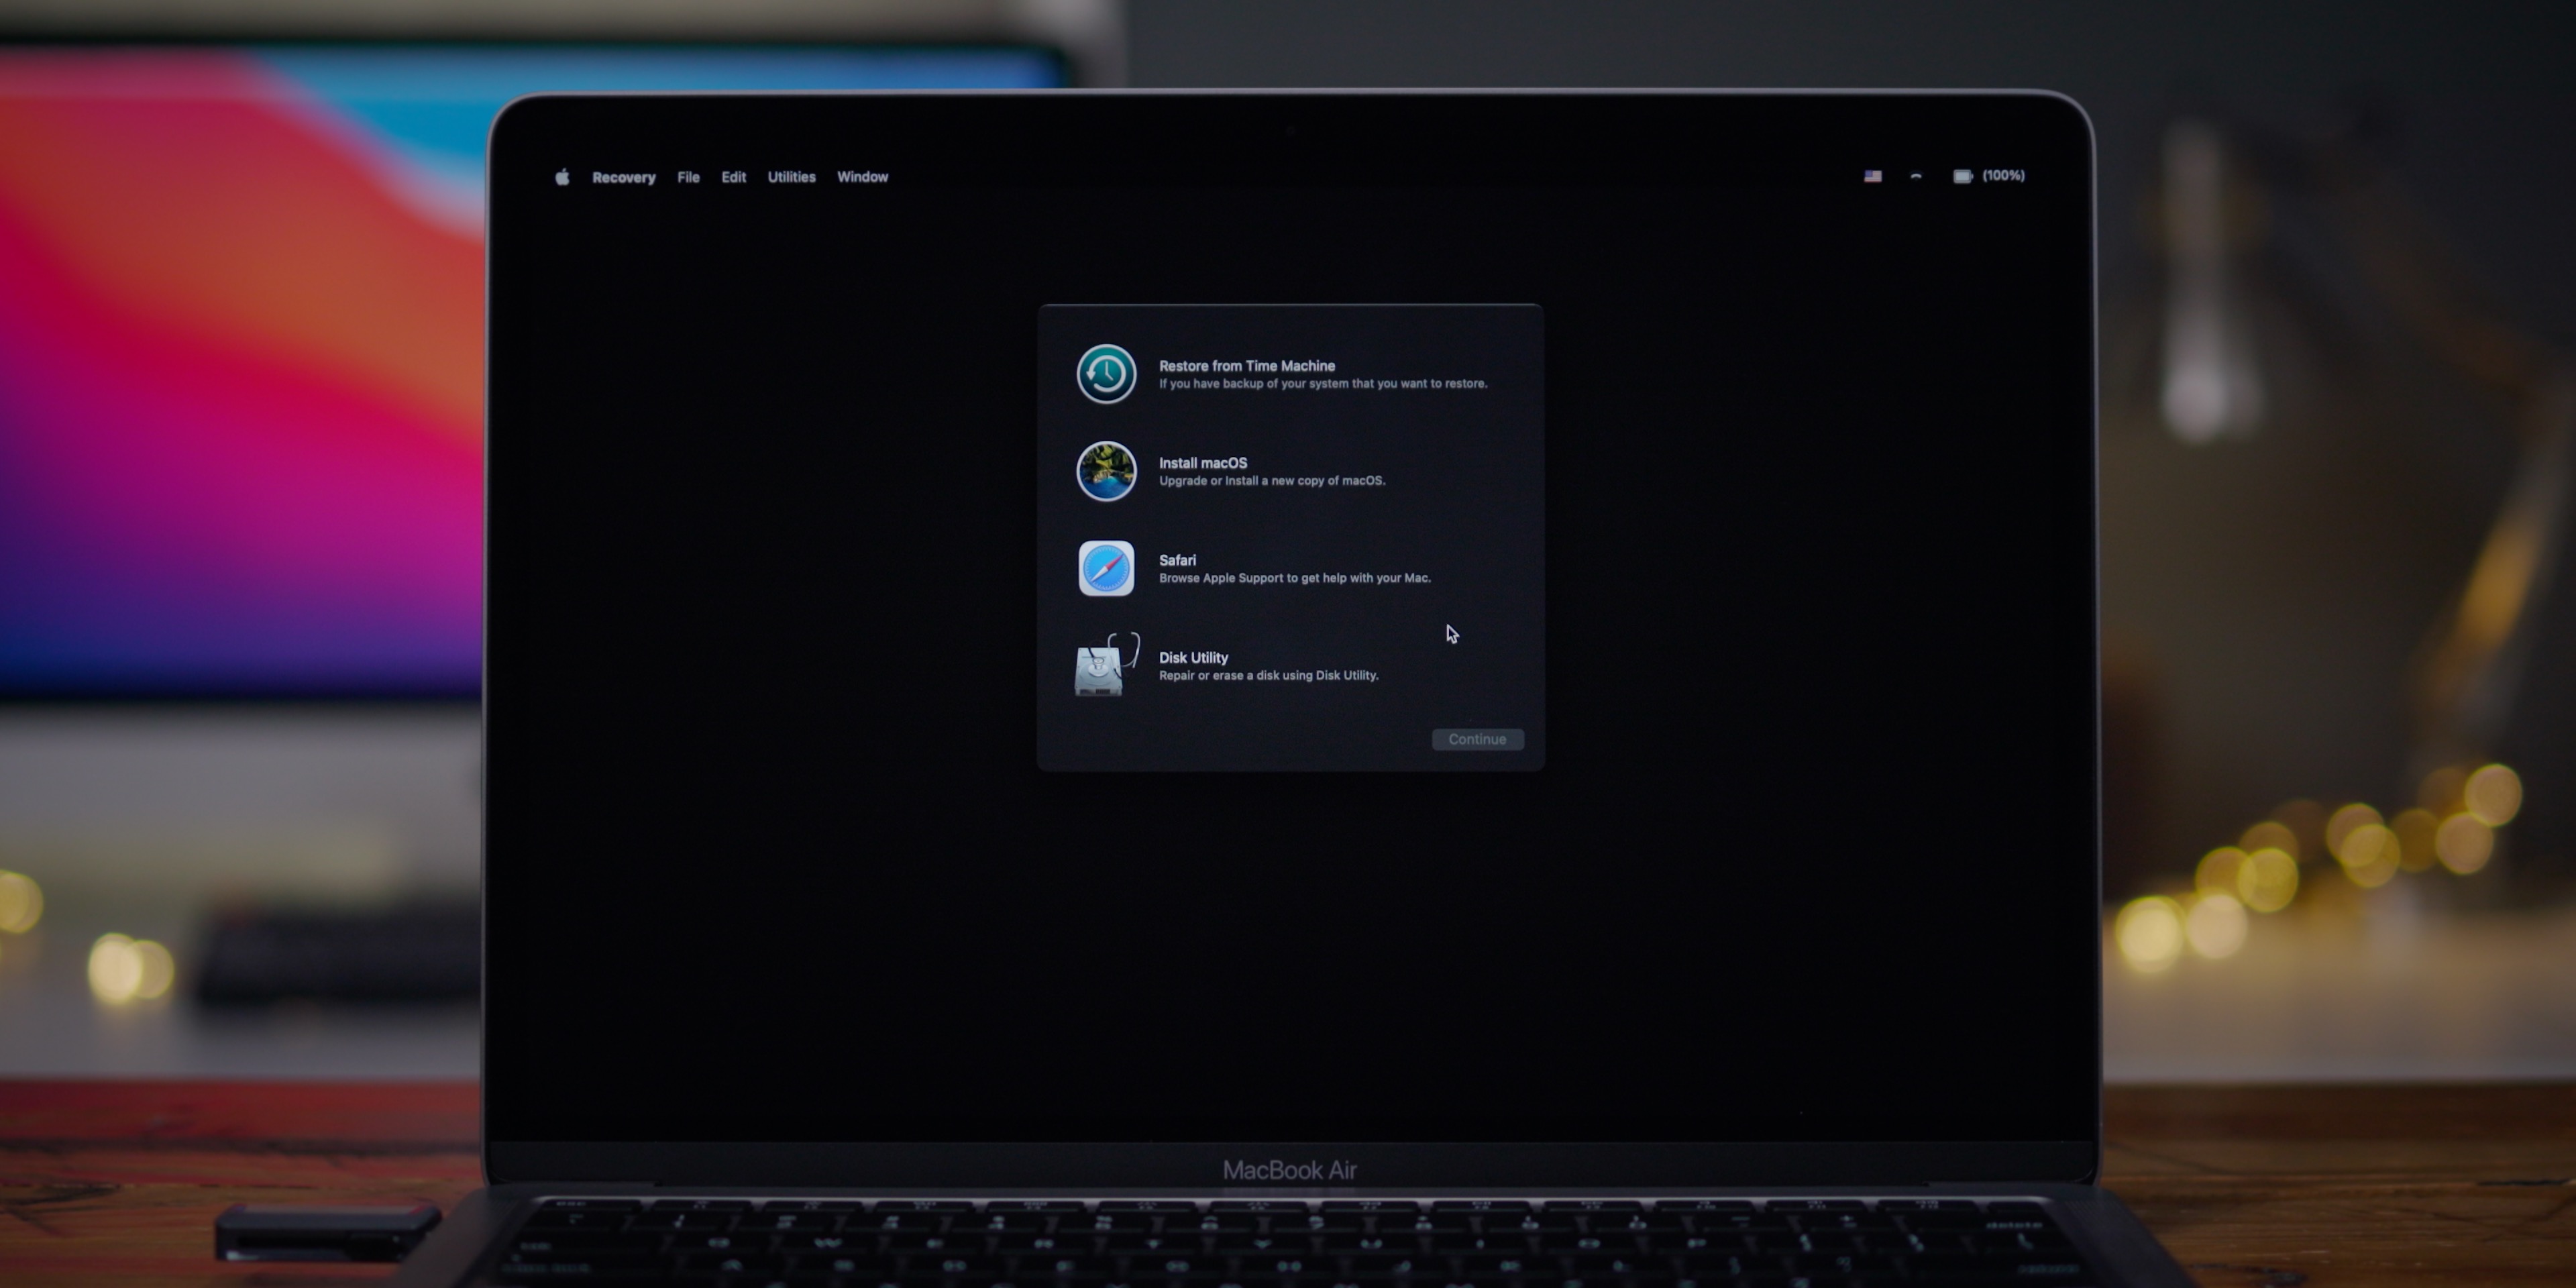
Creating the USB installer drive is easy, but actually using it can be challenging for users running Macs with Apple T2 Security chips. The aforementioned steps walk you through the basic process of creating the installer, but the video walkthrough goes even more in depth.
Details on how to enable booting from external/removable media via Recovery Mode are explained, along with direction on secure boot settings that I found helpful. Be sure to watch the full video for step-by-step details on how to utilize the USB installer drive once you’ve created it using the steps outlined above.
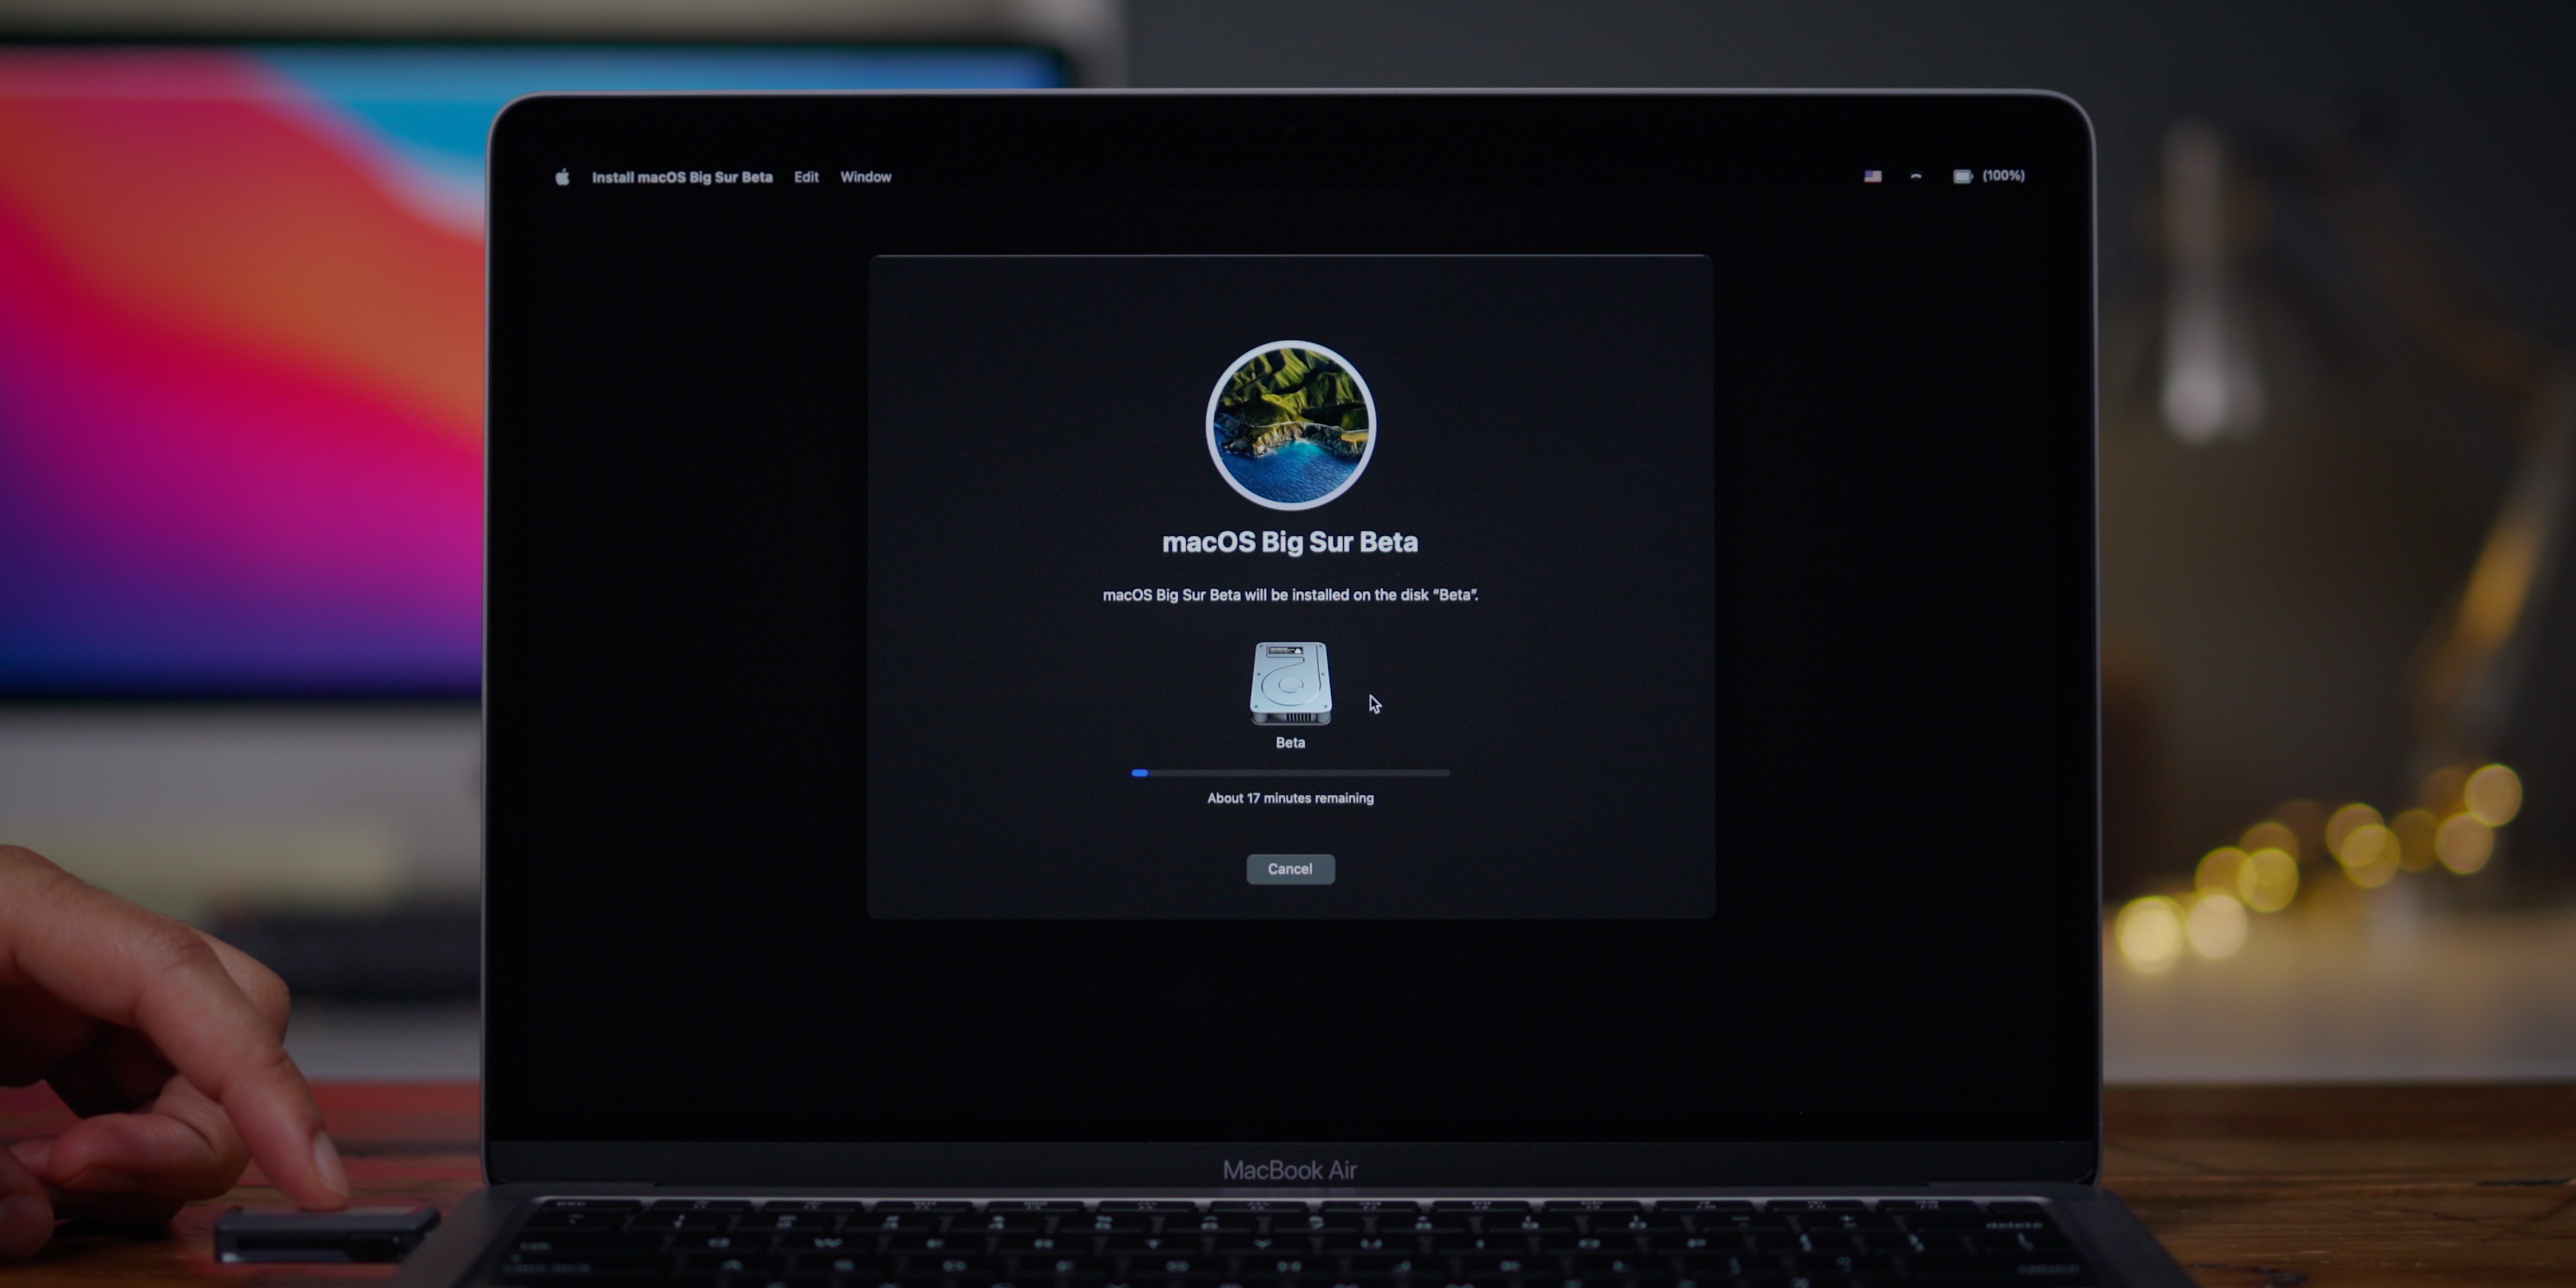
When installing macOS Big Sur, you’ll have several options at your disposal.
- You can choose to upgrade your existing macOS installation, going from macOS Catalina or previous versions of macOS to Big Sur.
- You can erase your existing installation and start from scratch.
- You can create a separate APFS volume and install macOS Big Sur there if you’d like to keep macOS Catalina around. Read and watch our tutorial about creating separate APFS volumes for macOS Big Sur for more details.
9to5Mac’s Take
Although there are Internet Recovery options available for reinstalling macOS, I like the idea of keeping a macOS USB installer around. It makes it easy to install macOS Big Sur on any compatible Mac, even if you haven’t downloaded the macOS Big Sur installer on that computer. It’s especially nice if you manage multiple Macs at home.
Do you make it a habit of creating bootable macOS USB install drives? Sound off in the comments with your thoughts on the matter.
FTC: We use income earning auto affiliate links. More.






Comments