Been testing out the new iPhone and iPad betas? If, for whatever reason, you’re ready to head back to the stable releases, read along for all the details on how to downgrade from iOS 15 beta to iOS 14.
Whether you took the risk to install the iOS 15 or iPadOS 15 beta on your primary iPhone or iPad or you just don’t need to keep testing out the in-progress software on a particular device, it’s relatively easy to downgrade back to iOS 14.
Below, we’ll look at how to immediately downgrade from iOS 15 beta.
How to downgrade from iOS 15 beta to iOS 14
Important: If you’ve already installed the watchOS 8 beta on an Apple Watch connected to an iPhone running the iOS 15 beta, you won’t be able to fully use your wearable after downgrading to iOS 14 as there is no way to downgrade to watchOS 7.
Downgrade from iOS 15 beta to iOS 14 with a Mac/PC
If you want to immediately downgrade from the iOS 15 beta (public or developer), you’ll need to erase and restore your iPhone or iPad. With this option, you won’t be able to restore from a backup done on iOS 15 when going back to iOS 14. But naturally, you can restore from a previous iOS 14 backup.
Luckily, with iCloud saving a lot of data for most apps, that isn’t as much of a hassle as it used to be.
Alternatively, you can head to Settings > General > VPN & Device Management > iOS 15 Beta Profile > Remove Profile. But keep in mind that won’t downgrade you to iOS 14. You’ll have to wait until the public release of iOS 15 to get off the beta.
How to erase and restore your iPhone/iPad and downgrade from iOS 15 beta immediately:
- Make sure you’re running the latest version of macOS ( > About This Mac > Software Update).
- Connect your iPhone or iPad to your Mac or PC with a Lightning or USB-C cable.
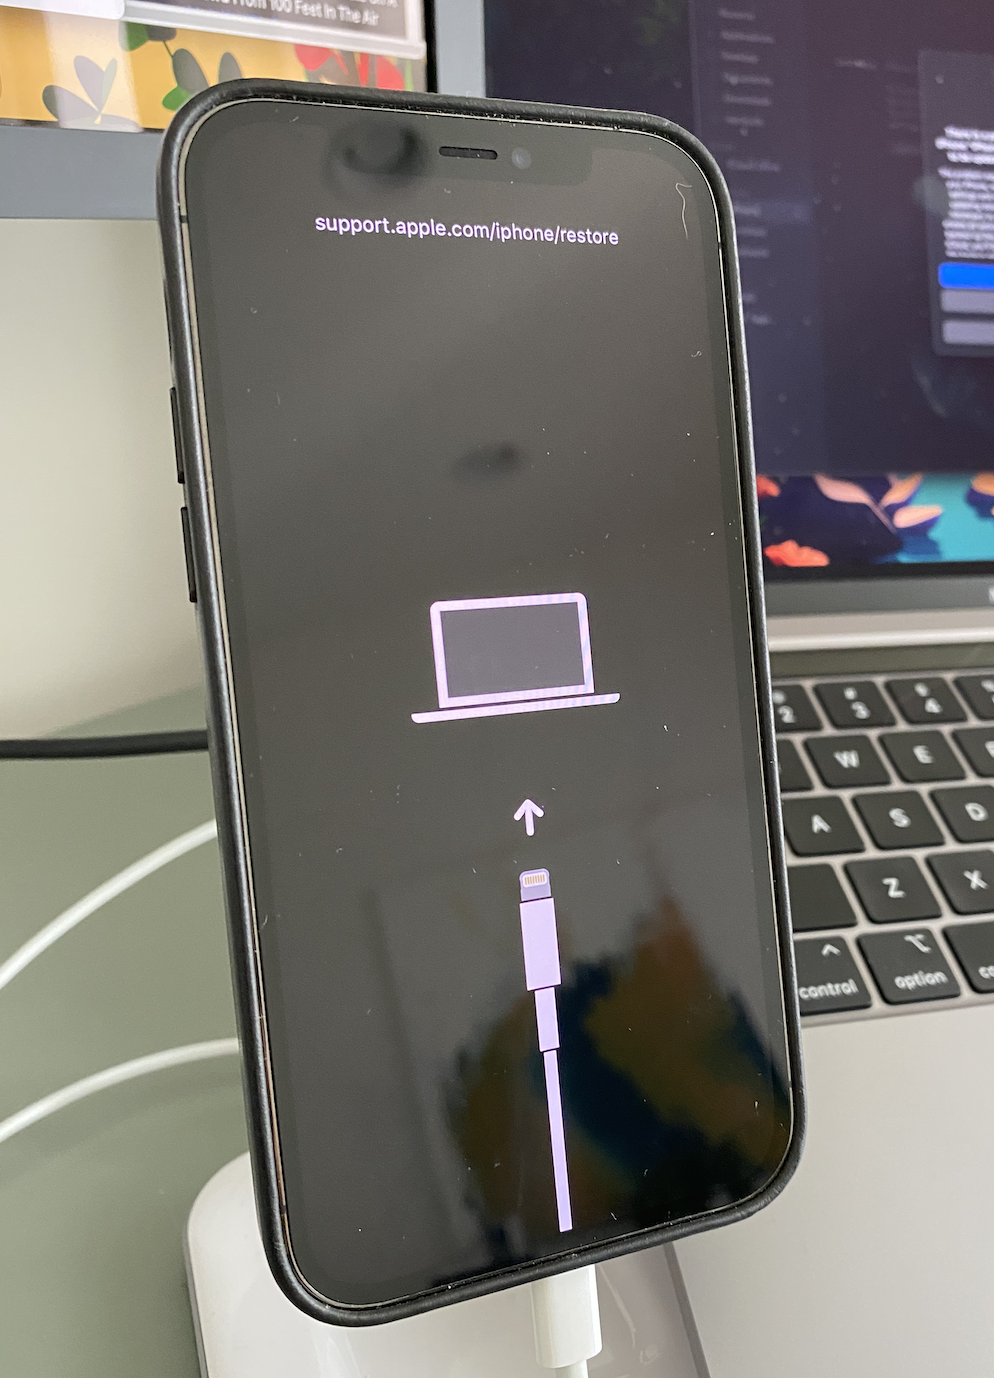
- Use the right method from the list below for your device to enter Recovery Mode. You’ll see a computer icon and Lightning cable when successful.
- For iPad Pro with Face ID: Press and quickly release the Volume Up button. Press and quickly release the Volume Down button. Press and hold the Top button until your device begins to restart. Continue holding the Top button until your device goes into Recovery Mode.
- For iPhone 8 or later: Press and quickly release the Volume Up button. Press and quickly release the Volume Down button. Then, press and hold the Side button until you see the recovery-mode screen.
- For iPhone 7, iPhone 7 Plus, or iPod touch (7th generation): Press and hold the Sleep/Wake and Volume Down buttons at the same time. Don’t release the buttons when you see the Apple logo. Continue to hold both buttons until you see the recovery mode screen.
- For iPhone 6s and earlier, iPad with Home button, or iPod touch (6th generation or earlier): Press and hold the Sleep/Wake and Home buttons at the same time. Don’t release the buttons when you see the Apple logo. Continue to hold both buttons until you see the recovery mode screen.
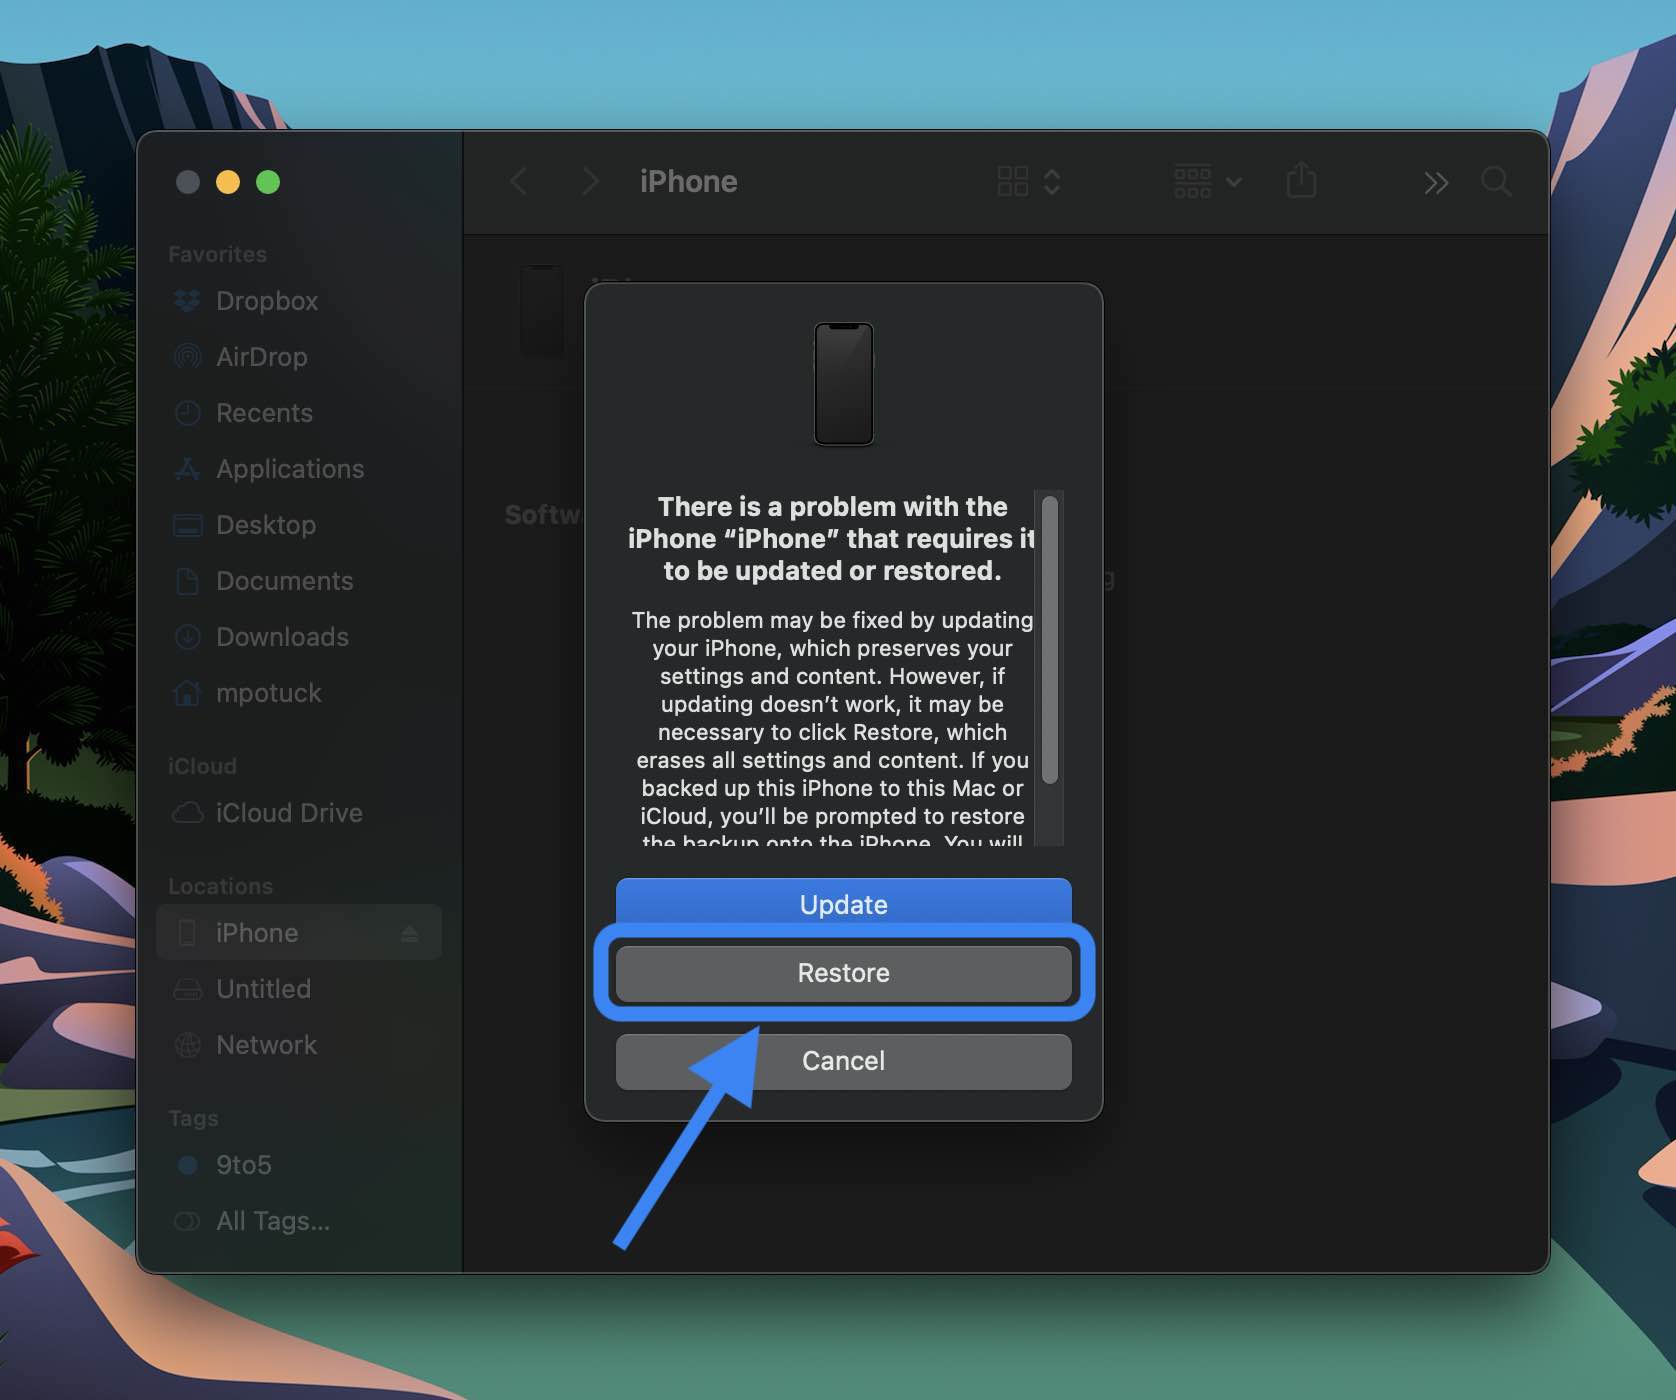
- When the Restore/Update option shows up on your Mac or PC, choose Restore. This will wipe your device and install the latest non-beta version of iOS.
- Choose Install when you see the prompt that an update is required to restore your iPhone.
After the software restore has been completed, you can restore a backup from iOS 14 with your Mac/PC or iCloud (or set up your iPhone or iPad as a new device).
Here’s how this looks on iPhone and a Mac:

Read more about how to downgrade from iOS 15 beta in Apple’s support document here.
Read more 9to5Mac tutorials:
- iOS 15 beta hands-on: 300+ changes and features [Video]
- Hands-on: Here’s how Background Sounds work in iOS 15
- Hands-on: Here’s how the all-new Safari in iOS 15 works
- iPhone: How to enable and disable iCloud Private Relay in iOS 15
- Here’s how Beats Studio Buds compare against AirPods and AirPods Pro
FTC: We use income earning auto affiliate links. More.


Comments