
Tying together accessories across manufacturers is a key reason I love building around a smart home platform vs. picking manufacturers. One of the most underrated accessory types for HomeKit is motion sensors, and this week for HomeKit Weekly, I want to dive into it to look at the best options and how to make the best use of them.
HomeKit Weekly is a series focused on smart home accessories, automation tips and tricks, and everything to do with Apple’s smart home framework.
Why motion sensors for HomeKit?
If you’ve ever had a security system in your house, you know what a motion sensor does. It’s turned on with the away mode to detect motion inside the house to set the alarm off. Motion sensors can do so much more, though. When you flip the concept of motion sensors from a security concept to a home automation concept, many new possibilities come into view.

Motion sensors are designed as a trigger for other HomeKit products. Automations are the critical part of how you implement motion sensors within HomeKit. For example, tracking motion inside a room is interesting to know, but it requires staring at the Home app to know what room has motion. The real benefit is when you can take a secondary accessory light a lamp, overhead lights, air filter, or even a HomeKit enabled thermostat and trigger them by what’s happening in the room.
Best HomeKit motion sensors
Like I mentioned in the beginning, one of the key benefits to HomeKit is taking a motion sensor from any brand (with HomeKit support) and tying it to any other product in your HomeKit environment. I’ve tried just about every brand, but here are some good options:
- Onvis Motion Sensor
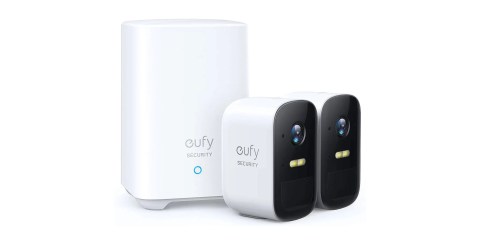
- Eve Motion Sensor
- Aqara Motion Sensor (requires an Aqara hub)
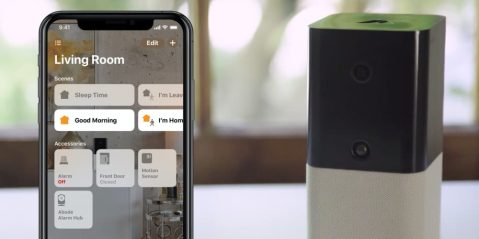
- abode motion sensor (as part of an abode security system)
- Hue outdoor motion sensor (requires Hue hub)
Depending on your needs/use cases, each one has benefits. The Onvis and Eve models are simple to set up for standalone motion sensors. If you want to expand out an Aqara accessory lineup, the Aqara motion sensor is a great option. Abode is an excellent choice for building out an entire security system inside of HomeKit. If you want to build an outdoor motion environment for trigger floodlights or other outdoor lights, Hue is the place to start.
Personally, I own every one of them and could justify the uses cases for each of them. However, the best option for you will be to decide where you want to end up and go from there.
Getting started with HomeKit motion sensor automation
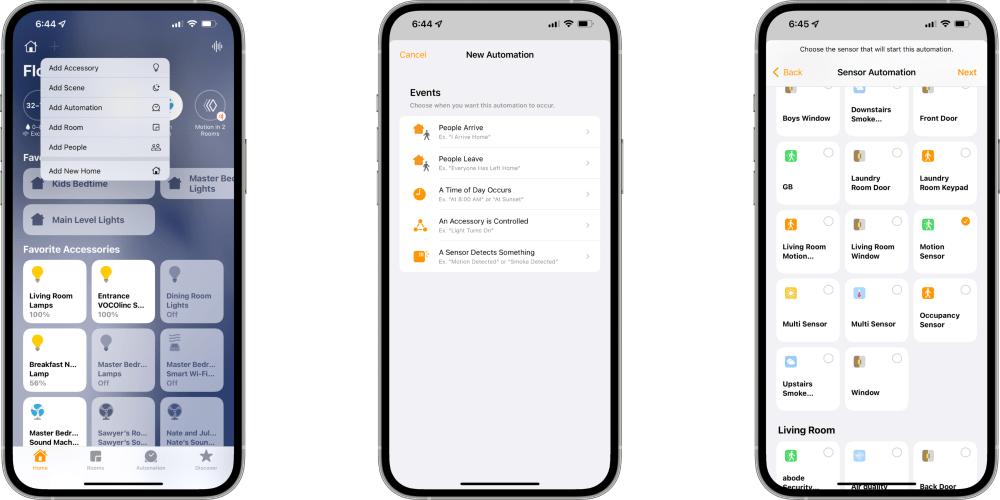
Once you add a motion sensor to HomeKit, it’s time to start building automations to trigger other accessories. Tap the + icon in the Home app and look for Add Automation. On the next screen, look for A Sensor Detects Something. The idea here is you’ll want to do something when a motion sensor detects motion.
On the next screen, you’ll want to find your motion sensor. On the following screen, you have two options: Detects Motion or Stops Detecting Motion. Both of these are useful in their own ways. Detects Motion is going to be useful for turning things on while Stops Detecting Motion will be useful for turning things off.
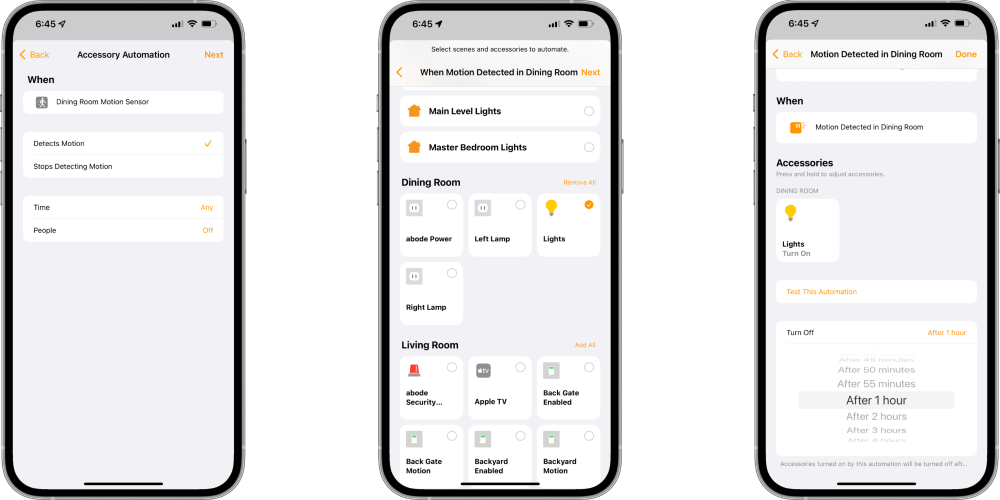
For my example here, I am going to choose Detects Motion; I then find my lights in that same room. I then get to tell HomeKit what I want to happen when motion is detected. The way I am configuring it is that I want these lights to turn on when motion is detecting, but then turn them off after one hour. The end result is that the lights will come on when someone walks into this room. When motion is no longer detected after one hour, they’ll go back off.
This automation will be beneficial in places in your home where lights are frequently left on, but no one is using for long periods. You’ll never want into an empty room with lights burning energy for no reason once this automation is implemented.
Wrap up
HomeKit motion sensors are incredibly beneficial for automating things around your home. For example, you can use them to trigger lights, trigger music, or set the temperature to a certain pace. Thankfully, products like the Onvis Motion Sensor and the Eve Motion Sensor are low-cost enough to put one in almost every room of your home.
FTC: We use income earning auto affiliate links. More.


Comments