Homebridge is an open-source platform that allows you to control and automate your home using Apple’s HomeKit technology, even if the devices don’t support it natively. While it can be run on countless devices for free, there are times when you want a plug-and-play solution that’s low-powered and can be tucked out of the way. This problem is exactly what the IONEXX XOME Homebridge for HomeKit aims to solve.
HomeKit Weekly is a series focused on smart home accessories, automation tips and tricks, and everything to do with Apple’s smart home framework.
Before you immediately head to the comments and point out that Homebridge is free and you don’t need to buy anything, yes, that is correct. This solution is aimed at people who either don’t have an old computer they want to run Homebridge on or want a turnkey appliance to manage Homebridge.
How is XOME different from HOOBS?
HOOBS is a product I’ve covered in the past, and it’s absolutely fantastic. XOME and HOOBS differ in that XOME is a plain-vanilla running of Homebridge where HOOBS is building on top of Homebridge. Both products will get you to the same result where you can run non-HomeKit devices in HomeKit, but the path they take is slightly different. They’re both good products that I recommend. XOME is Wi-Fi only, and HOOBS includes an Ethernet port. I can see a situation where that might be your determining factor outside of price. HOOBS retails at $249.99, while XOME is under $150. HOOBS offers some nice features, but if budget is your determining factor, then XOME is a great product.
Installation process
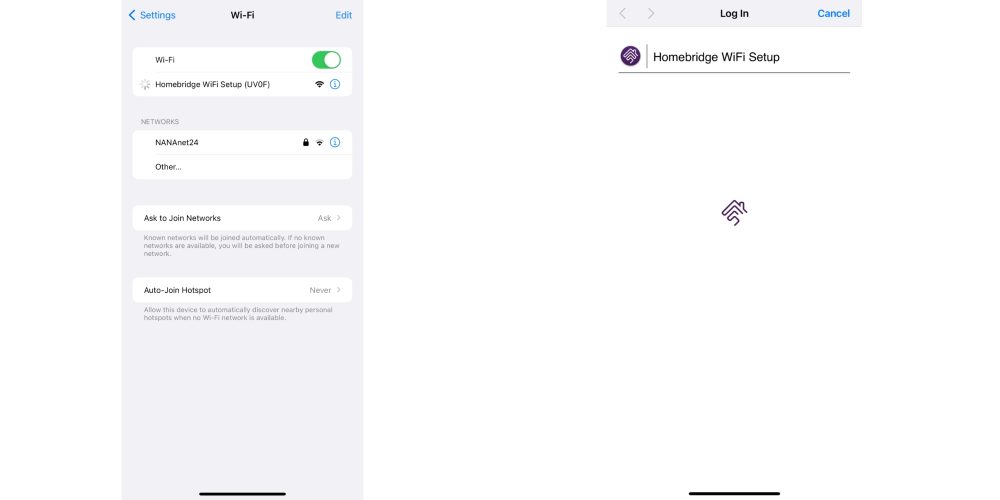
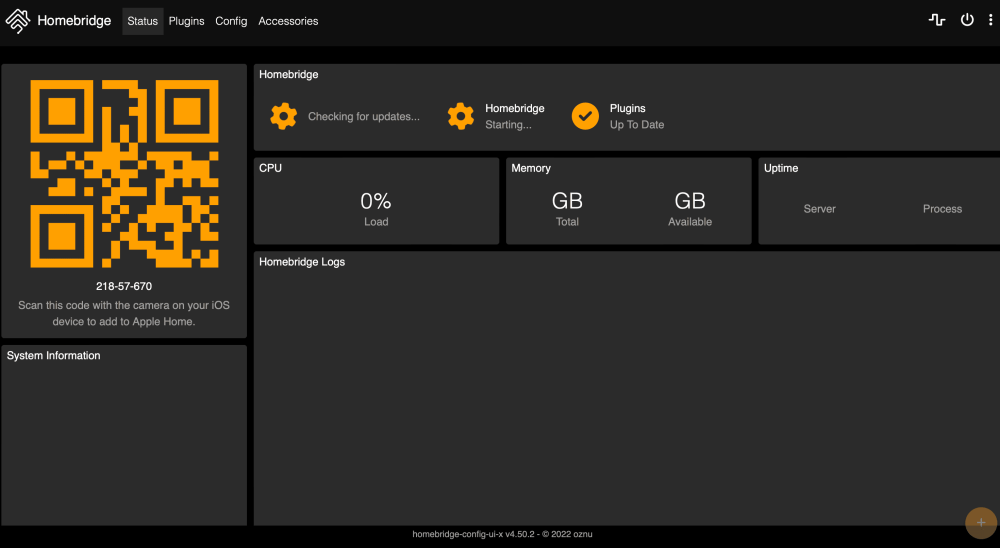
To set up XOME, plug it in within 20 feet of a Wi-Fi access point and away from any devices that may cause electromagnetic or wireless interference. Wait a few minutes, then connect to the HOMEBRIDGE WIFI SETUP network using a Mac, iPad, or iPhone in the same room as XOME. My iPhone immediately brought me to the setup screen, where I was able to connect it to my home Wi-Fi network. After it was connected, I went to Homebridge.local on my local network, and the setup began. XOME’s instructions mention a default username/password of admin/admin, but I was able to set up a new user without following this step. To add XOME to HomeKit, open the Apple Home app, choose “Add Accessory,” select “More Options,” and choose “Accessory not shown.” Enter the code that can be found in the Homebridge interface at Homebridge.local or the IP address. Once everything is connected, you can go back to the Homebridge interface and start adding plug-ins. Popular Homebridge plug-ins in Ring, UniFi, MyQ, and Nest.
Overall, it’s a simple device with a single purpose. It works exactly like you’d expect. Yes, you can easily build your own version of this, but it’s design for people who don’t want to deal with figuring out what to buy and how to configure it. It’s a plug and play option for Homebridge.
Wrap up
I hope that, over time, Matter makes the need for Homebridge less common, but I think we’re a few years away from that. Even once Matter becomes the standard for all new products, there will be plenty of existing products that can take advantage of Homebridge in order to connect to HomeKit. XOME for HomeKit is a low-cost Homebridge-in-a-box solution that is an easy way to have Homebridge running without needing a full-size computer running 24/7. It. can be purchased from Amazon or eBay.
FTC: We use income earning auto affiliate links. More.


Comments