If you’re ready to sell, trade in, or give away your Mac or wipe it for another reason, there are different steps to the process depending on what Mac you have and what version of macOS you’re on. Notably, recent macOS releases include a handy modern erase option like iOS. Read on for how to reset MacBooks and Mac desktops.
Before you reset your Mac, make sure that you have a fresh backup.
In case you’re running macOS Big Sur or earlier, you’ll want to sign out of iCloud, iMessage, and FaceTime. It doesn’t hurt to sign out of any other accounts under System Preferences → Internet Accounts, too. You may want to unpair any Bluetooth devices as well.
If you’re on a recent version of macOS, you won’t need to worry about those steps. Let’s dig into how to reset Macs in macOS Sonoma, Ventura, Monterey, Big Sur, and earlier.
Table of contents
How to reset MacBooks and Mac desktops
macOS Ventura and Sonoma: How to reset your Mac
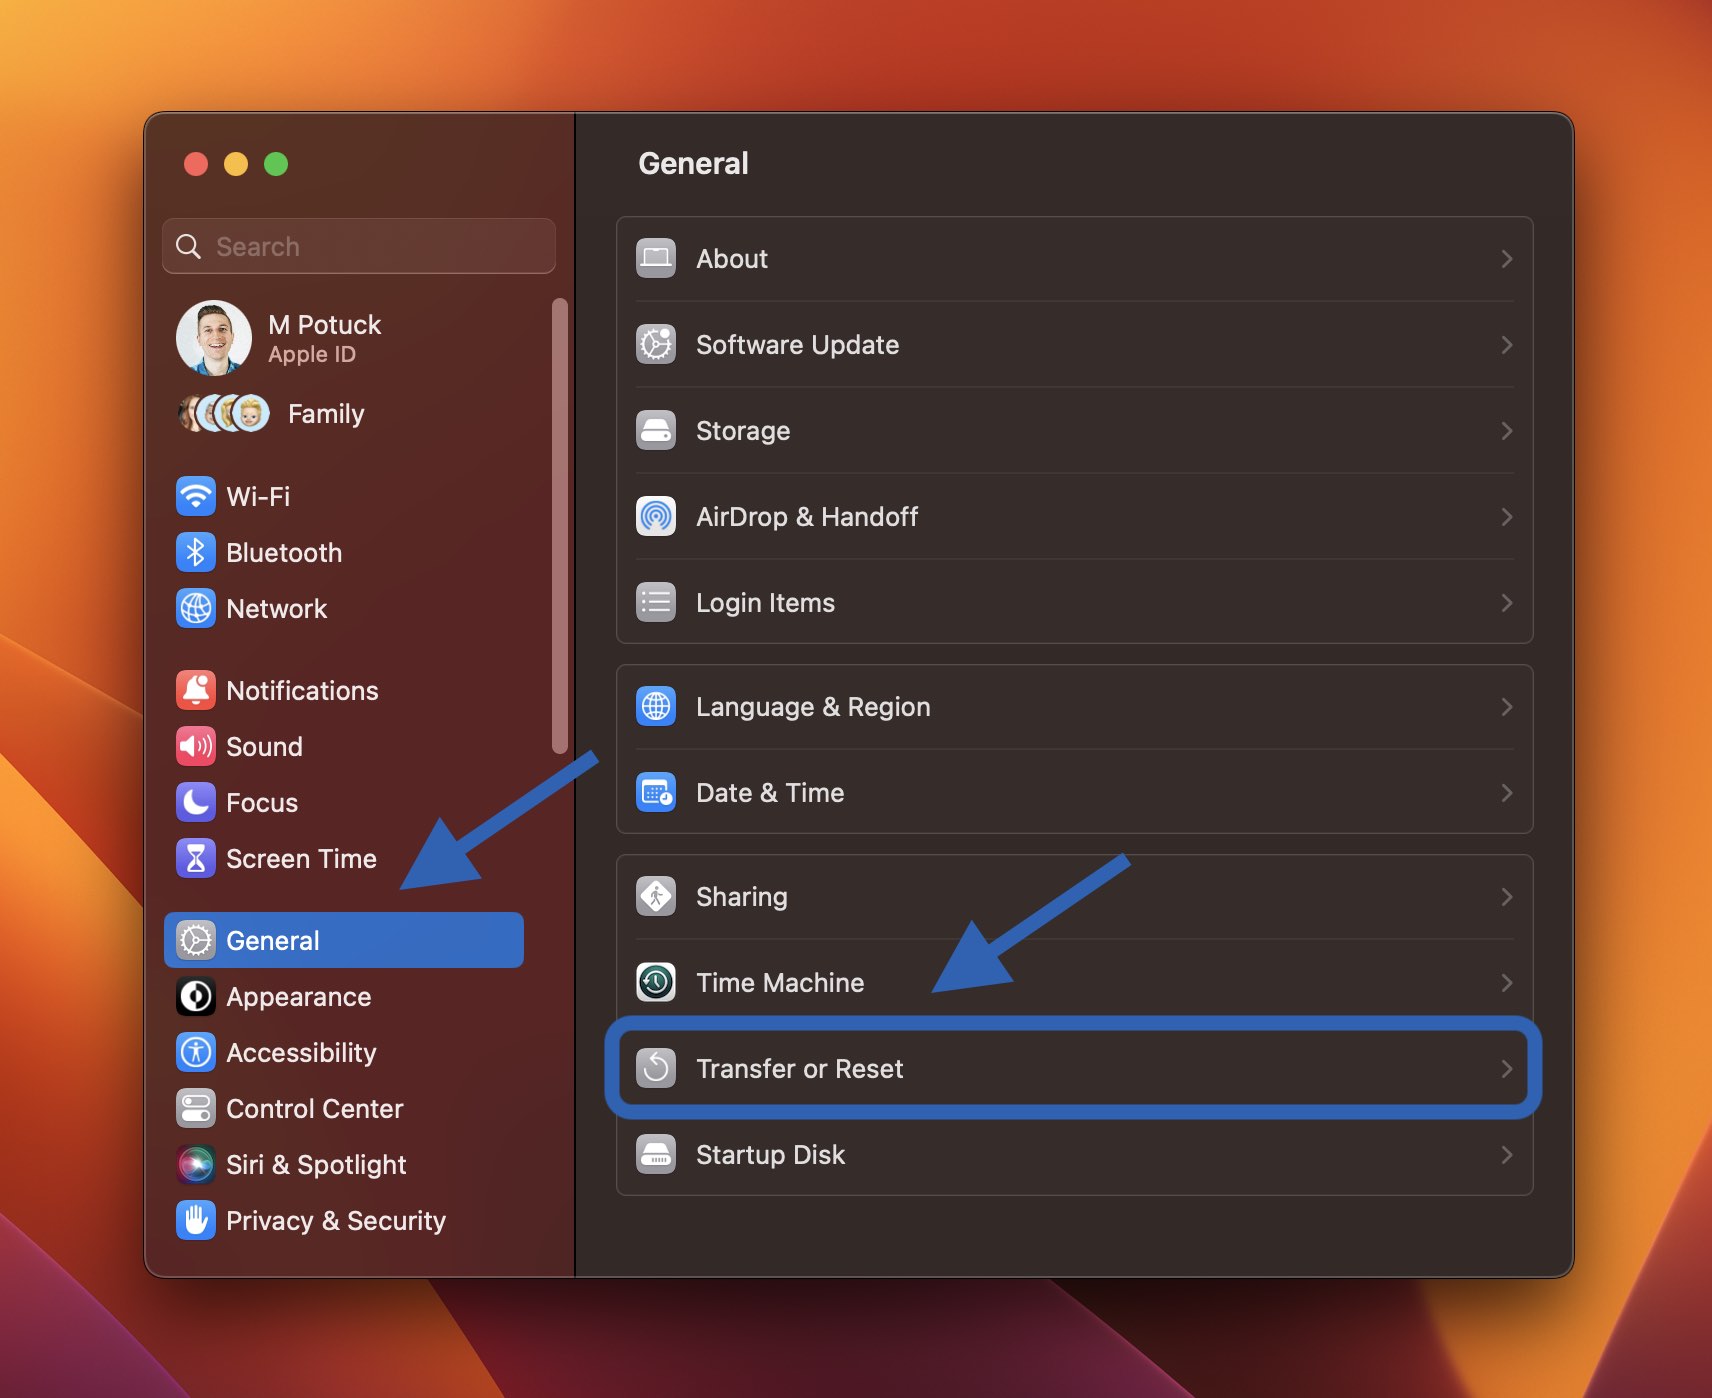
- Open the System Settings app on your Mac
- Choose General from the left sidebar
- Now click Transfer or Reset > Erase All Contents and Settings
- Enter your password if required, then follow the steps to reset your Mac
Shortcut: You can also search your Mac for “erase” with Spotlight search (magnifying glass in top right corner or use keyboard shortcut cmd + spacebar)
macOS Monterey: How to reset your Mac
macOS Monterey offers a new Erase Assistant for 2018 and later Macs. If you haven’t upgraded already, it’s easiest to factory reset a Mac that’s running Monterey.
- Make a fresh backup of your Mac
- Open System Preferences
- Click System Preferences in the menu bar > Erase All Contents and Settings
- Follow the prompts to fully erase your Mac
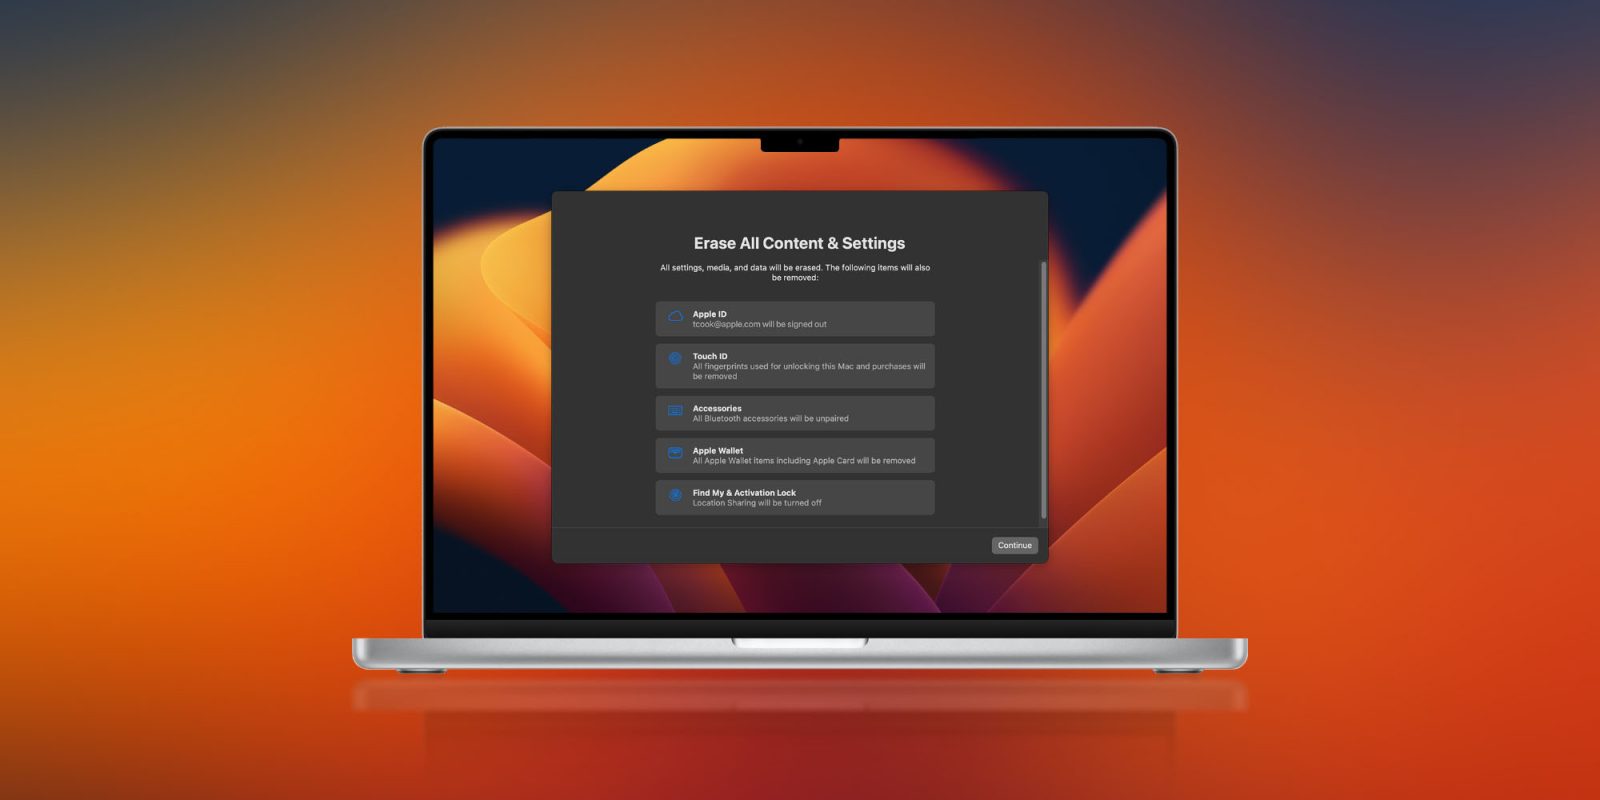
- Like iOS, the new erase process in macOS Monterey handles everything to fully wipe your Mac
- The currently installed macOS version will remain
Here’s how the process looks:

You can read more about the new Erase Assistant in macOS Monterey in Apple’s support document here.
Note: If your Apple Silicon MacBook won’t start up properly, you may need to restore or revive it.
Reset MacBooks and Mac desktops on macOS Big Sur or earlier
- Make a fresh backup of your Mac
- Sign out of iCloud (System Preferences > Apple ID > Overview > Sign Out)
- Sign out of iMessage and FaceTime (in Preferences for each app)
- Reset NVRAM (see below for details on steps 4-7)
- Boot into macOS Recovery
- Erase your startup disk
- Reinstall a fresh copy of macOS
Reset NVRAM
Apple notes in a support document that resetting the NVRAM is important to do for Intel Macs without the Apple T2 Security Chip as it wipes out user settings and restores security defaults. Here’s how to do it:
Shut down your Mac, then turn it on and immediately press and hold these four keys together: Option, Command, P, and R. Release the keys after about 20 seconds.
Boot into macOS Recovery
On Apple Silicon Macs
- Power down your Mac if it’s on
- Press and hold the power button to turn it on and continue to hold it until you see the startup options
- Choose macOS Recovery
- Select Reinstall macOS
- Follow the prompts
On Intel Macs
For Intel Macs, macOS Recovery will install a different version of macOS depending on the key combination you use when starting up your Mac (no installation discs or macOS loaded onto an external drive is needed). Hold down one of the following key combinations right after powering on your Mac, and let go when you see the globe or Apple logo.
- ⌘R (Command R) = Reinstall the latest macOS that was installed on your Mac, without upgrading to a later version.
- ⌥⌘R (Option Command R) = Upgrade to the latest macOS that is compatible with your Mac
Apple notes on its support page, “if you’re selling or giving away a Mac that is using OS X El Capitan or earlier, use Option-Command-R to make sure that the installation isn’t associated with your Apple ID.” This also installs the latest available software.
Loading time for macOS Recovery will vary depending on your internet connection. When the process is complete, you’ll see the macOS Utilities window.
Erase your startup disk (hard drive/solid state drive)
- Click Disk Utility in the Utilities window, then click Continue.
- Select your startup disk in the sidebar of Disk Utility (click the top item like Apple SSD, not the volume name, Macintosh HD)
- Click Erase in the top area of the utility window
- Enter a name for the disk (Macintosh HD is the default on a new Mac), use Mac OS Extended (Journaled) for formatting, and GUID Partition Map for scheme or APFS, whatever is recommended by Disk Utility
- Click Erase (once complete, in the menu bar click Disk Utility → Quit Disk Utility to return to the macOS Utilities window)
Finish reset by reinstalling macOS
- Back on the main macOS Utilities window, click on Reinstall macOS
- Follow the prompts and select which disk you’d like to install macOS (if you have multiple drives)
- Plug in your power cable if you’re using a Mac notebook
- Click Install
- If you have an SSD you may see a 10-20 minute installation estimate, if you have an HDD likely longer
- When the installation is complete you’ll see the welcome screen with the region selector. If keeping your Mac, continue on with the setup process. If selling or giving your Mac to someone else, use the keyboard shortcut ⌘Q to quit the setup assistant and power your Mac down.
Thanks for reading our guide on how to reset MacBooks and Mac desktops!
Read more 9to5Mac tutorials:
- Mac System Settings in macOS Ventura: Tips, tricks, and requests for the overhauled design
- M3 MacBook Pro vs M2: What’s different?
- M3 iMac vs Intel iMac: Here are all the upgrades and a few downsides
- M3 Pro/Max vs M2 Pro/Max: In-depth comparison
FTC: We use income earning auto affiliate links. More.


Comments