I’ve joked that if I were “super-rich,” that I’d love to hire someone whose only job would be to hand me a large cup of coffee as soon as I walked out of my bedroom. HomeKit hasn’t let me do that, but it’s getting me close. Read on to learn how I automated my morning coffee based on when motion is detected by my bedroom door using HomeKit, HOOBS, and Switchbot. Read on to learn how to implement, what gear you’ll need, and how to configure in HomeKit.
HomeKit Weekly is a series focused on smart home accessories, automation tips and tricks, and everything to do with Apple’s smart home framework.
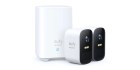
Switchbot products needed
To get started, we need to understand what we’re trying to do from a high level. The first thing is building a Switchbot set up in your home. Switchbot’s most unique product is the Button Pusher. For appliances that require a button press to turn on, a standard HomeKit outlet won’t accomplish the goal as turning the appliance on will not start the process. In my situation, my coffee maker doesn’t immediately begin brewing when it’s turned on, so I need a way to push the button from HomeKit.
Before you mention in the comments that my coffee maker likely has an automatic timer, yes, I am aware. However, I wanted to see if I could better integrate it into HomeKit based on when I got out of bed, not a particular time.
For the Switchbot side, you’ll need to purchase a Switchbot hub as well so the button pusher can be on your Wi-Fi instead of relying on Bluetooth alone. Once the products are unboxed, download the Switchbot app, and begin connecting them to your network. Then, inside the Button Pusher’s settings, put it in “Press mode.” I set my hold time at two seconds after a bit of testing.
Switchbot API key
You’ll need a few things from the Switchbot app to connect them to HomeKit, so let’s grab them here before moving on. First, go to Settings > Preferences > and tap on App Version 10 times until Developer Options appears. You’ll see your API token on that screen. You’ll need that later, so copy it into an Apple Note so you can access it from whatever device you’ll configure the heavier setup on.
You’ll also want to find the MAC address of the Switchbot button pusher. It’ll be found under Device Info under the device’s settings. Again, you’ll need it without the colons, so write it down in the same Apple Note you put the API key.
HOOBS setup with Switchbot

Once the Switchbot devices are up and running on your network, you’ll want to get it configured in HOOBS. I am writing this with the assumption that you’ve already configured HOOBS and connected it to HomeKit.
Inside the HOOBS dashboard, search for the Switchbot Plugin. The certified one is the one I am using, and I would reccomend it to you as well. Once it’s installed, you’ll paste in the API key in the appropriate field.
I then added a Press mode bot and input the BLE MAC Address. In full disclosure, I had a lot of difficulties figuring this section out. The documentation could be better explained, but I finally got it. Unfortunately, I also had a typo in my MAC address which took me a lot of time to figure out.
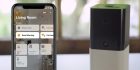
After inputting the MAC address into HOOBS, the Switchbot Button Pusher showed up in the Home app as a switch. Pressing it triggers the button push and immediately flips it back off. Before mounting it on my coffee maker using the 3M, I tinkered with the placement to make sure it would accurately turn the coffee maker on.
HomeKit automation
Now that I had the Switchbot Button Pusher working in HomeKit, the final step is creating the HomeKit automation. I have an ecobee remote sensor in my bedroom to help with heating and cooling exposed in HomeKit as a sensor.
Go to Automations in the Home app and look for the + button in the top right. Next, choose Add Automation > A Sensor Detects Something > Find your motion sensor > Choose the time of day > and then set your time range. The final step is to ensure the button is flipping on when the automation runs.
If you set it upright, when the motion sensor detects movement during the preset time, the Switchbot Button Pusher will start brewing your coffee. Reminder, you’ll need a Switchbot Hub and HOOBS to tie everything together.
FTC: We use income earning auto affiliate links. More.


Comments