Grabbing a screen recording is a handy feature in a variety of scenarios. Read on for how to screen record on iPhone and iPad including how to save the video to your device and stream screen recordings to third-party apps.
Native screen record on iPhone and iPad first arrived with iOS 11 but if you don’t use it regularly, it can be easy to forget about.
In addition to being able to record everything that’s on your screen as well as audio via your iPhone or iPad‘s microphone, you can also use the feature to stream to third-party software.
How to screen record on iPhone and iPad
- If you haven’t added it already, head to the Settings app > Control Center
- Swipe down and tap the green + icon next to Screen Recording
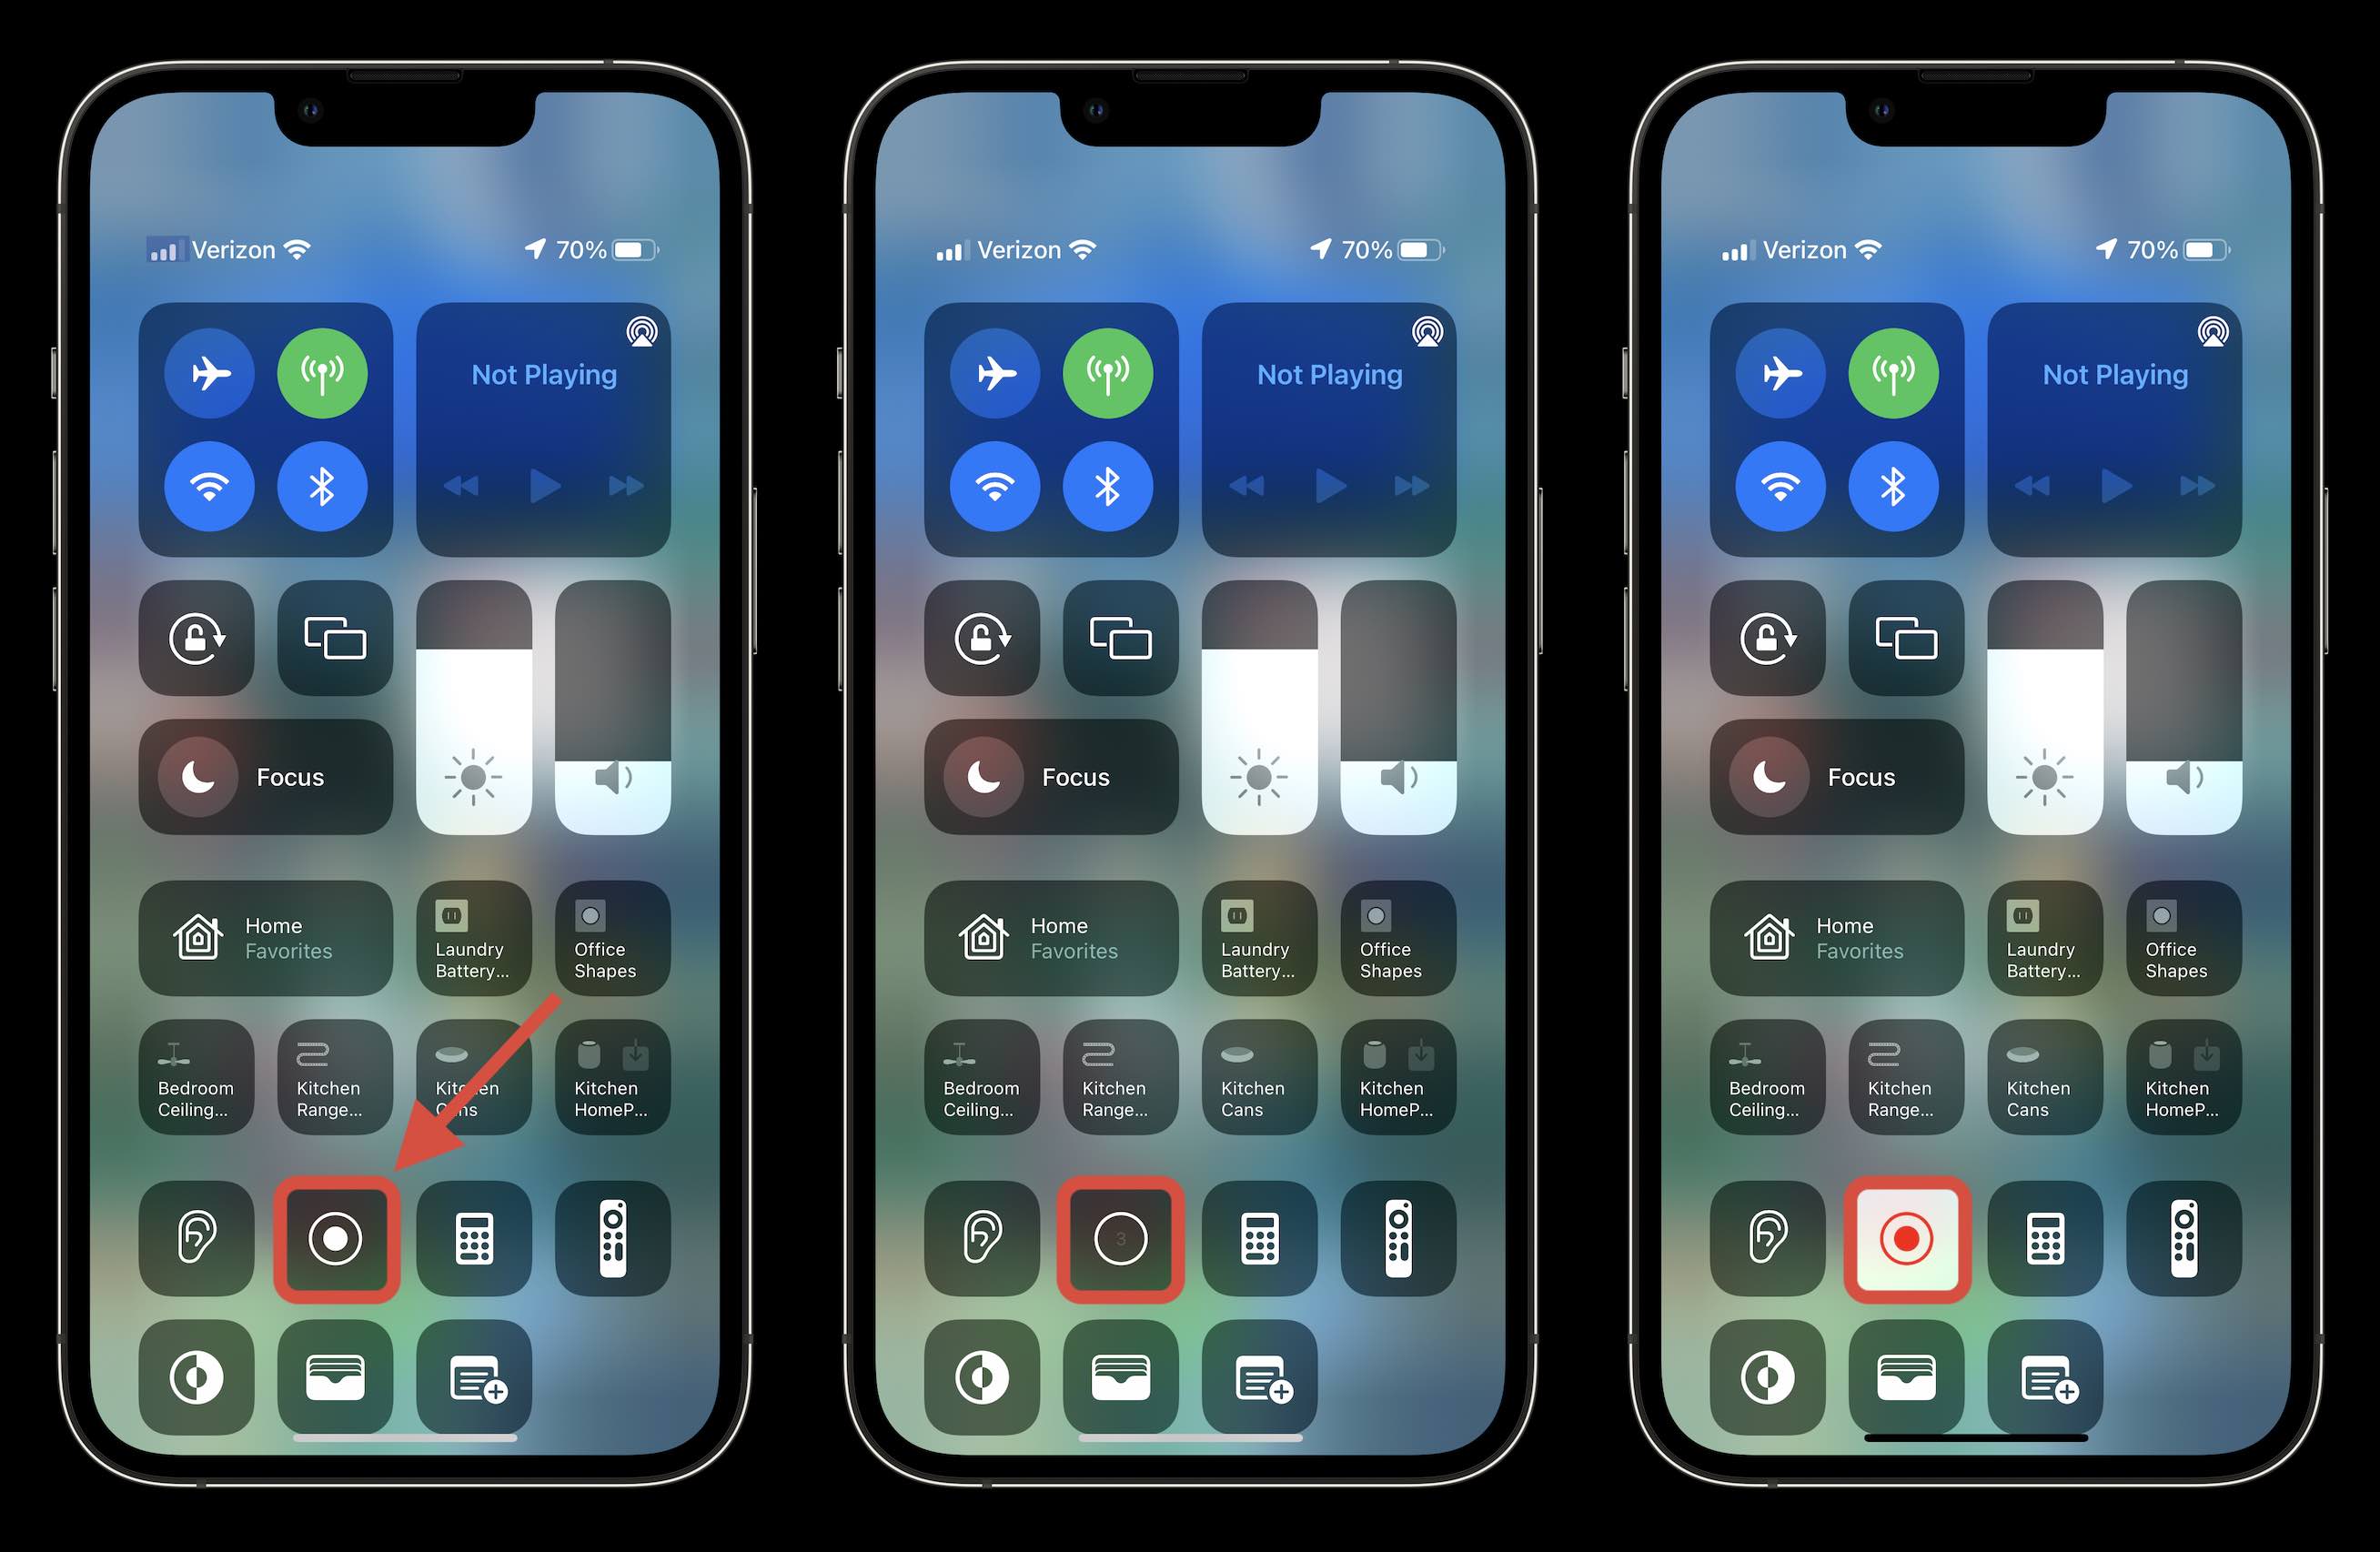
- Now open Control Center (swipe down from the top right corner on iPhones without a Home button, pull up from the bottom of your screen on iPhones with a Home button)
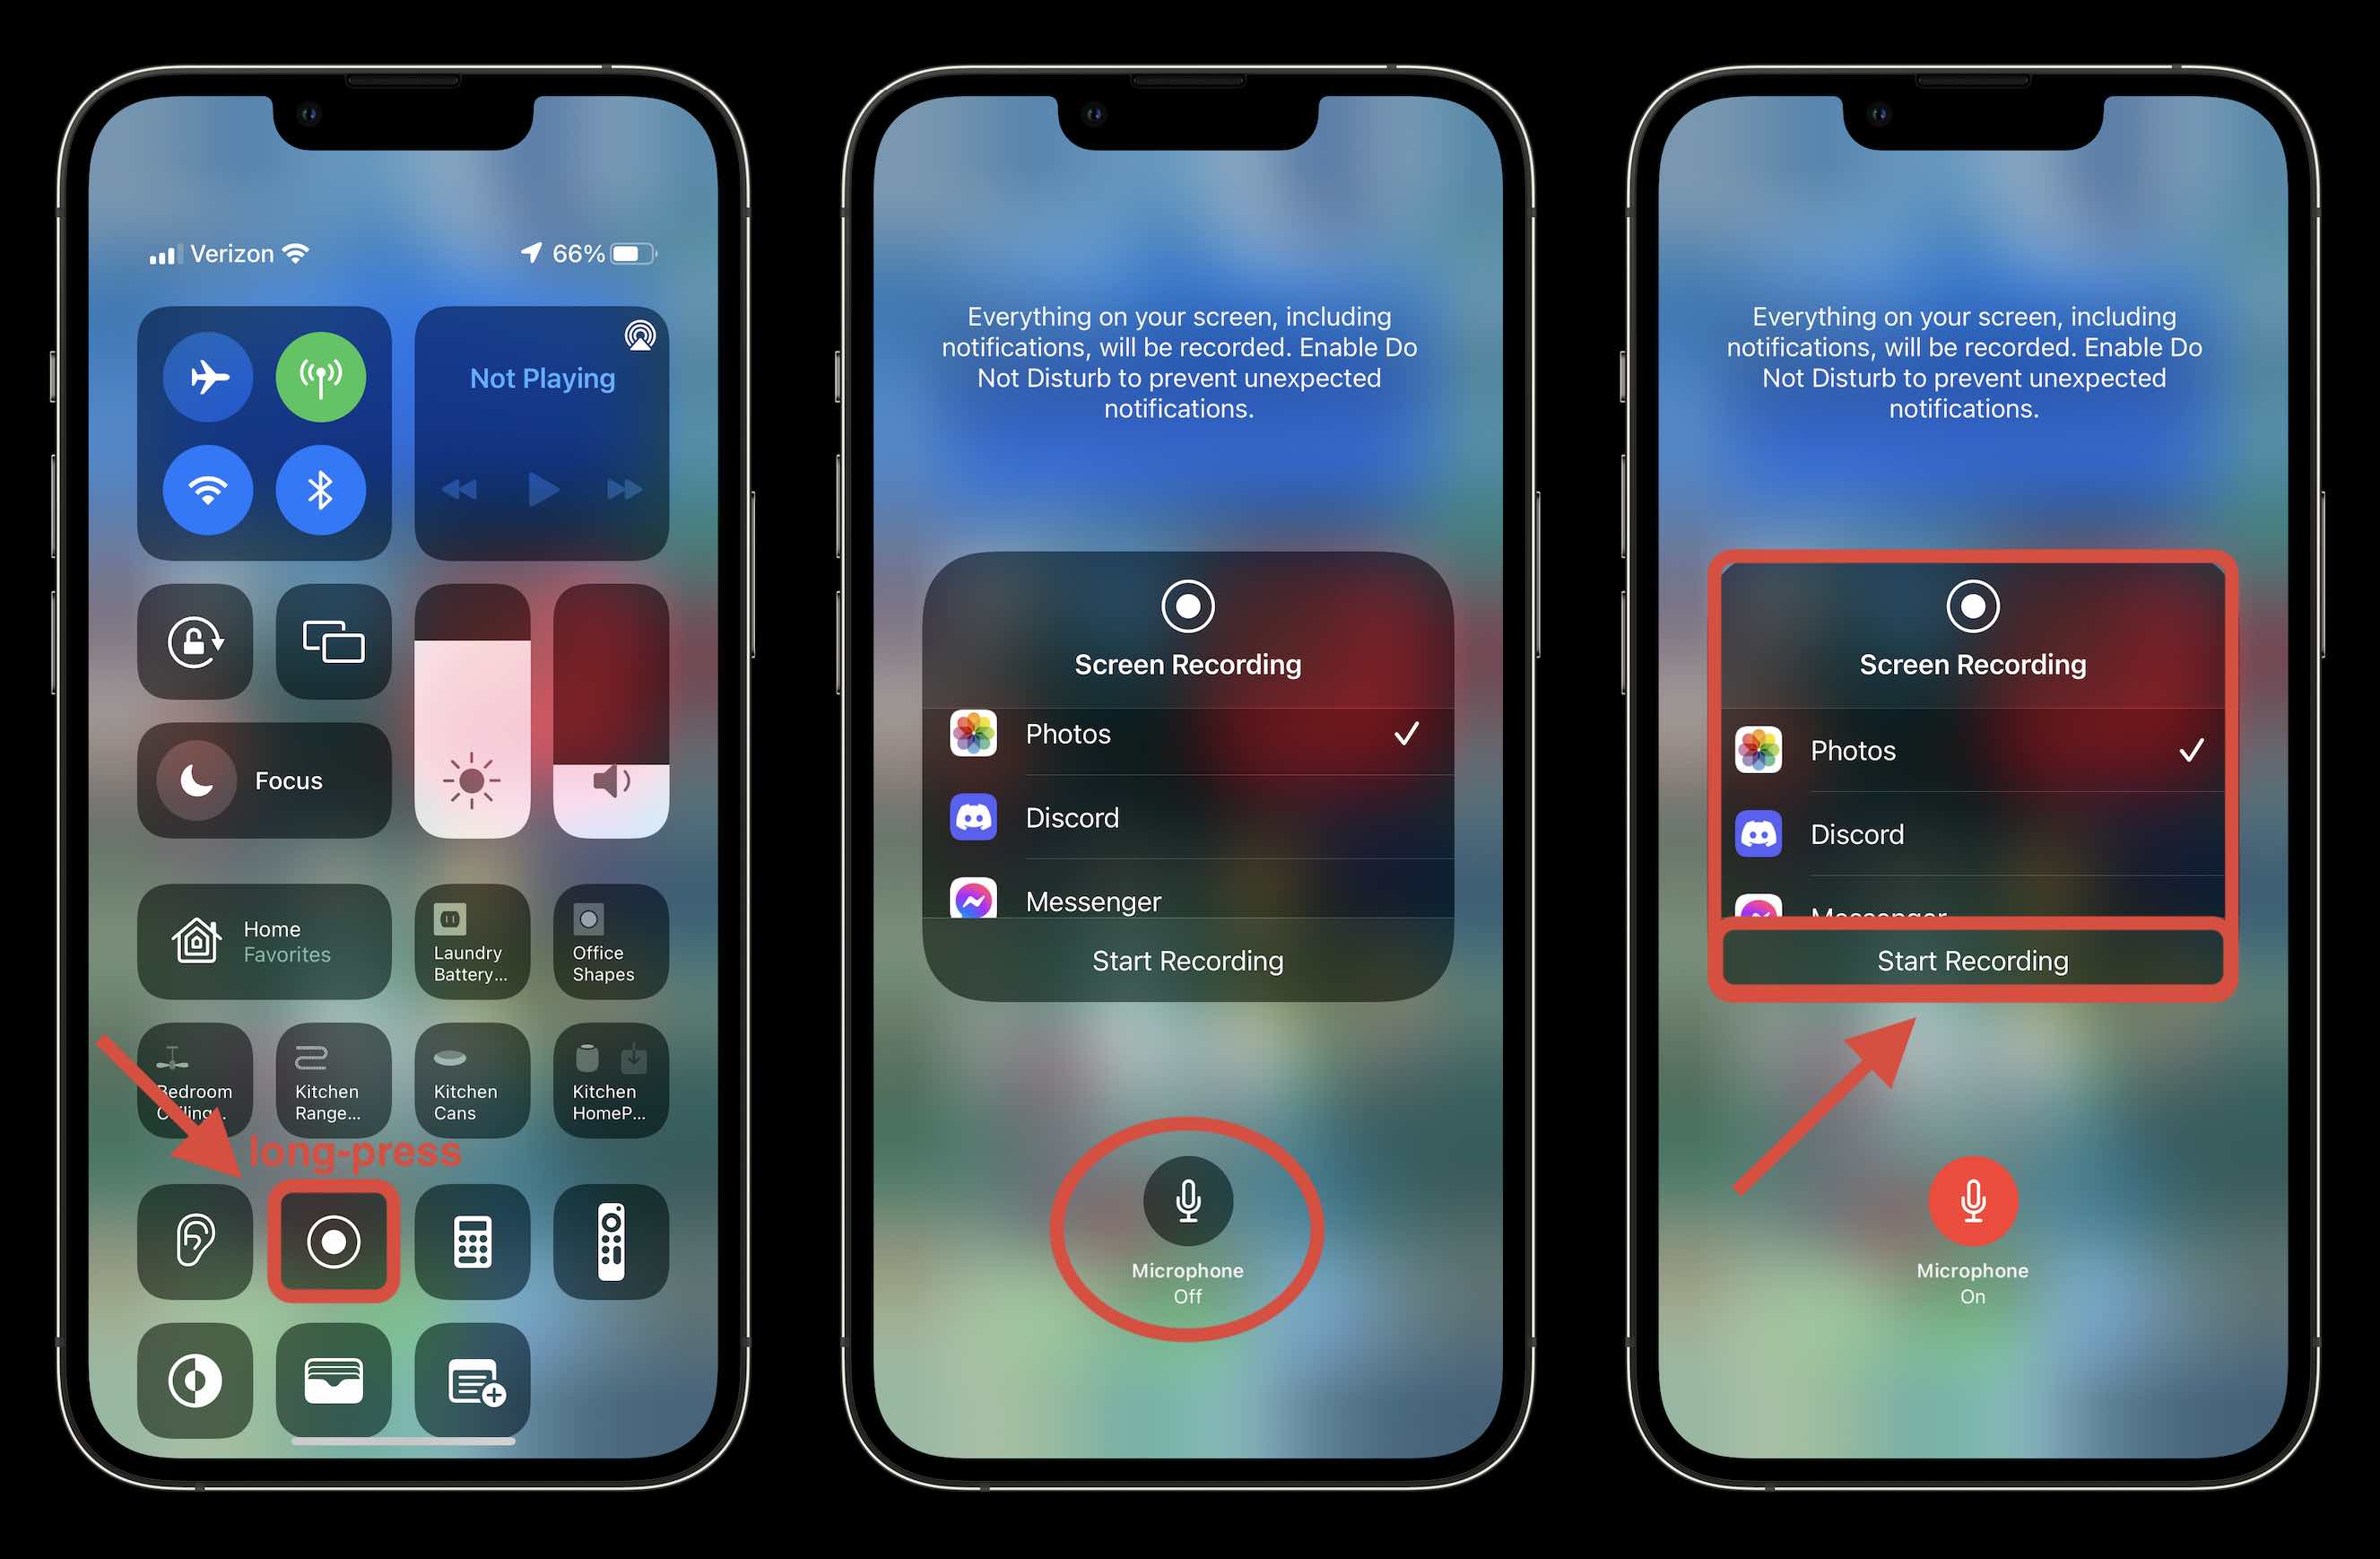
- Tap the screen recording icon (double circle) to immediately start a recording or long-press to turn the microphone on/off or use a third-party extension like streaming to TikTok, Zoom, and more
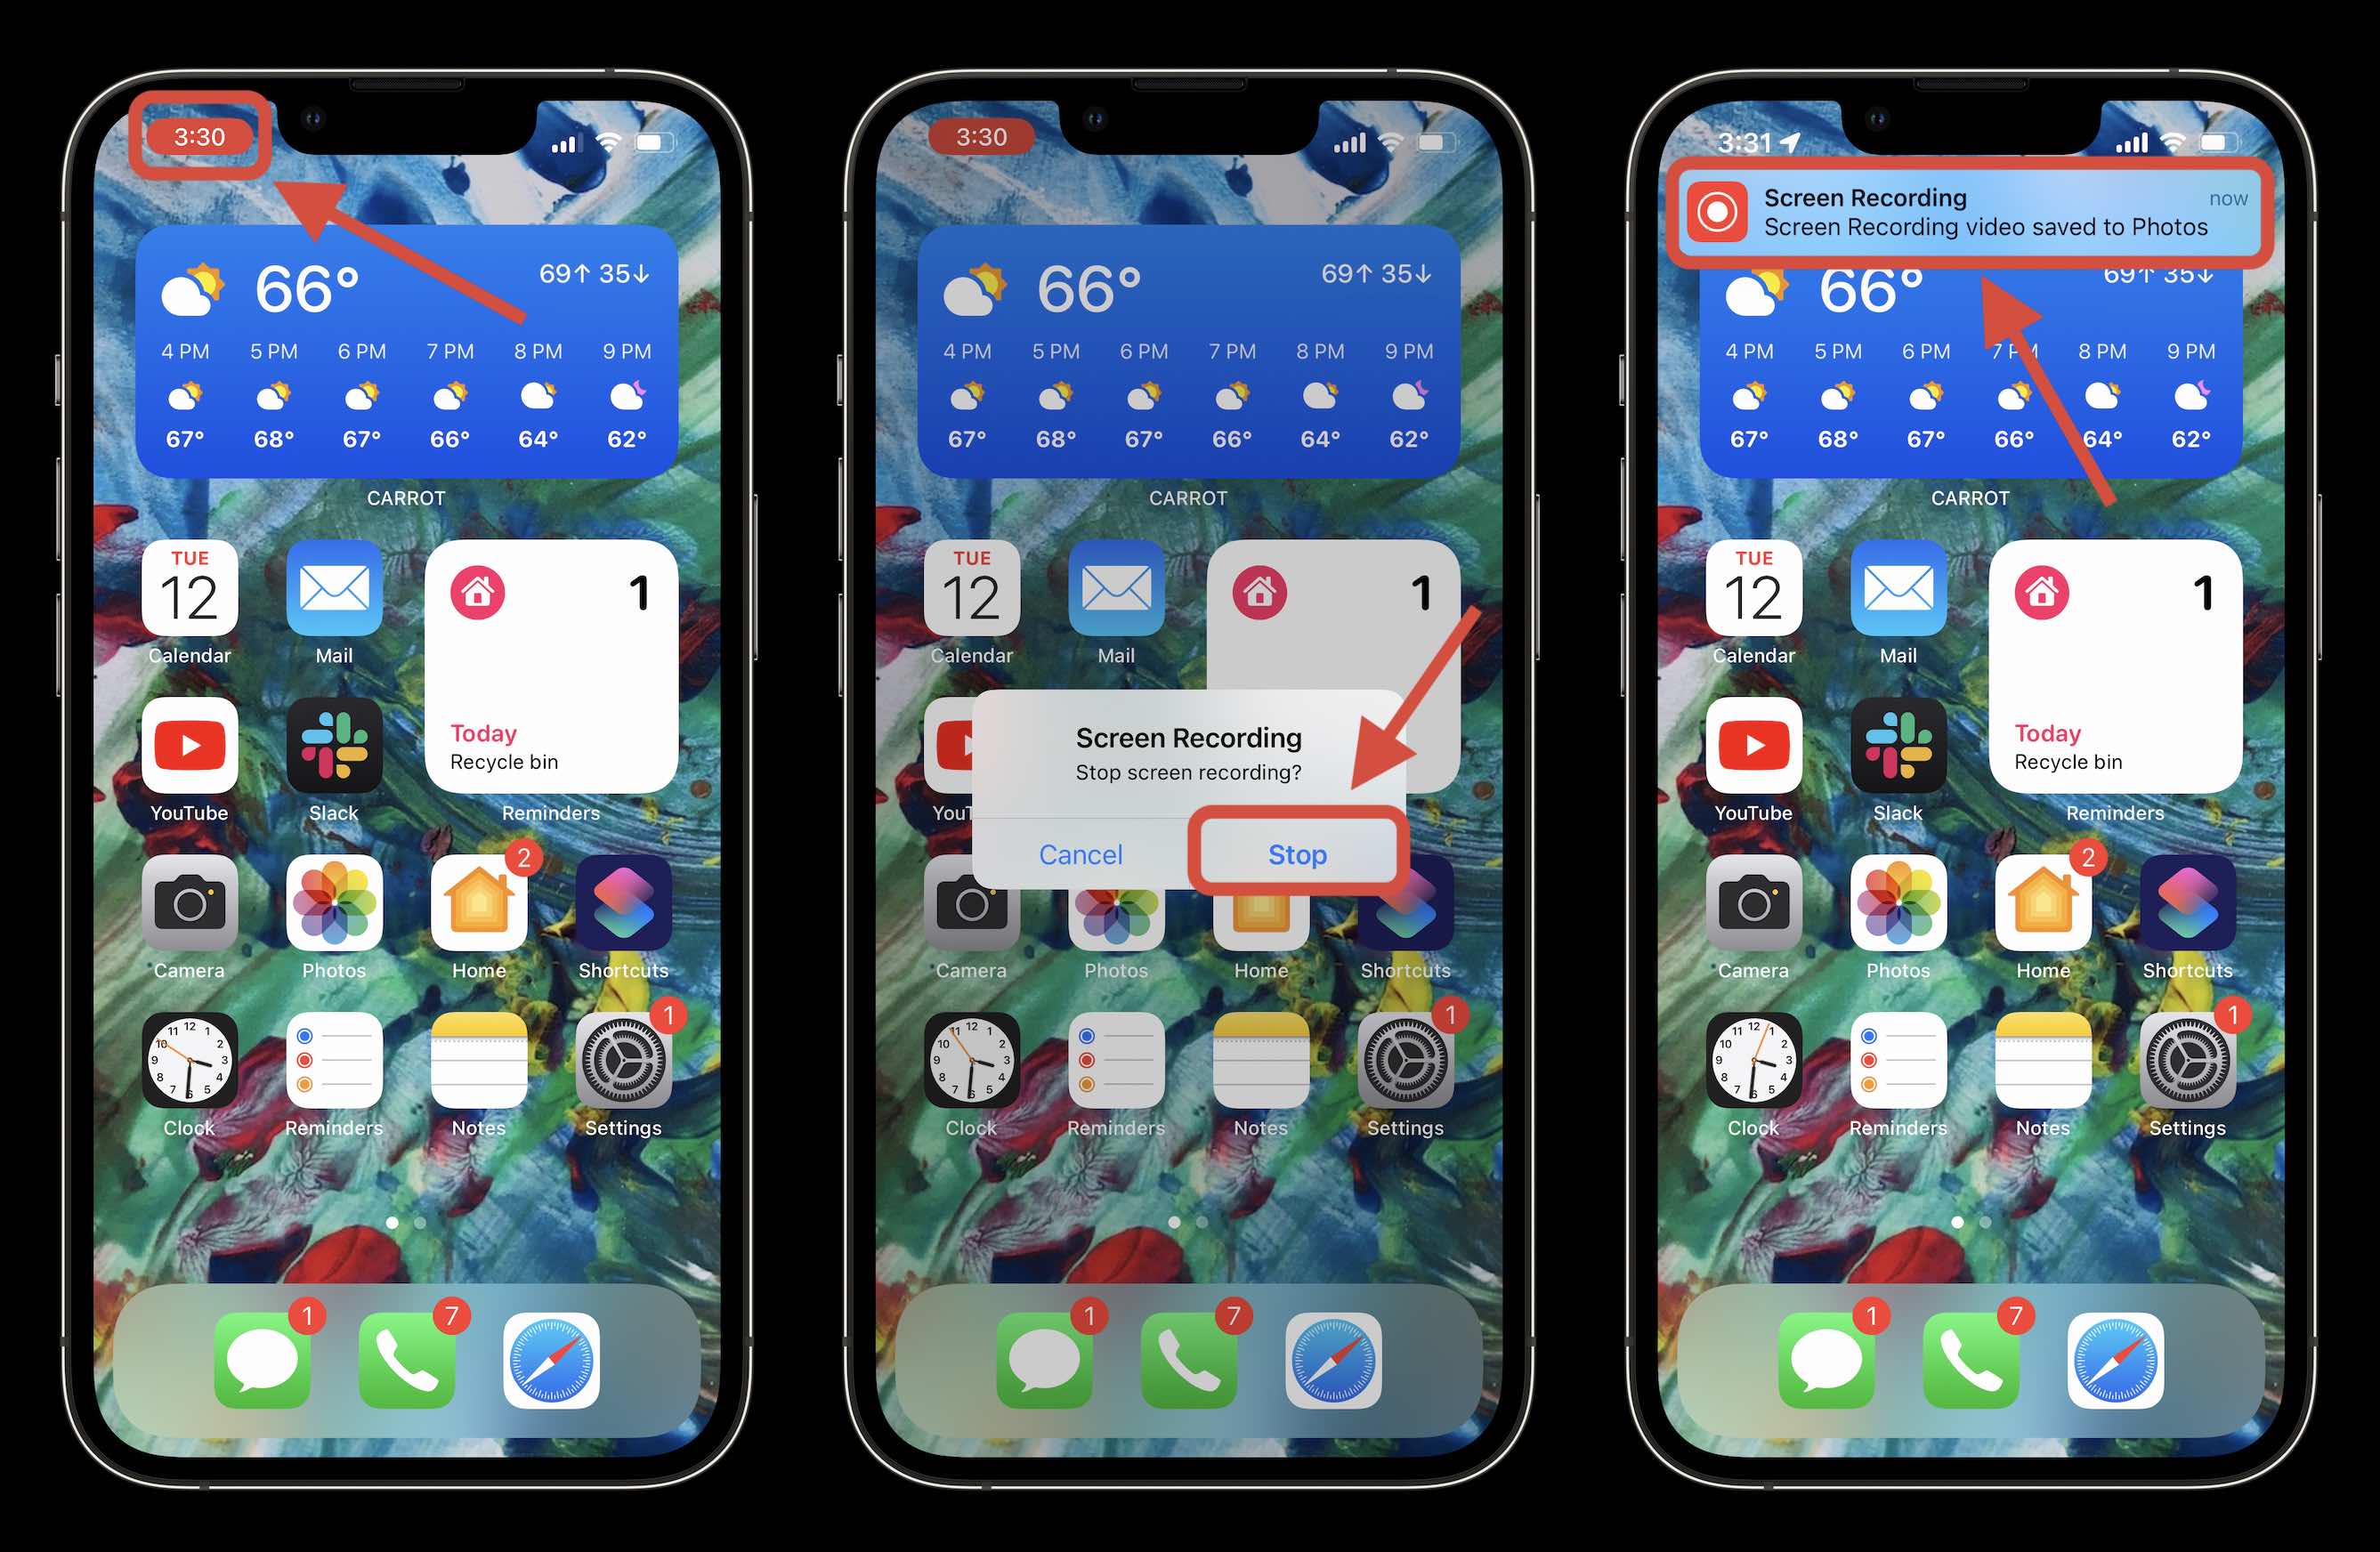
- You’ll see a red indicator when recording in the top corner of your screen, tap it to stop the recording
- If you left the default settings, you’ll find the recording saved in the Photos app
Apple notes that screen record on iPhone and mirroring don’t work at the same time.
Here’s how these steps look:
After you tap the button to start your screen recording, you’ll get a 3-second countdown before it begins. The icon will turn red and flash when the recording has started.

When you’re ready to stop and save your recording, look for the red pill-shaped icon in the top left of your iPhone screen on newer models or top right on iPad.

After tapping the icon in the status bar tap Stop to end and save it or you can use Cancel if you’d like to keep recording.
You can tap the banner alert to jump to the saved recording to view and share it as seen above.
Screen record on iPhone with audio and third-party apps
If you’d like to turn the microphone on/off while you screen record, use a long-press. This is how you’ll choose third-party integrations as well.

Read more 9to5Mac tutorials:
- iPhone: How to change your 5G settings for better battery life or faster speeds
- Best affordable iPhone plans for 2022
- Here’s how you will (and won’t) be able to use Apple digital IDs in the real world
- Best USB-C and Thunderbolt displays for Mac
FTC: We use income earning auto affiliate links. More.


Comments