Capturing a screen recording on your Mac is valuable for a variety of scenarios. There are handy third-party apps to help with this, but Apple offers a free built-in option with macOS. Follow along for several ways to screen record on Mac.
Table of contents
With modern macOS releases (Mojave and later), Macs have a hidden screen record app with more advanced controls like a timer, save to destination choices, show/hide the mouse pointer, remember last selection, microphone control, and more.
If you mostly do straightforward screen recording on Mac, the native functionality is free with no app to download.
However, if you need advanced features, we’ll cover third-party options below too.
Screen record on Mac: Basics to advanced
Built-in macOS tool
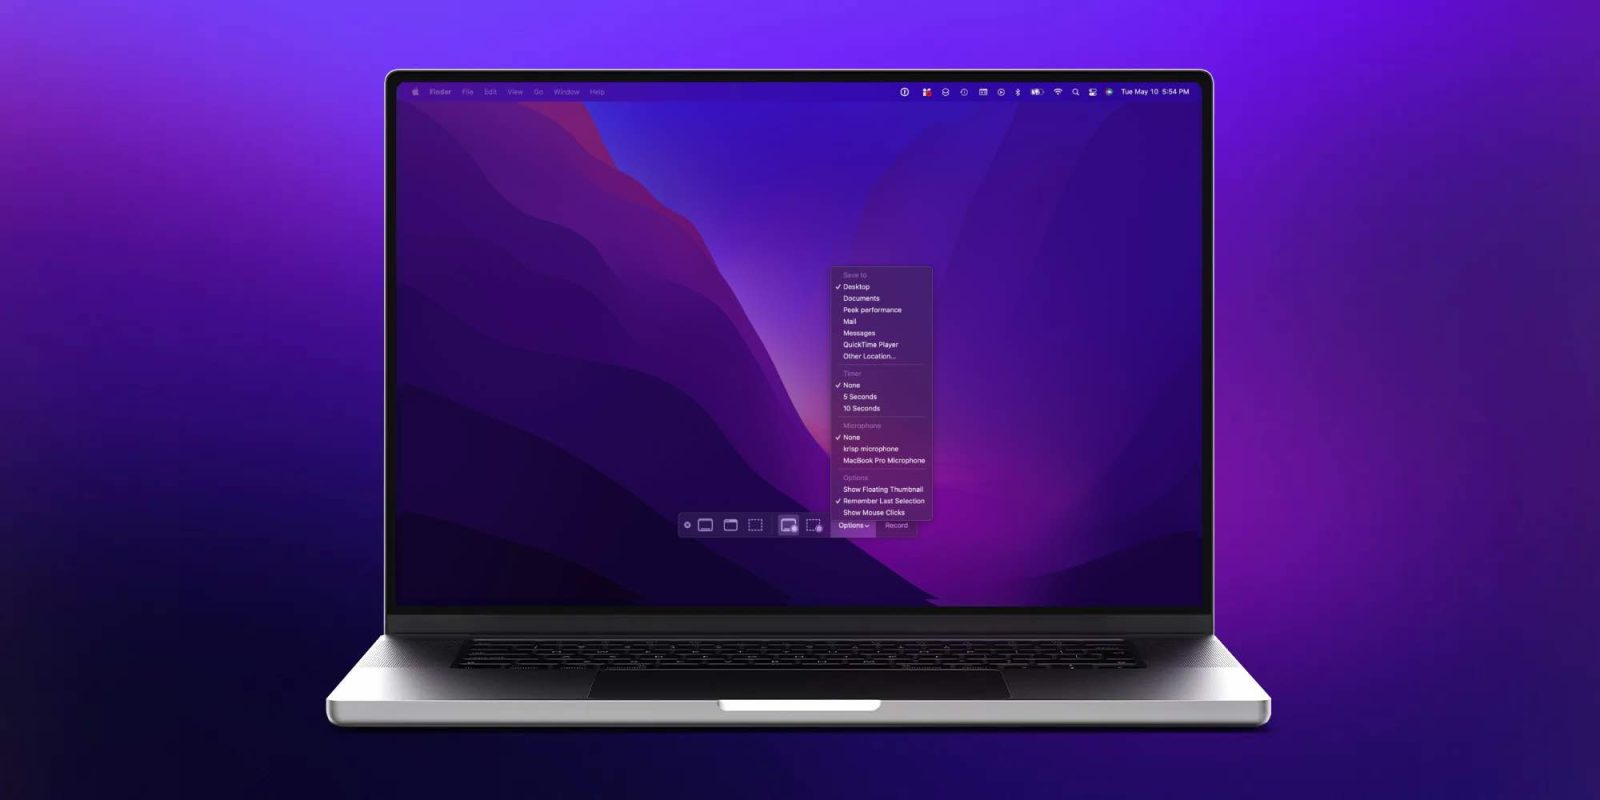
- On your Mac keyboard, press the combination command + shift + 5 (can be used while running any app)
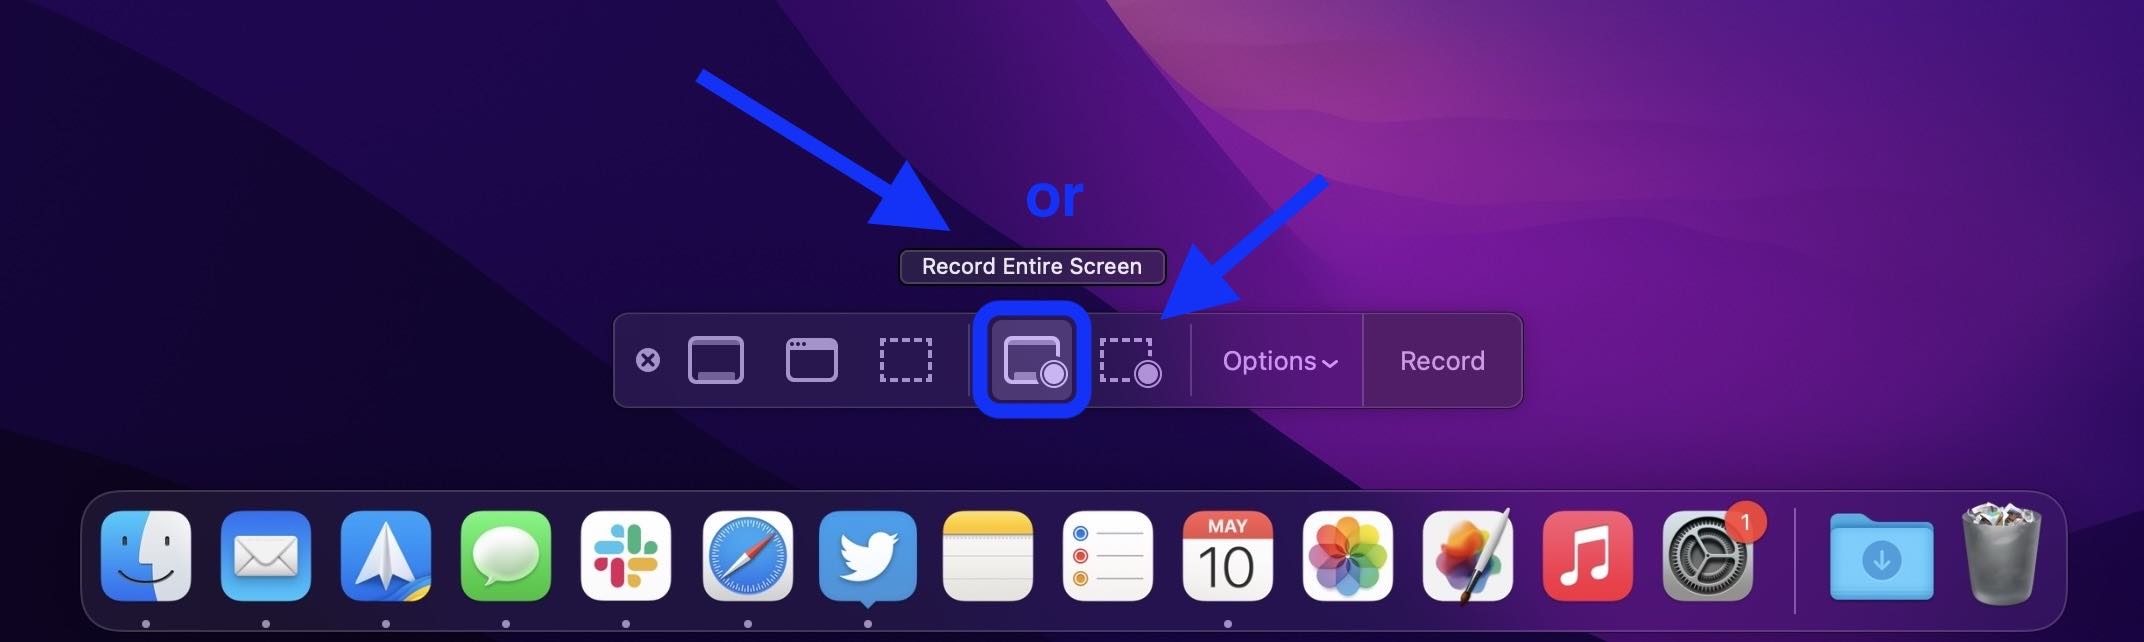
- In the bottom middle of the screen, choose the rectangle with a circle icon to record the whole screen or the dotted-line rectangle with a circle icon to record a selection of your screen
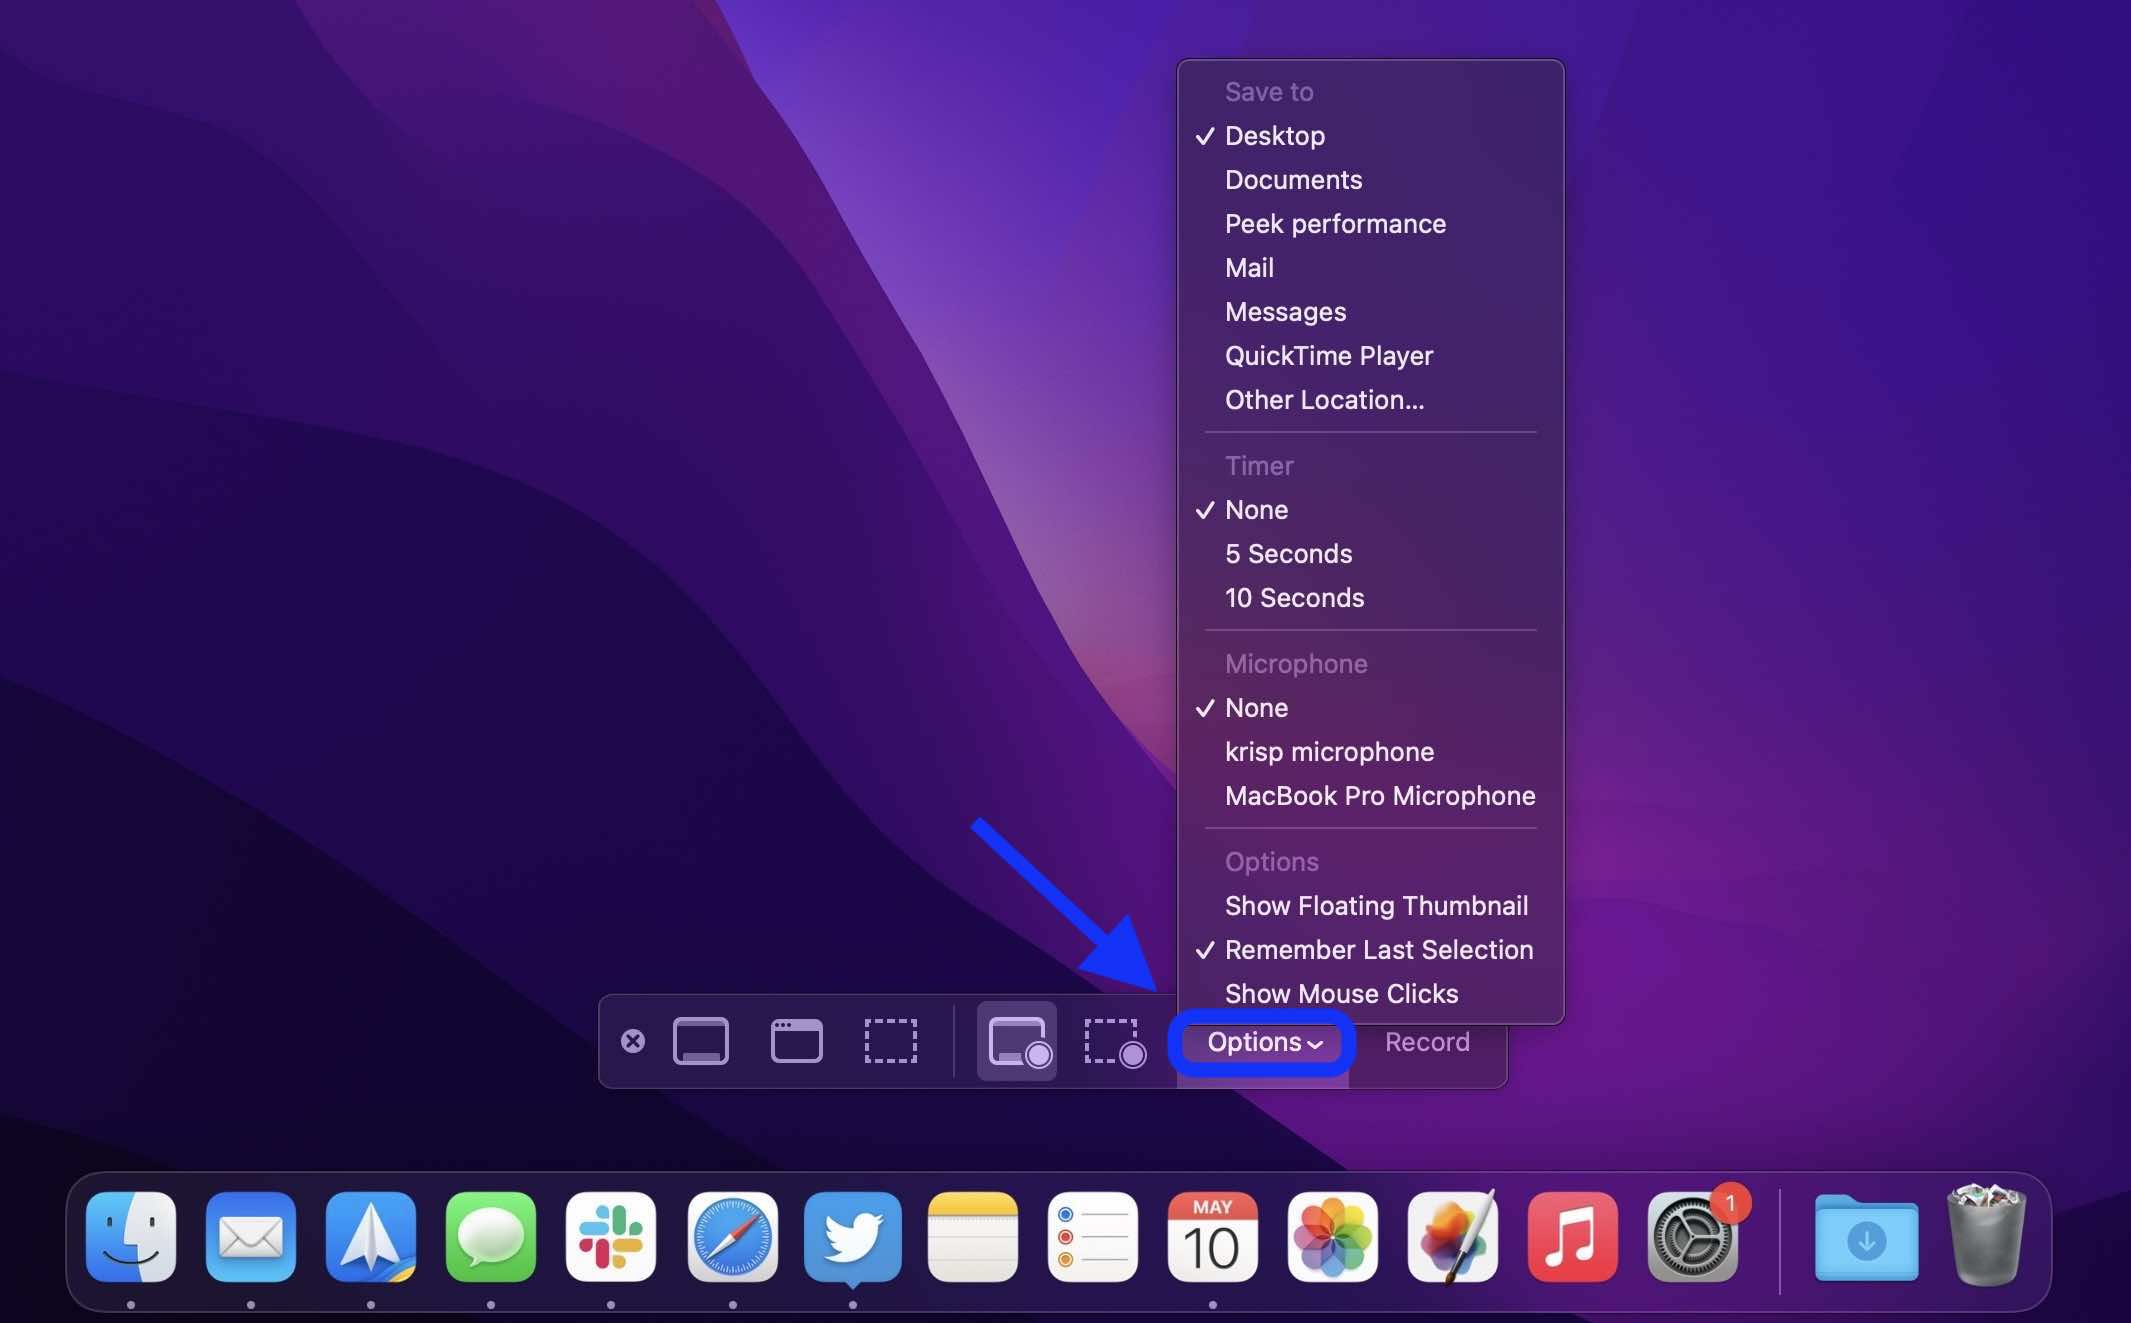
- Click the Options button if you’d like to enable the microphone, show mouse clicks, select a save location, and more
- Choose Record to start
- When you’re done, click the Stop button (circle with square icon) in the menu bar found in the top middle/right of your screen
- Your recording will show up on your Mac’s desktop by default unless you picked a different save location
You can also pull up this menu in QuickTime by clicking File > New Screen Recording but the keyboard shortcut is usually faster.
Here’s how all that looks on Mac:
From there you can either hit Record to start or click Options to customize your screen record settings.
If you have multiple displays in your setup you’ll get to choose which screen to record if you selected the full-screen option.
When you’re done, click the Stop button (circle with square icon) in the menu bar found in the top middle/right of your screen.

Look for your saved screen recording on your desktop or where you chose to save it when customizing
Screen record on Mac with third-party apps
If you need advanced screen record features, a favorite of the team here at 9to5Mac is CleanShot X.
Capabilities include:
- Annotations
- Quick access overlay
- Scrolling capture in addition to entire screen, selection, windows, more
- Freeze screen
- Robust screen recording
- Record as GIF
- Auto-enable Do Not Disturb
- Show/Hide cursor
- Hide clutter from your desktop when recording
- Capture Clicks
- Capture Keystrokes
- Upload screenshots and recordings and get a link to share with CleanShot Cloud
- Tags
- Team management features
- Custom domain and branding
CleanShot X is priced at $29 for 1 Mac as a one-time purchase that includes updates for a year (optional $19 annual subscription for future updates). Meanwhile, CleanShot Cloud Pro offers all the features including custom domain names and branding, self-destruct control, and more from $8/month per user when paid annually.
Two more popular third-party screen record apps for Mac worth checking out include:
- Snagit – free trial then $39/year or $63 lifetime
- Monosnap – free basic plan or $2.50 or $5/month for advanced and commercial plans
Read more 9to5Mac tutorials:
- Best USB-C and Thunderbolt displays for Mac
- Use iMac as monitor: How to create a Mac to Mac, PC to Mac, or iPad to Mac setup
- Tips and tricks to fix Bluetooth connection issues on Mac
- 30+ Mac tips for new setups that everyone should know [Video]
FTC: We use income earning auto affiliate links. More.


Comments