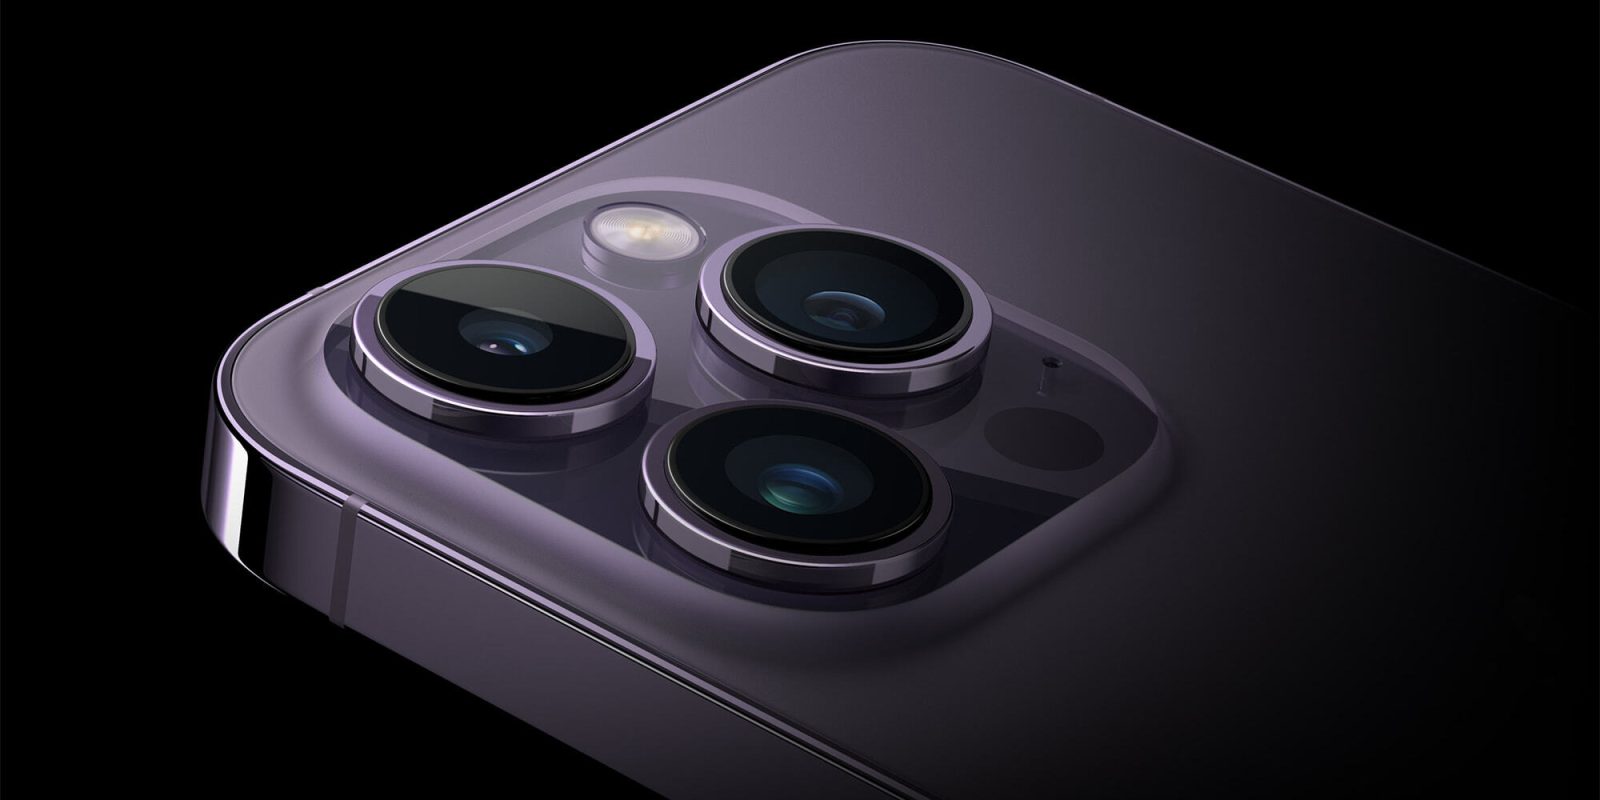
One of the biggest upgrades for the iPhone 14 Pro camera system is the main lens being increased to 48MP with what Apple calls an “advanced quad-pixel sensor.” However, the camera defaults to taking 12MP images. Read on for how to use the 48MP iPhone 14 Pro camera.
Shooting with the full 48MP resolution main camera on the iPhone 14 Pro isn’t something you’ll want to do all the time with a single image ranging from 75 to 100MB+ in size.
But when you want to capture the most amount of detail possible – allowing for impressive crops and edits – using the full power of the main iPhone 14 Pro camera is key.
Offering 8064 x 6048 pixels, that’s 4x the resolution of 12MP shots. And Apple says “with a new machine learning model designed specifically for the quad-pixel sensor, iPhone now shoots ProRAW at 48MP with an unprecedented level of detail, enabling new creative workflows for pro users.”
How to use 48MP iPhone 14 Pro camera
Note: 48MP image sizes range from 75-100MB+ each
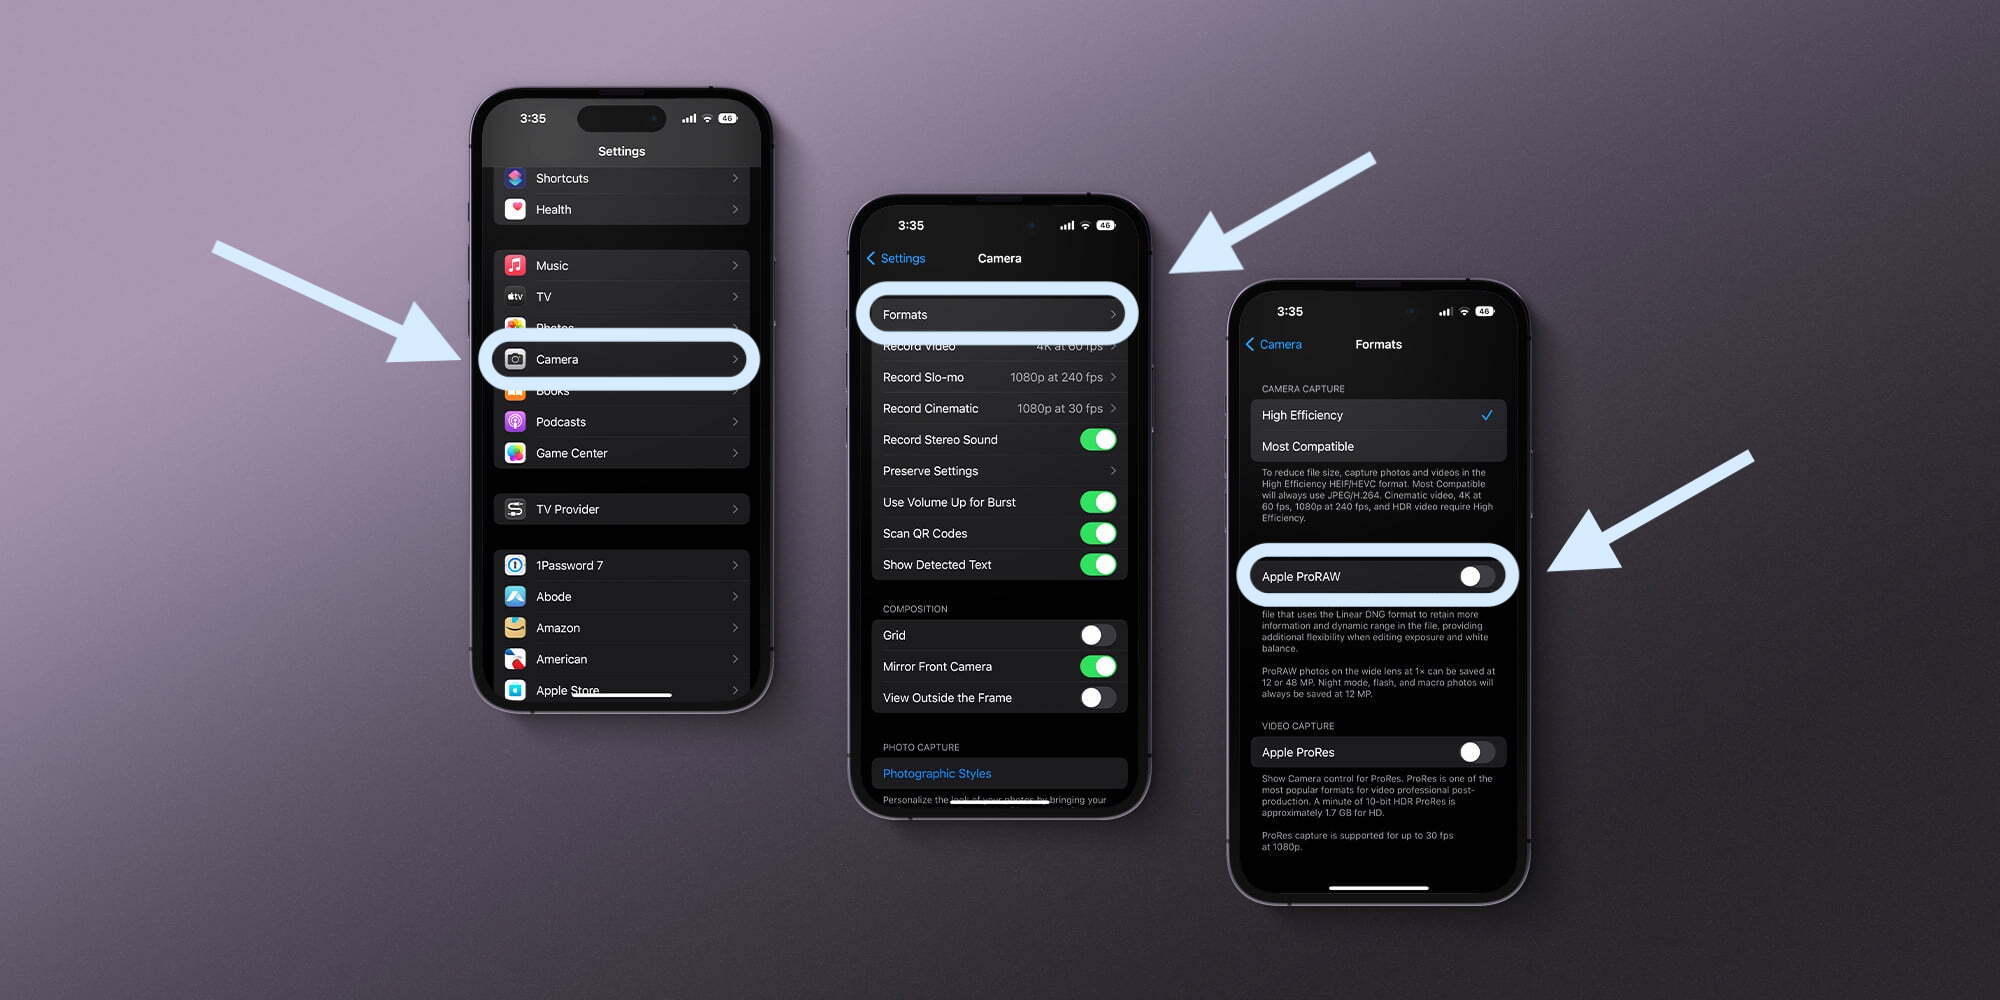
- If it’s not turned on already, enable Apple ProRAW
- Open the Settings app on your iPhone 14 Pro or Pro Max
- Swipe down and tap Camera
- Now choose Formats at the top
- Tap the toggle next to Apple ProRAW – the default resolution for Apple ProRAW should be 48MP
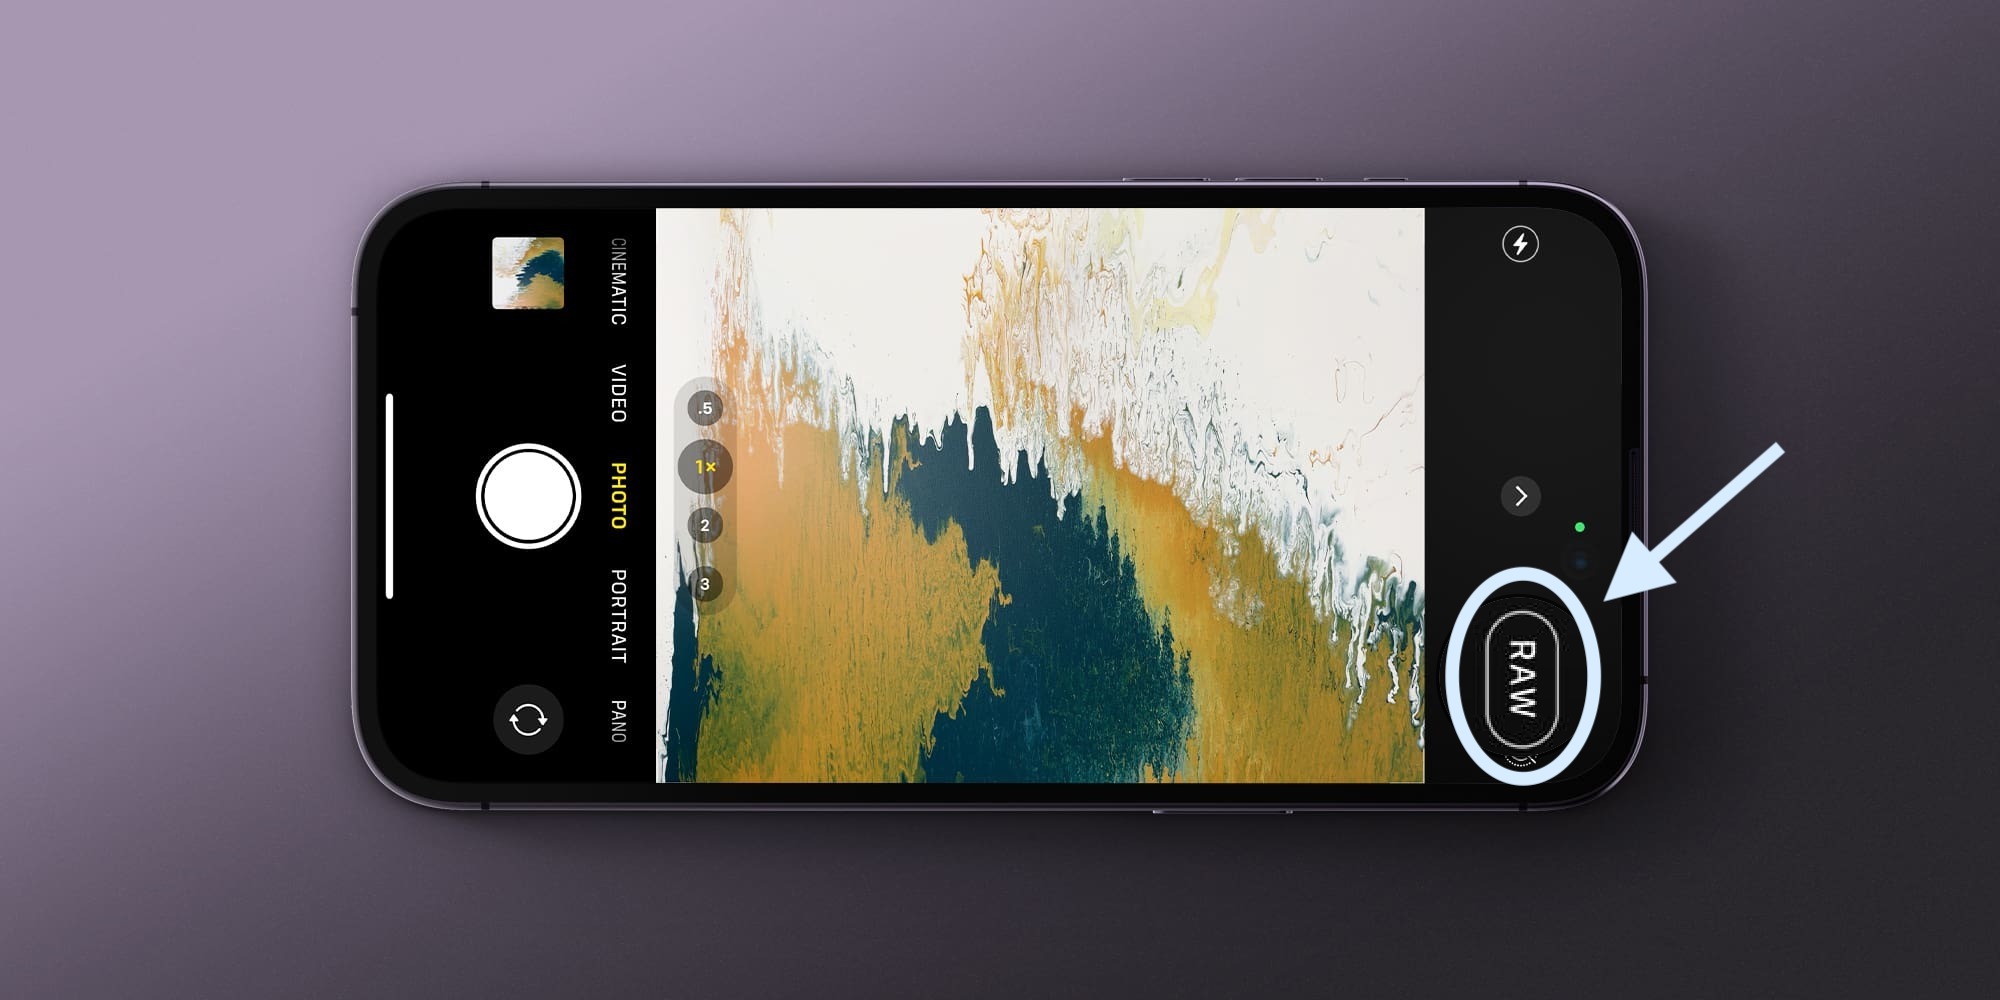
- Now open the Camera app, make sure RAW shows in the top right or bottom right corner and is not crossed out – fire away! Just remember to use the 1x focal length, changing that will switch you to 12MP shots even though they’ll still be RAW
- You can also use third-party apps like Halide or Camera+ to take full 48MP images
You can also choose to Preserve the ProRAW setting to on in the camera app instead of it resetting to available but off when you open the default camera – Settings > Camera > Preserve Settings > Apple ProRAW.
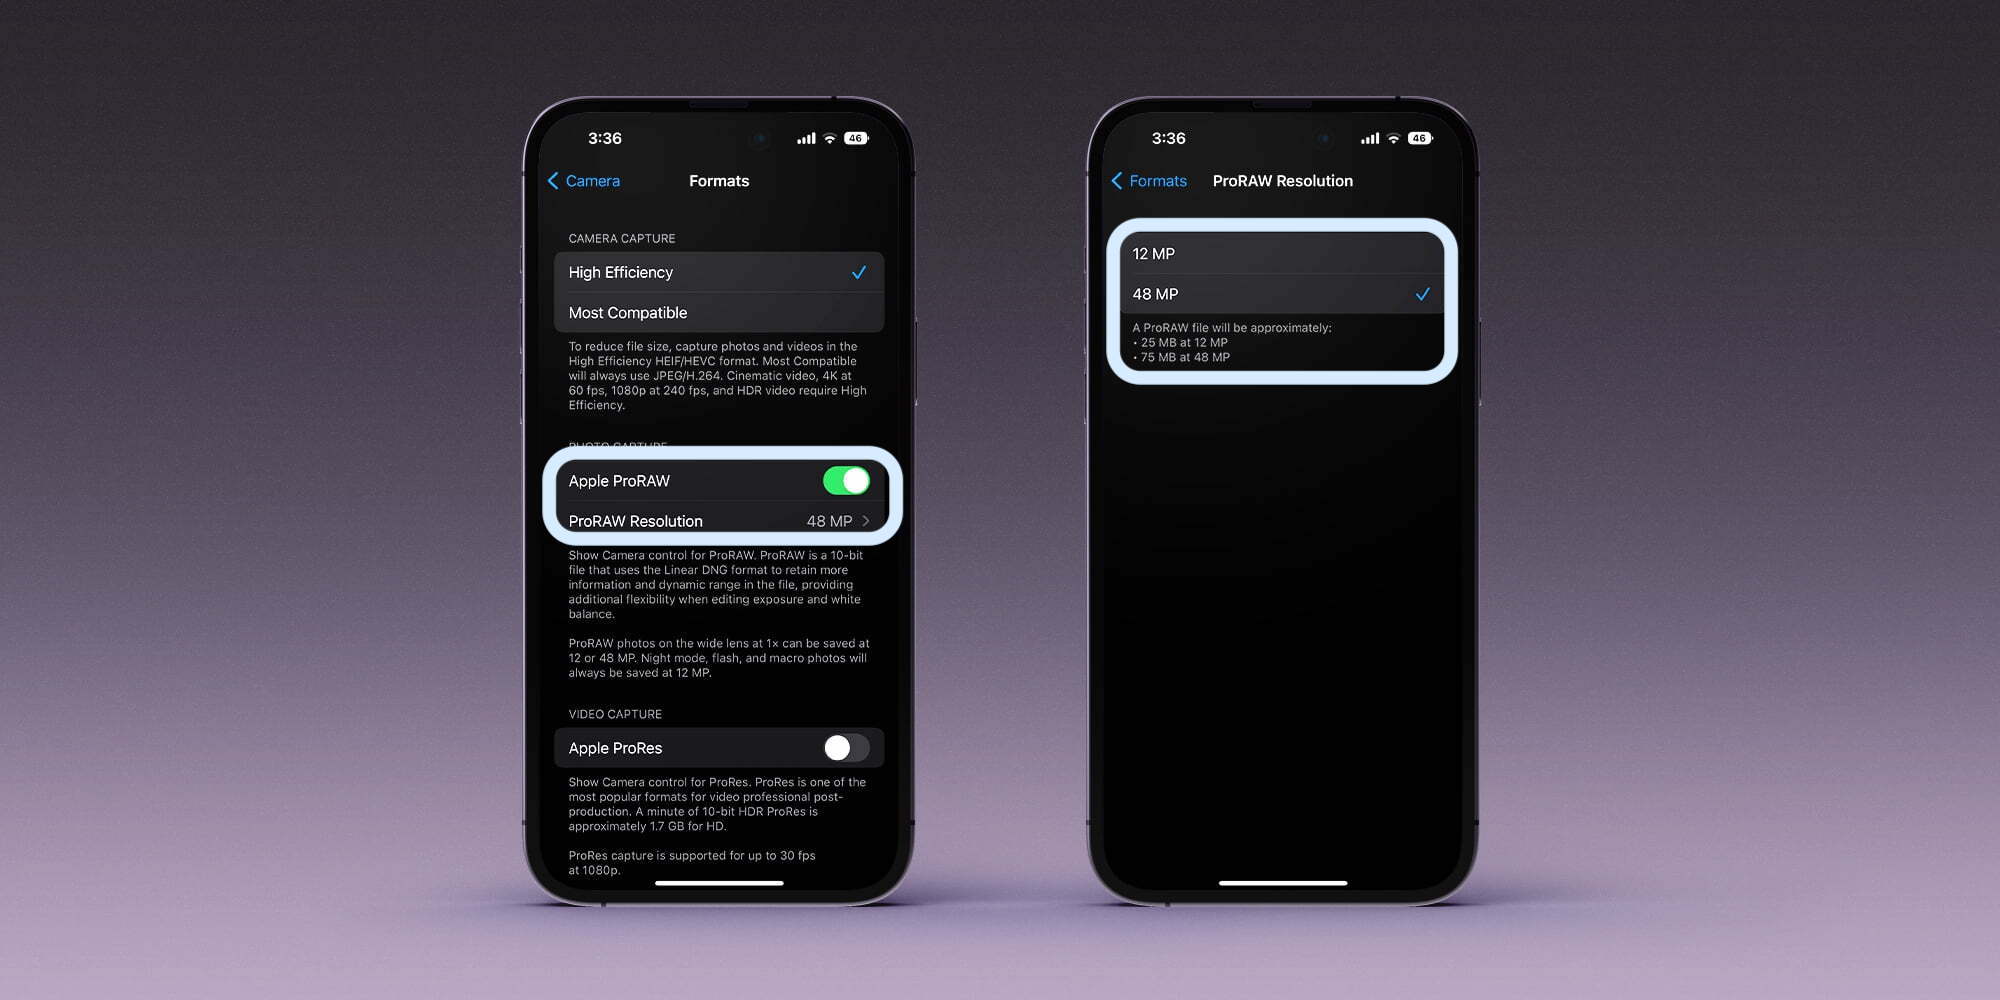
Here’s how this looks on iPhone 14 Pro:
With Apple ProRAW turned on, you should see 48MP as the default resolution for iPhone 14 Pro and Pro Max (this is optional – tap to switch back to 12MP for ProRAW).
Top comment by Nunya
However, that’s only when shooting with the 1x focus, if you change to 0.5x, 2x, or 3x you’ll be auto-switched to 12MP images but it will still be in the RAW format.
Now when you take a picture with the default Camera app, make sure RAW is not crossed out:
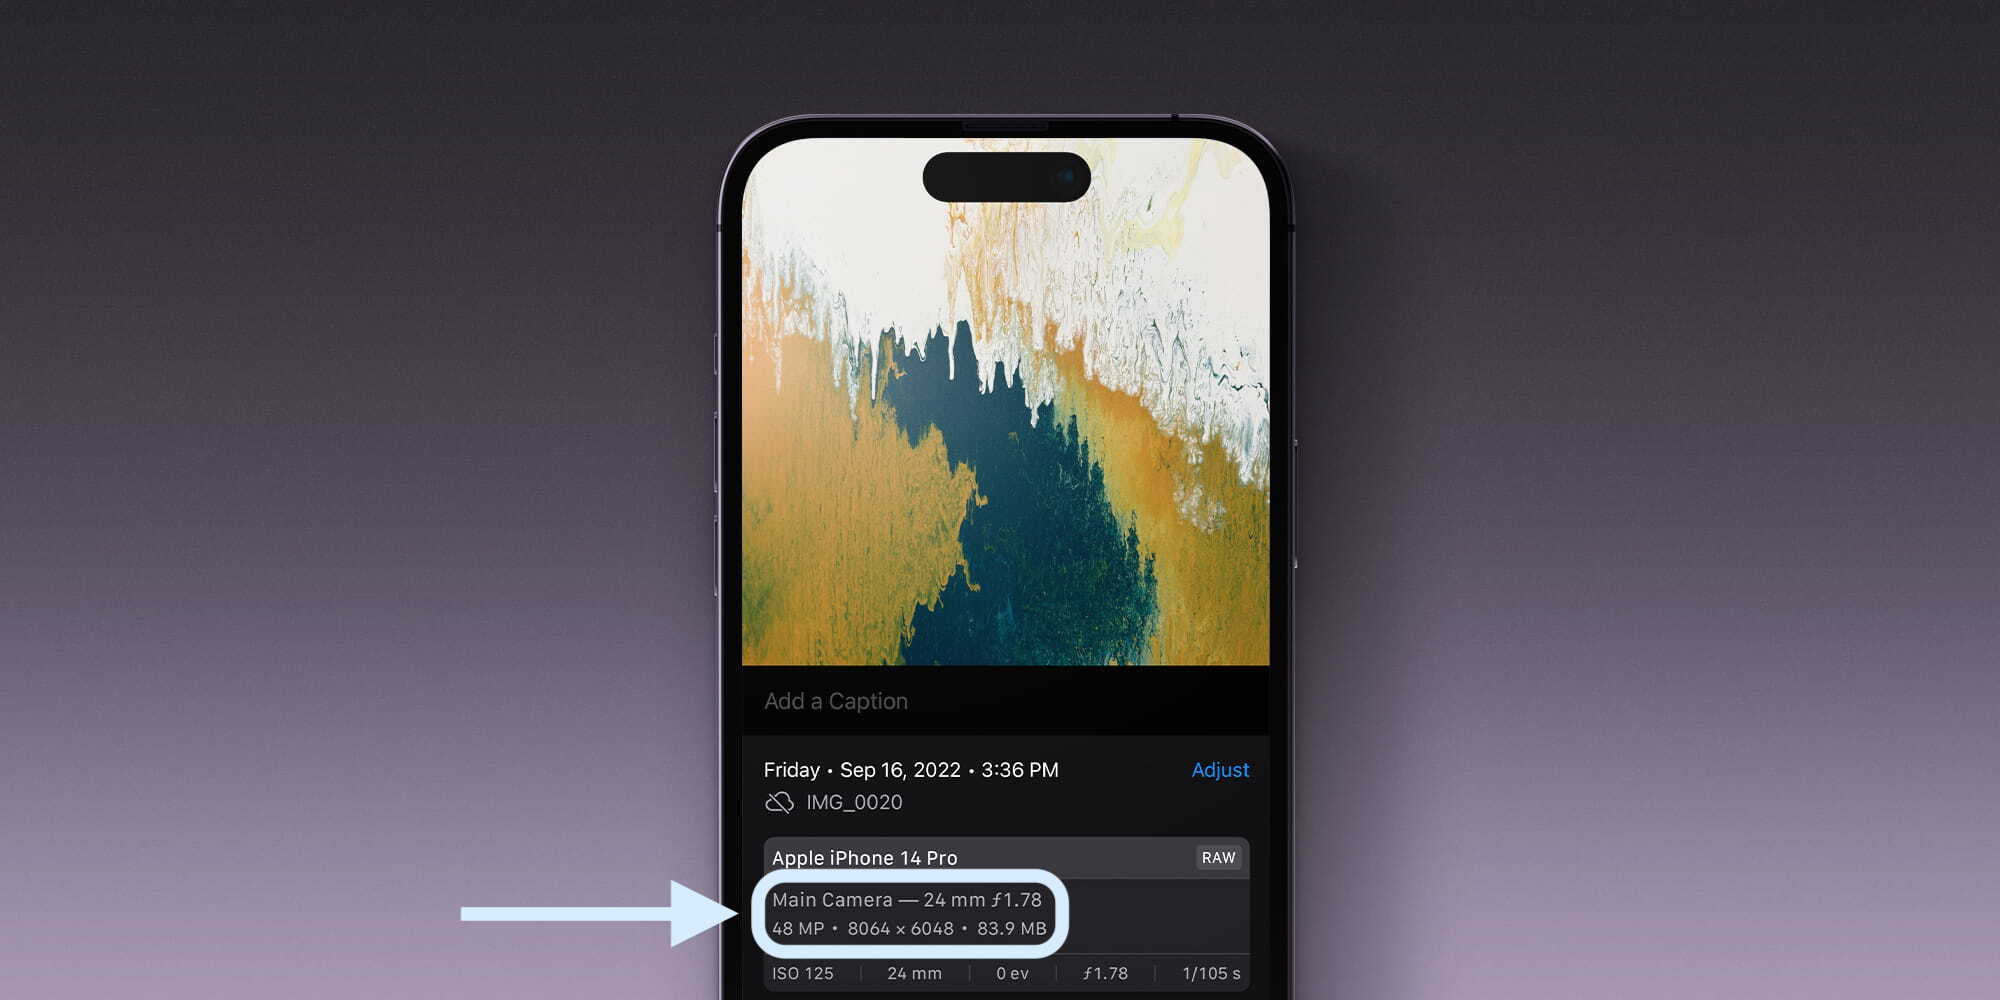
If you tap the “i” info button after taking a photo, you can confirm you’re shooting with the full 48MP 8064 x 6048 resolution. This image for example is 83.9MB.
What do you think about the option to shoot 48MP ProRAW images with the iPhone 14 Pro and Pro Max? Share your thoughts in the comments!
More tutorials from 9to5Mac:
- Here’s how to automate iPhone’s always-on display with iOS 16.4
- How to enable iOS betas from the Settings app with 16.4 and later
- Cardio Recovery: What is the Apple Watch feature and how do you track it?
FTC: We use income earning auto affiliate links. More.


Comments