Apple has released iOS 8.1 and with that, we have Apple Pay support. This is Apple’s new mobile payment platform that takes advantage of the NFC capabilities of iPhone 6 and iPhone 6 Plus. This will allow you to make purchases in stores that support Apple Pay using supported cards from a growing list of banks. Setting up Apple Pay is very simple and we’ve put together a quick tutorial to walk you through the process…
In order to take advantage of Apple Pay, you’ll need to make sure that your iPhone 6, iPhone 6 Plus, iPad Air 2, or iPad mini 3 has been updated to iOS 8.1. If you’re not sure, head into the Settings app, tap on “General,” then tap “Software Update.” If an update for iOS 8.1 is available, you’ll be able to download and install it here. You can also quickly verify by tapping on “About” within the General section of the Settings app. Keep in mind, iPad Air 2 and iPad mini 3 will only be able to use Apple Pay in apps as neither device features NFC.
Check out our Apple Pay setup tutorial video below:
[youtube=https://www.youtube.com/watch?v=8kNLTFAdS4A]
Apple Pay will store your credit/debit cards virtually within Passbook. Personal information will not be revealed within Passbook, but an image placeholder will be shown for each card along with the last four digits of the card number.
Next up, jump back into the Settings app and tap on “Passbook & Apple Pay.” Here you’ll find the option to “Add Credit or Debit Card” along with the ability to set transaction defaults for a specific card and information such as your billing/shipping address, email, and phone number. Starting out, you’ll want to tap on the option to add a credit/debit card. You’ll be able to add the existing card on file with iTunes or enter a new card. You can also start this process within Passbook if it’s currently empty or by tapping the plus sign in the top right corner. You’ll have the option to add new passes or set up Apple Pay.
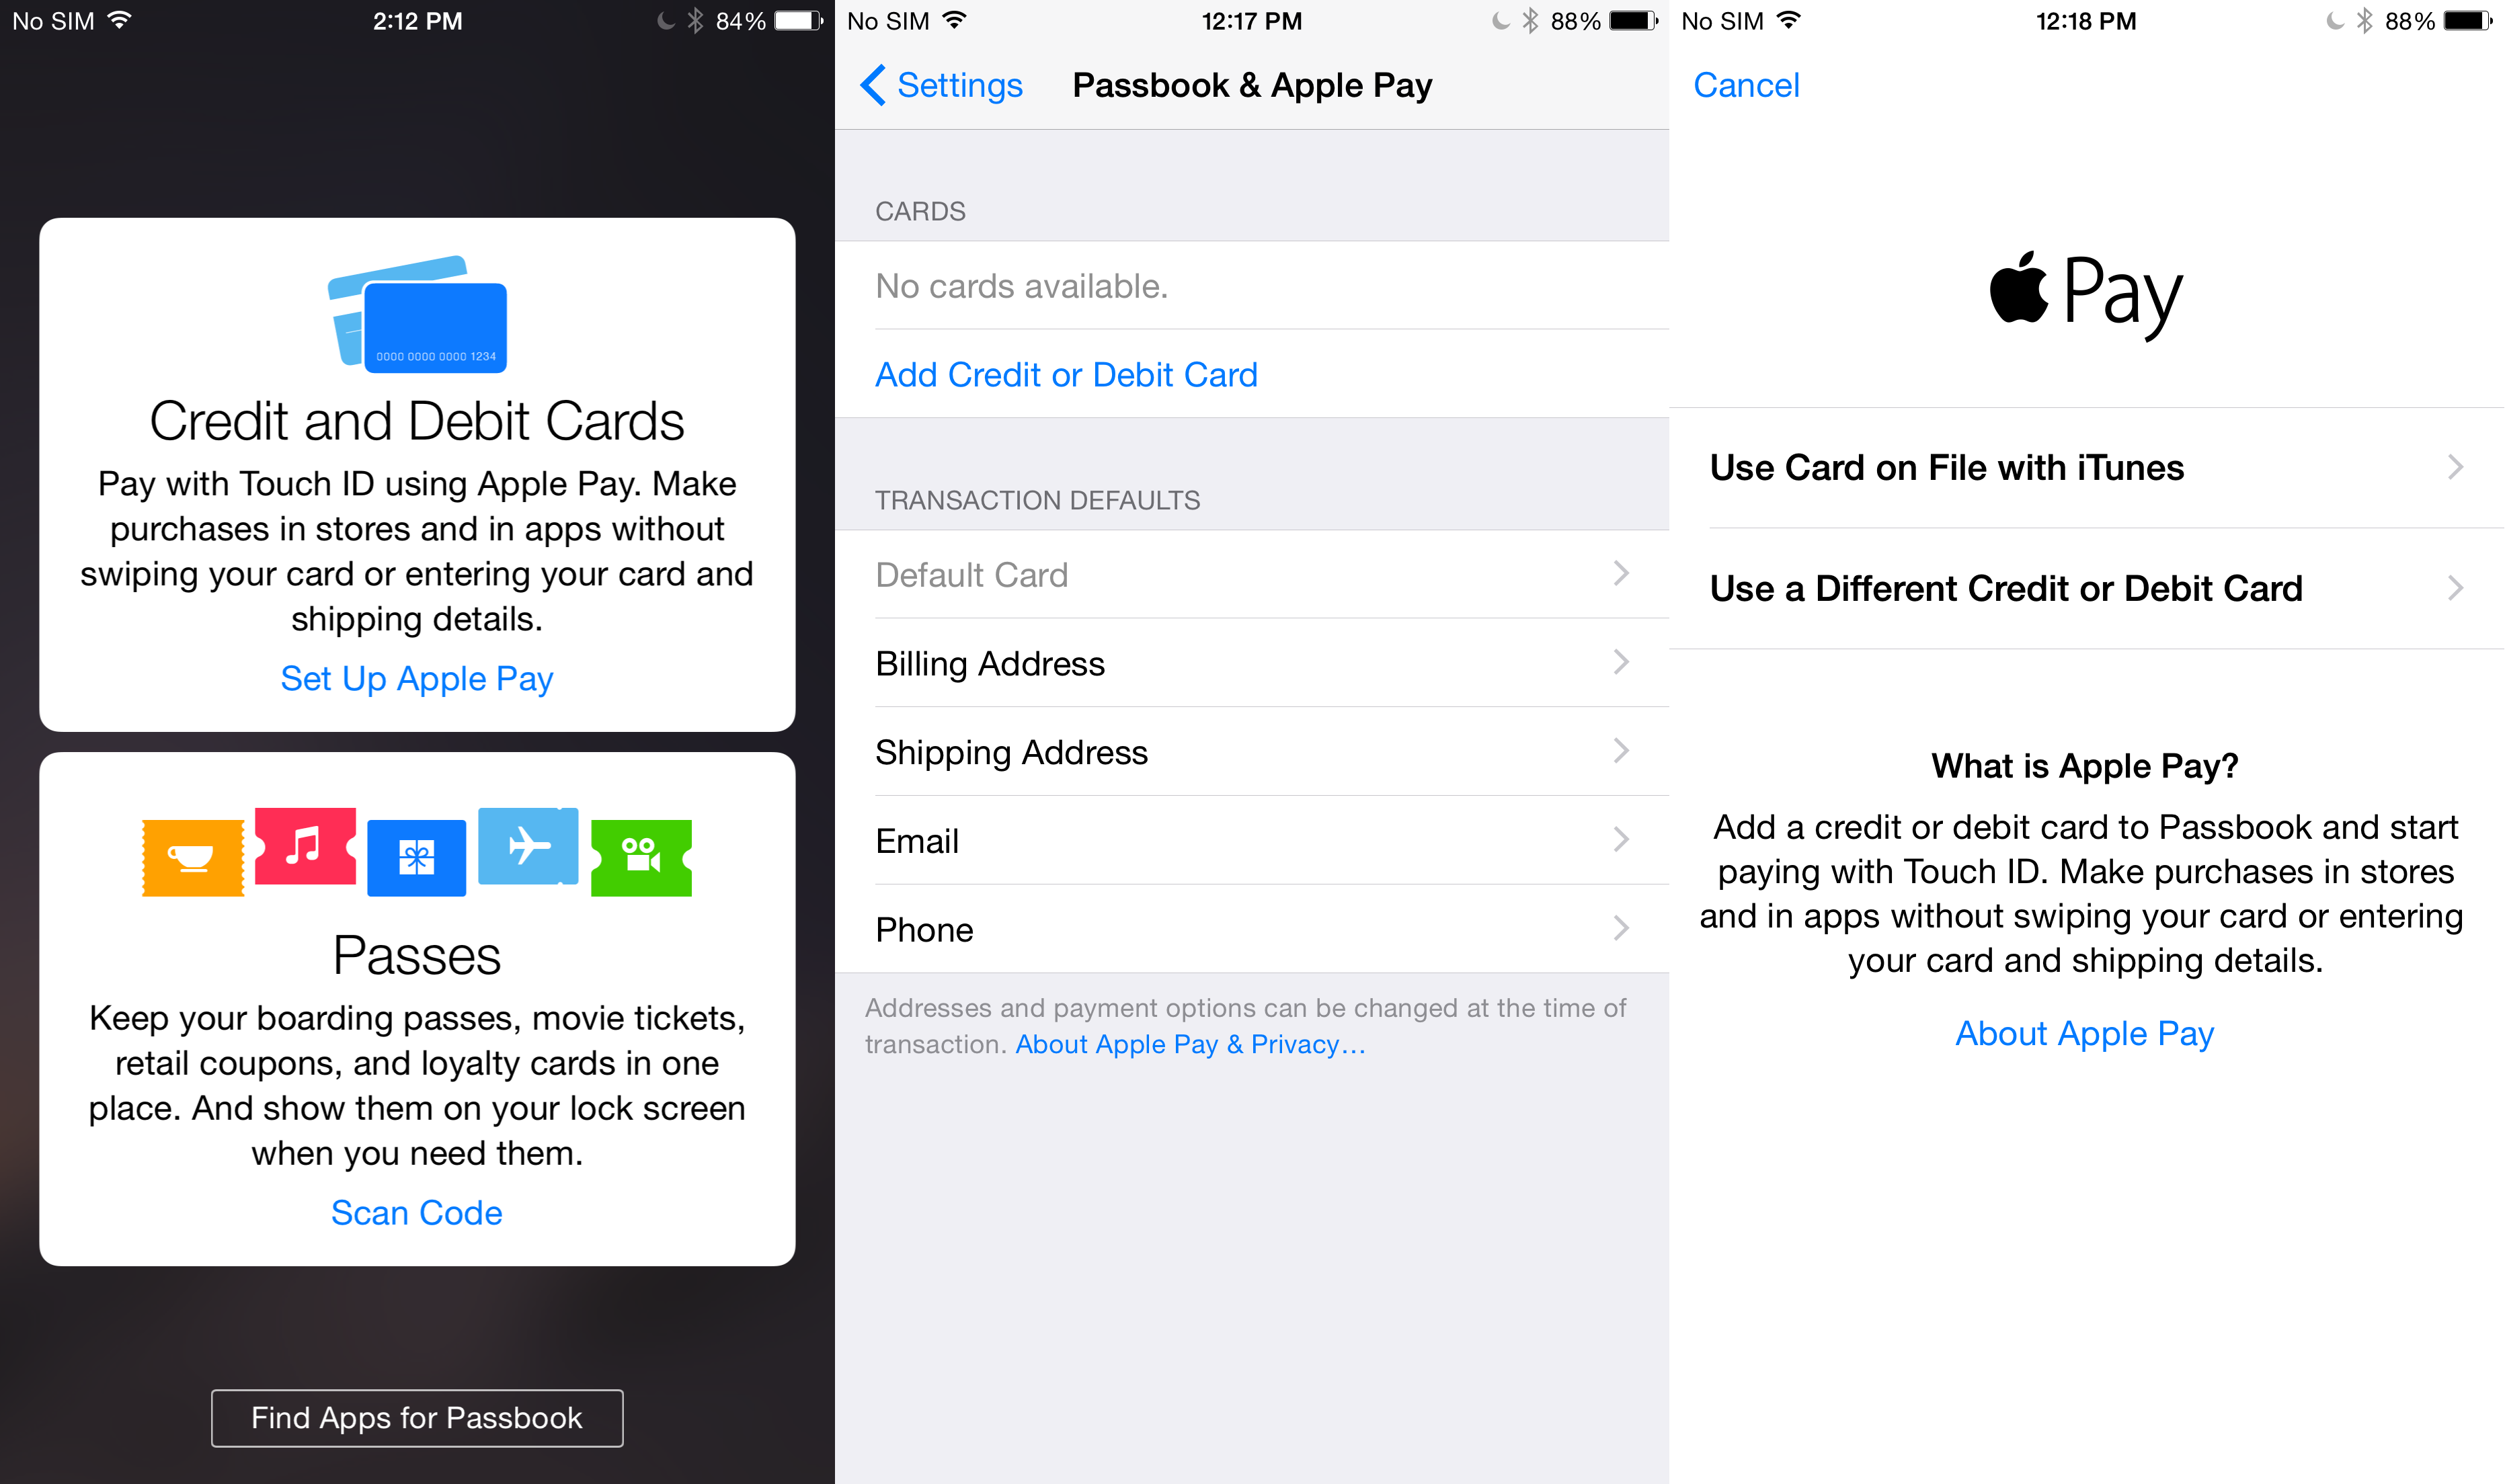
Adding a card to Apple Pay.
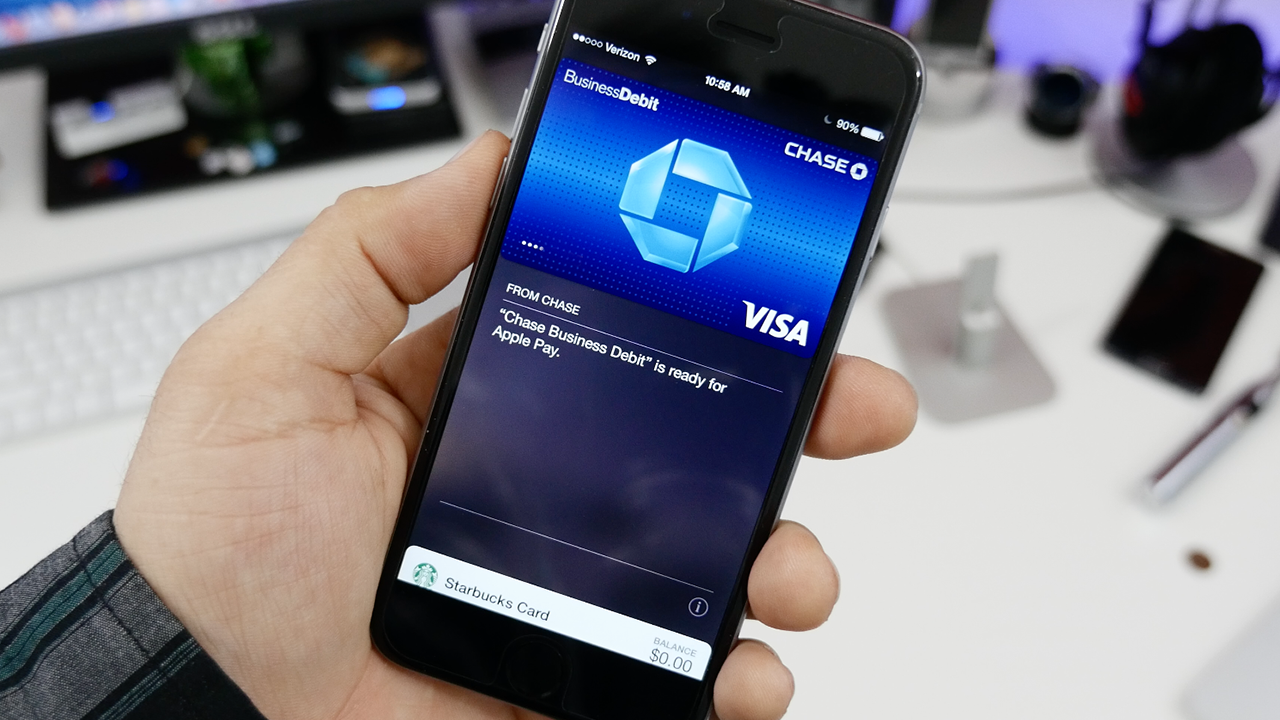
If you’re going with the iTunes card route, you’ll need to verify the security code from the back of the card before you can proceed. Otherwise, enter a new card using the fields available or snap a photo of your card with the camera icon next to the card number field. You’ll need to accept the terms and conditions and proceed with the verification process. Each card issuer will have its own card verification process so your experience may differ, but most of the time it will be as easy as verifying information associated with your account or it may be done automatically if you have your bank’s app installed.
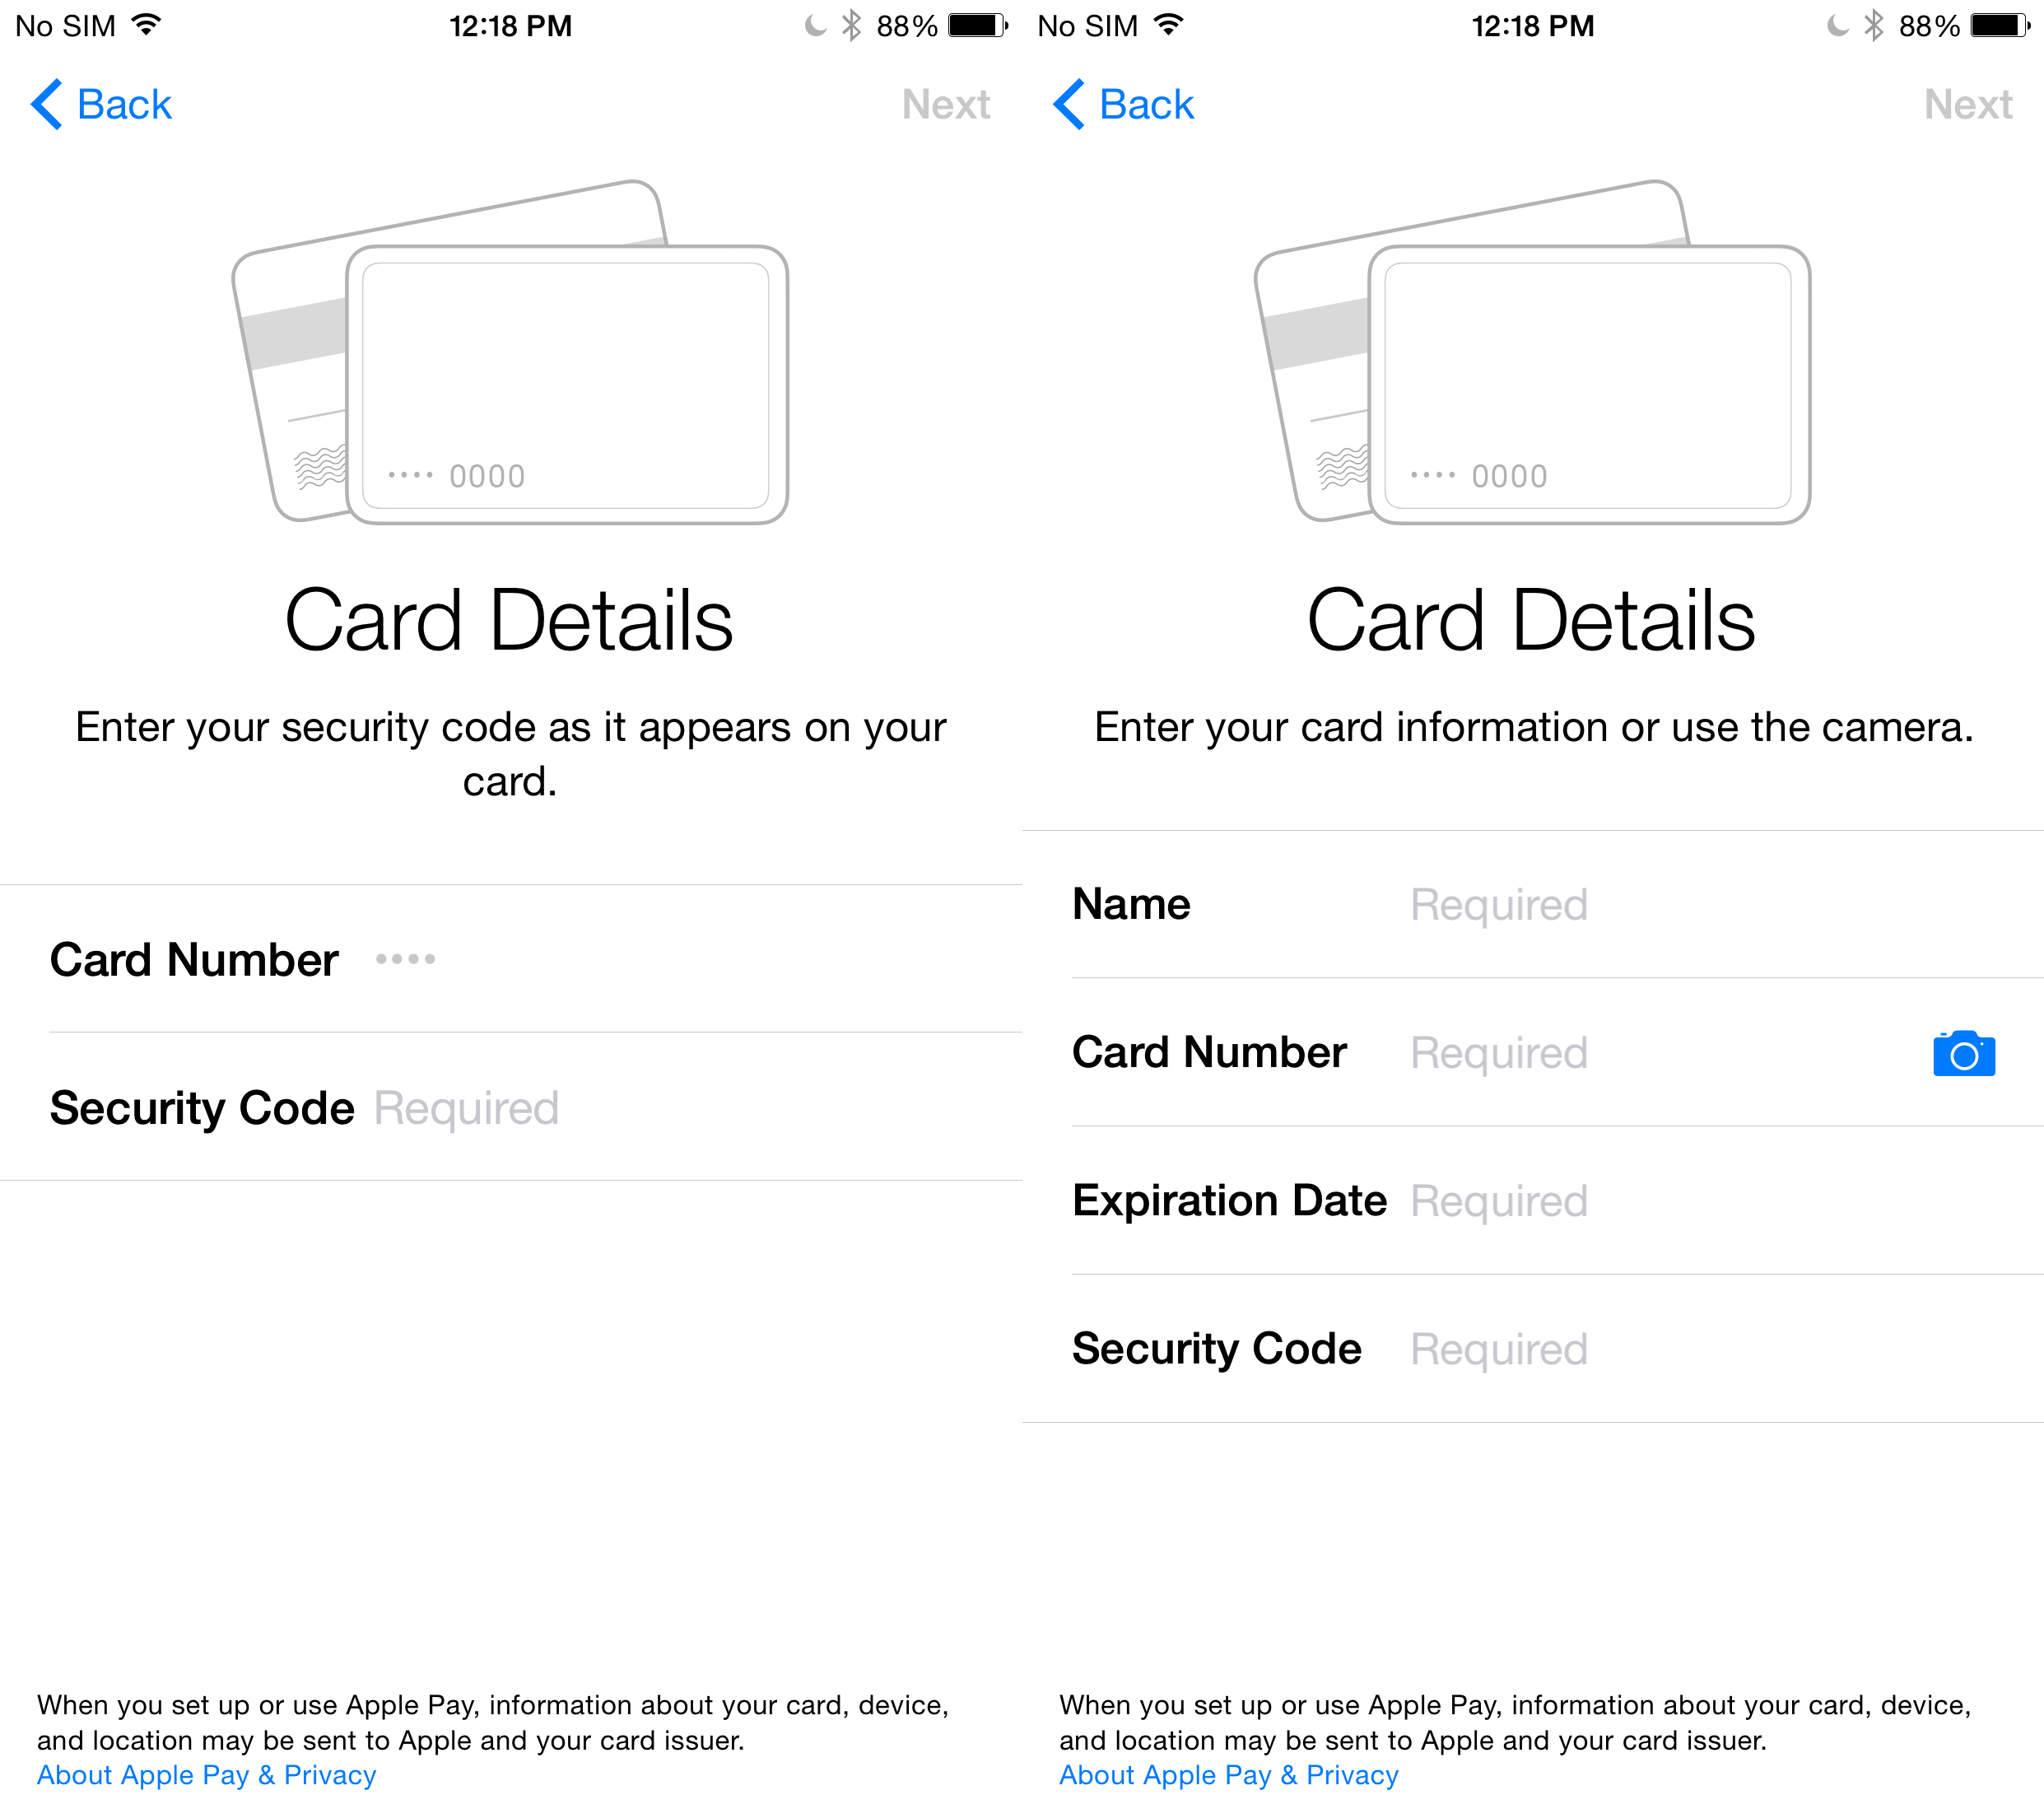
Using existing iTunes card with Apple Pay or adding a new card.
Once the card has been added, you can enter additional billing/shipping information, email, and phone number. This information will be specifically helpful when it’s required through a merchant, in-app purchase, or online store. After this information has been entered, you should be all set up and ready to go. As mentioned above, your card will be stored in Passbook, but only as a virtual version. No real card information will be associated with the card shown in Passbook.
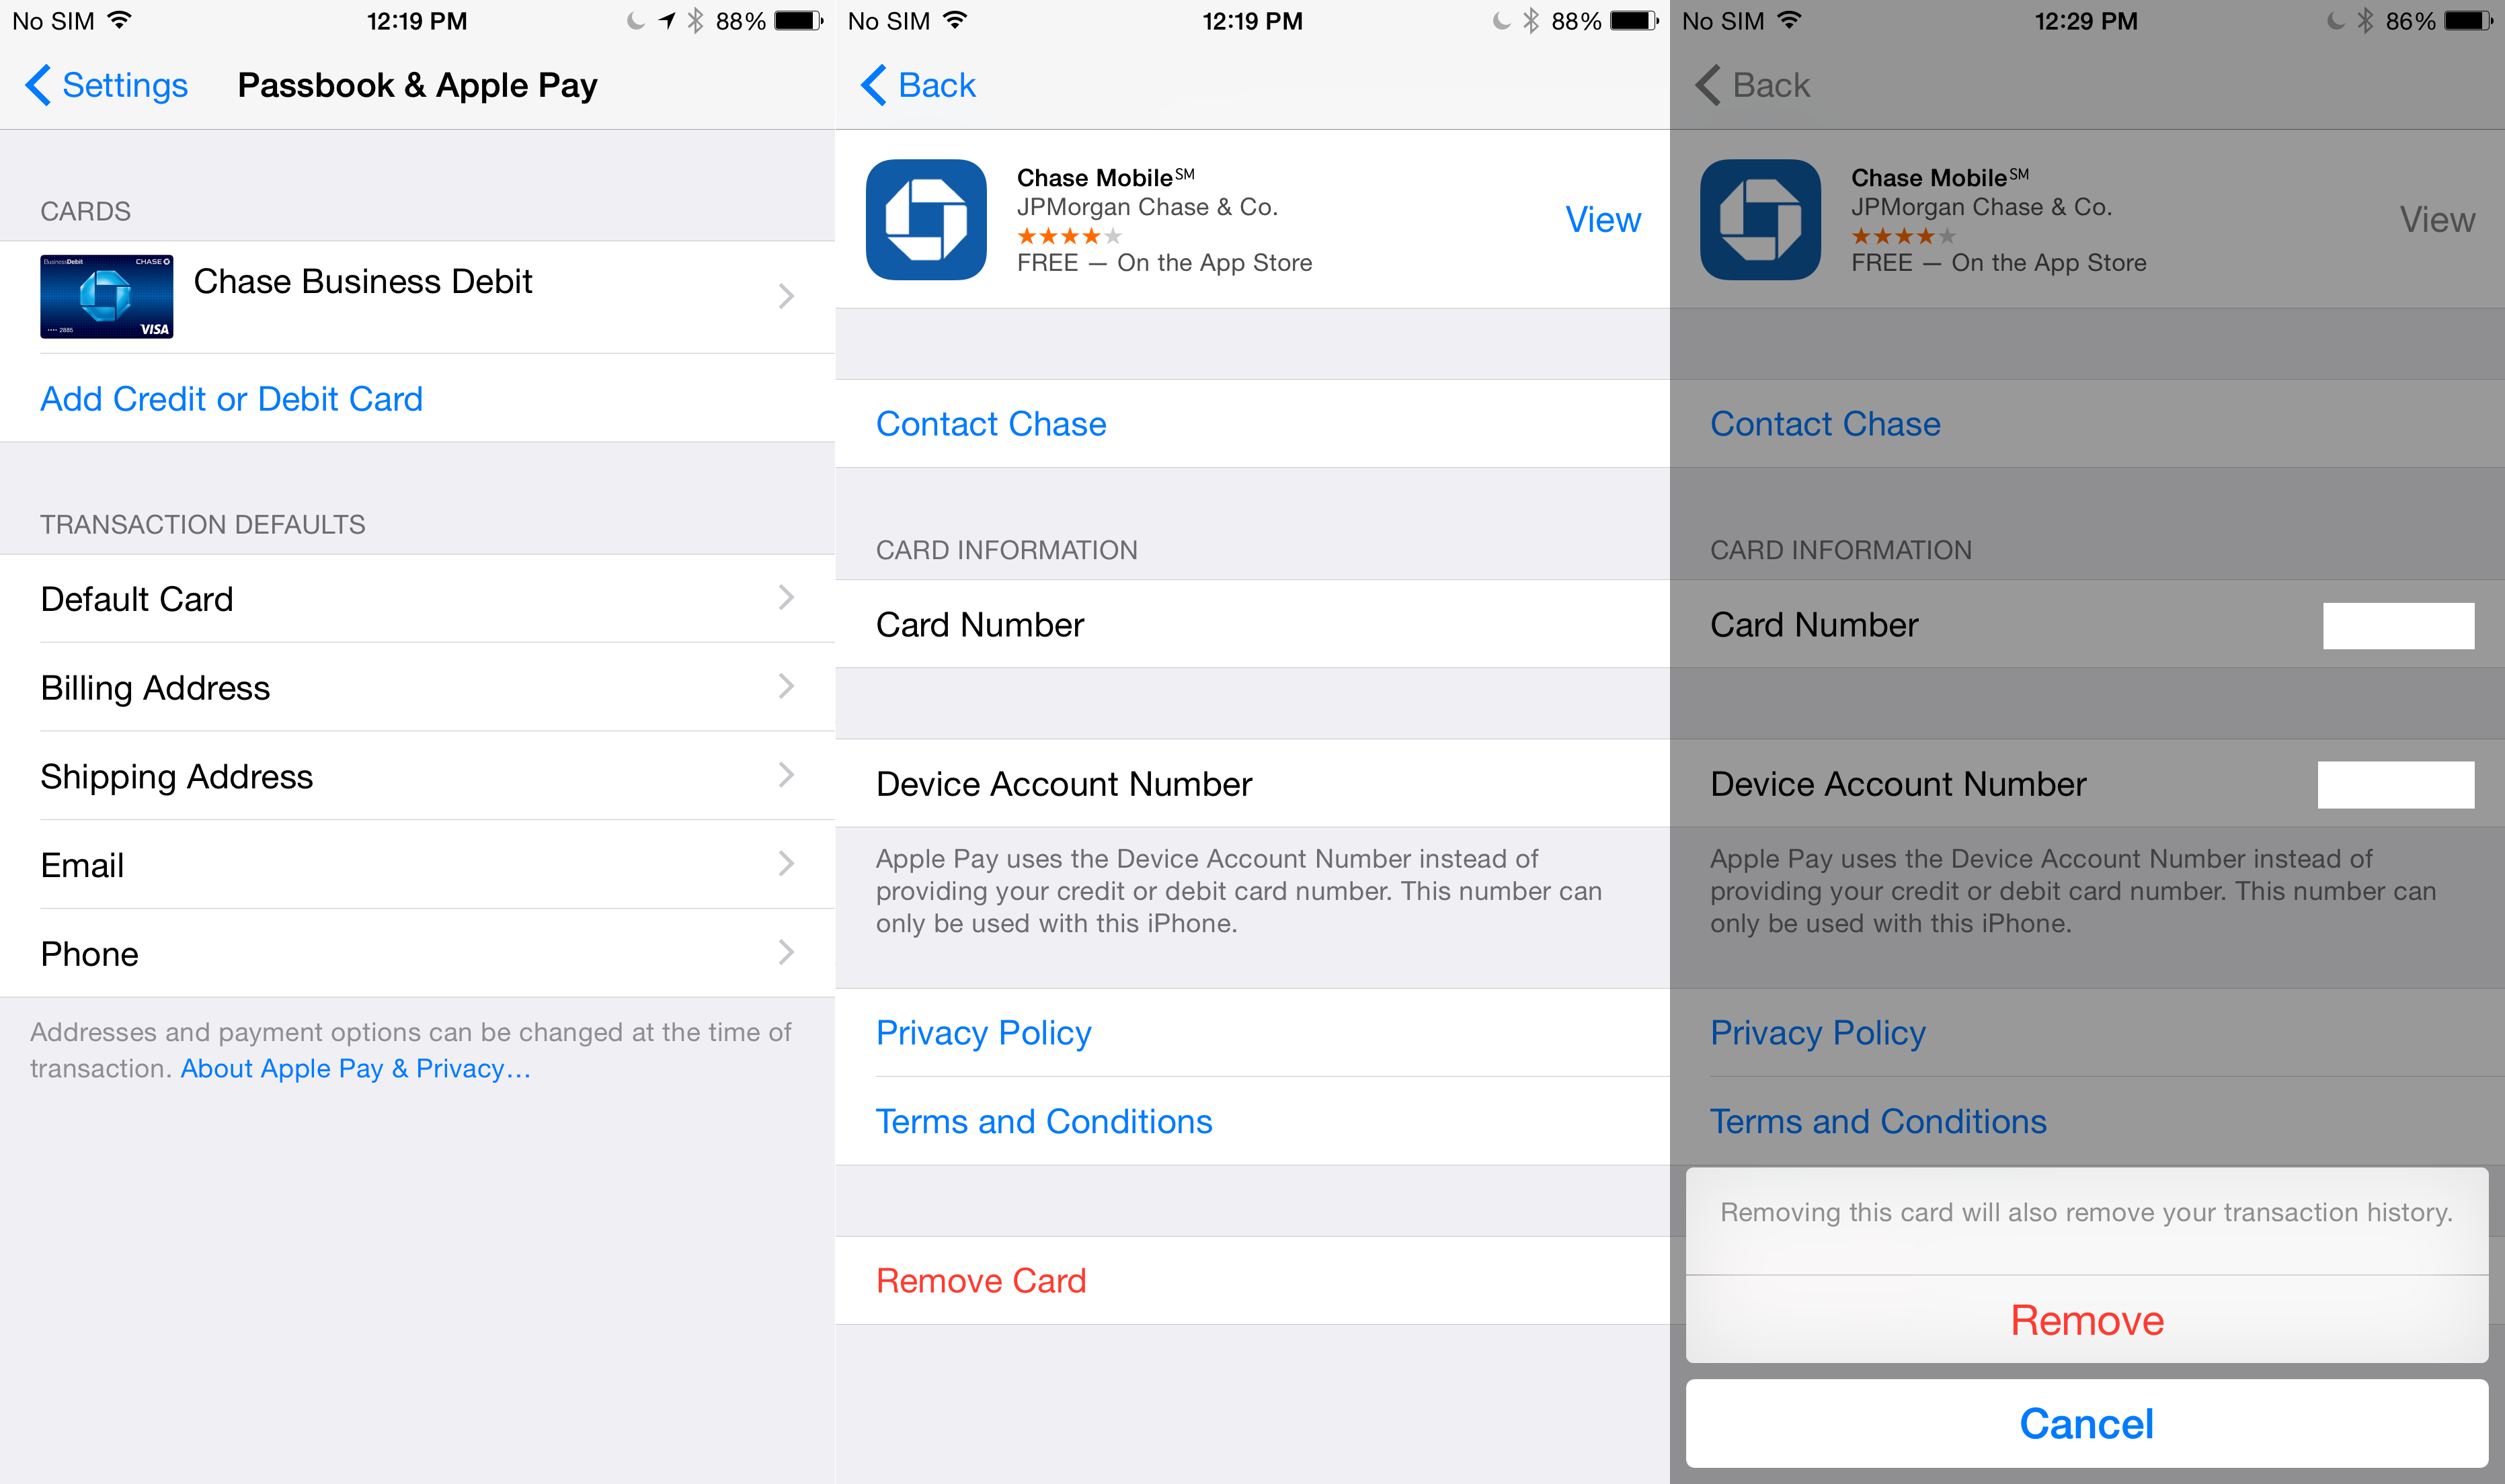
Adding billing/shipping information or removing a card.
If you’d like to delete a card associated with Apple Pay, navigate back to the Apple Pay section within the Settings app and tap on any card available that you’d like to remove. At the bottom of the following screen you’ll have the option to “Remove Card.” Simply tap that button and verify that you’d like to remove it.
Hopefully this helps you get up and running with Apple Pay. For a closer look at the setup process, check out the above video. I’m looking forward to using Apple Pay out and about in the future. Let us know what you think about the setup process and if you plan to use Apple Pay.
FTC: We use income earning auto affiliate links. More.

Pretty painless process (at least for me). If you’ve already got a card on your iTunes account you’re practically already setup and it’s no more difficult to add additional cards than it is to add cards to an online shopping account.
I tried it out at a McDonald’s today and it worked like charm.
only for USA! shouldn’t you put this in your article?
It’s quicker to just hit the + in passbook to add a card then going to the settings app.
I got a SMS from ATT saying that I needed a new SIM Card. Do I really need to go get a new one? Anyone else get this? The SIM is from my original iPhone 5.
Yes, it’s just you. The iPhone has NFC hardware and doesn’t require a separate “secure element SIM” like the Android phones do that work with ISIS (I mean, whatever they renamed it to disassociate with terrorism).
It requires an iPhone 6 sim card for Apple Pay to work i believe, should be able to get one from the carrier
No Apple pay at all the UK! That as well as no iTunes radio may mean a change in phone supplier if no support is brought soon. We may not be as big as the U.S. but when I pay the same if not more for the privilege of an iPhone equal support would be nice :(
It can’t be Apple can it? I’m sure it’s some regulatory issue. Can’t you talk to MP’s about getting it in the UK?
I know what you mean. Imagine my frustration living in Mexico and not having a lot of other features that other people have just over a line.
I updated to 8.1 and the passbook and apple pay does not show in my setting and you described above
How about I make a video showing you how to update your apps and read notifications.
It would be nice to have a nickname for each card, so I don’t have to memorize which account number goes with what card/account. The image of the card in Passbook only shows the last 4 digits of the card number, and not the name of the user on the card.
Just went to Walgreens and bought my razor cartridges and use Apple Pay and boy this is convenience, it’s even faster than cash
Why don’t I get the option for “Use Card On File In iTunes?” It’s on file and I buy stuff all the time
I think it will only show up if your iTunes card is associated with a participating bank. I use my bank debit card and it’s not supported and it doesn’t show up either. When I went to add it manually it stated it wasn’t supported.
I added few Amex cards. I received email from the banks that my card has been added to Apple Pay. But still the passport says your card is being activated. Also I don’t see any of the cards to select as default in Settings > Passbook & Apple Pay. Any one knows what is wrong here?
I’m having the same issue. The credit card company (Chase Visa) says the card is ready to use but my iPhone says “Your card is being activated”.
How do I update credit card info after I add the card. For example I need to update the exp. date
Remove the card and re-add it if you entered the wrong details when setting it up. If the card expires, some people are reporting that the bank automatically updates your Apple Pay card automatically with the new details.