If you’d like to add tracked text to Final Cut Pro X, there are many ways to go about doing so. For instance, I used to faux-track objects manually by using keyframes. Needless to say that was quite the tedious endeavor.
Tracking text is easier and much more accurate when using a plugin like MotionVFX’s mCallouts, which is powered by the excellent Mocha Tracking Technology from Imagineer Systems.
There are several packages in the mCallouts series, but each of them contain a heaping helping of callout styles that you can use to add tracked text to the objects in your Final Cut Pro X projects. In this brief hands-on video walkthrough, I’ll show you just how easy it is.
The first thing that you’ll need to do is get the mCallouts plugin. The full mCallouts Simple 2 package that I’m using is $69, but MotionVFX offers a free demo to test before you take the plunge.
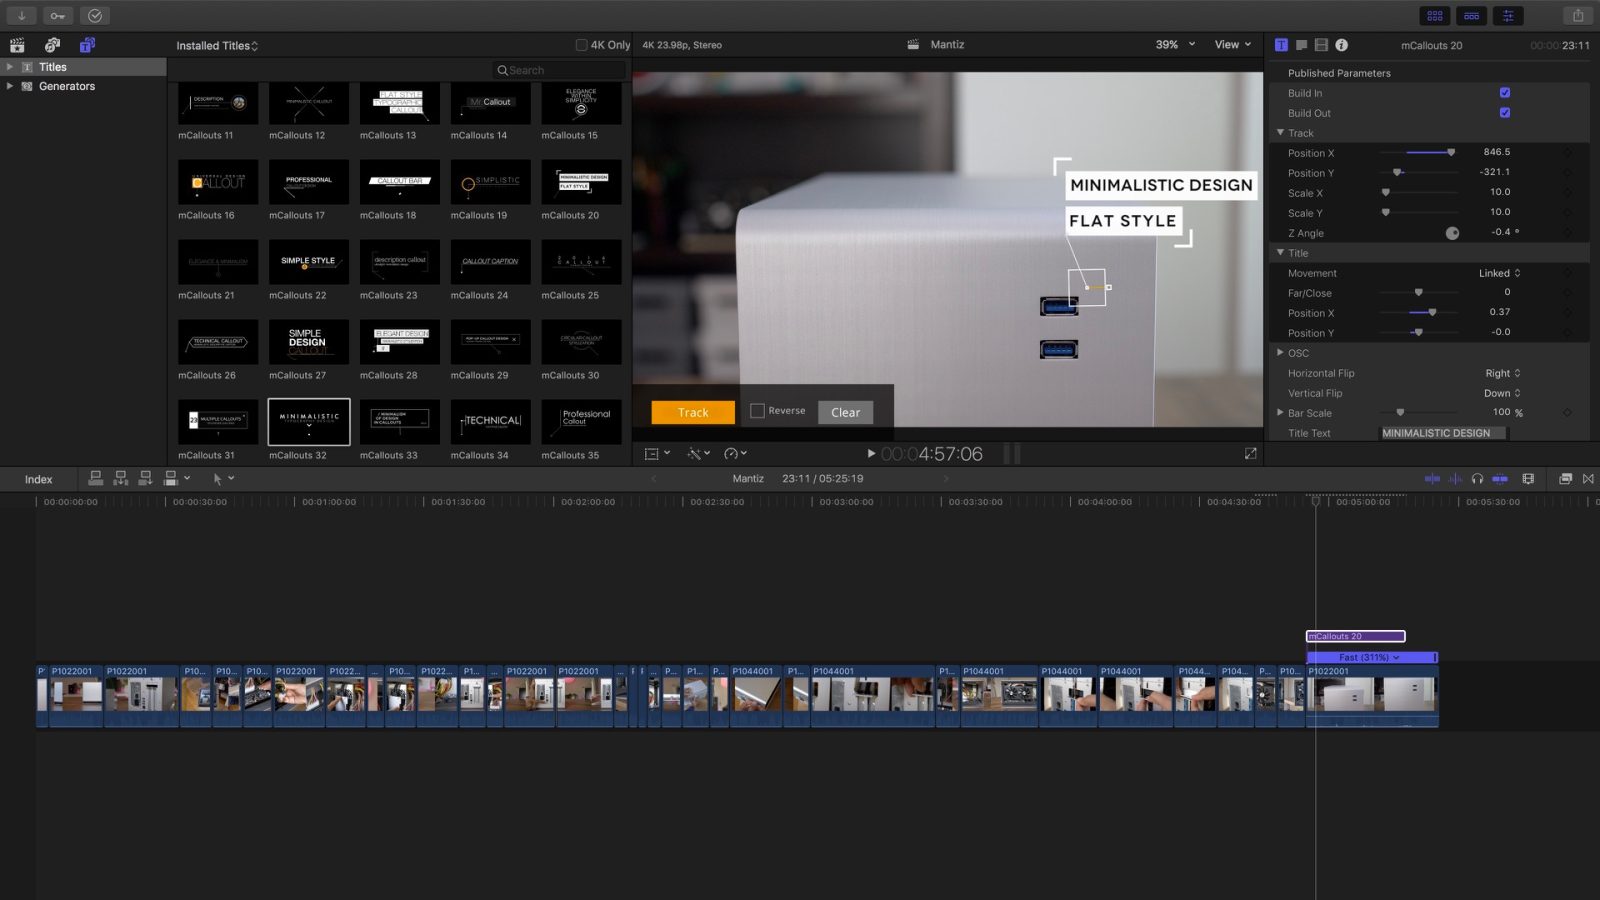
Once the package is installed, launch Final Cut Pro X, and open the Titles/Generators panel. There, you’ll find all 50 mCallouts Simple 2 items that are ready to be used.
For my particular use-cases, I like to drop a selected callout right on top of the beginning of a clip where I want to implement tracking on an item in frame. In the example that I use, I’m tracking the Mantiz Venus eGPU box.
Video walkthrough
Subscribe to 9to5Mac on YouTube for more videos
From there, it’s just a matter of moving the placement of the tracker and the text using the draggable on screen controls. It’s generally best to position the tracker on a place in frame that features some sort of contrast so that the tracker can easily follow its target.

Once you have the general placement down, clicking the Track button will start the automated text tracking, frame by frame. The amount of time it takes to complete the tracking process will depend on how long the title is. You may extend or shorten the length of the callout by adjusting the title on the timeline.

You may also venture into the inspector to adjust many of the callout’s options — including text font, position, and size. You’ll find that there are a plethora of options available for adjusting the callout to your exact liking. Afterwards, you may want to render the text so that you can garner a smooth preview of what the callout will look like.

I find that tracked callouts add a lot to the look of a video, and can help explain or describe whatever is on screen. mCallouts is just one of the available options, but it’s one of the most straightforward ways to add this valuable feature to your Final Cut Pro X Projects.

Do you use mCallouts, or any other similar solutions? Sound off in the comments below with your experiences and findings.
FTC: We use income earning auto affiliate links. More.


Comments