
AirPods Pro have great features like noise cancellation and a Transparency mode with an in-ear design. And to switch between those and other features, Force Sensors in the AirPods Pro (and AirPods 3) stems offer easy control. Read on for how to change AirPods controls including press speed, press duration, what your left and right Force Sensors do, and more.
AirPods gen 1 and 2 use double taps on the earbuds for controls. But AirPods Pro and AirPods 3 use a squeeze of the Force Sensor built into the stem of each earbud.
We’ll look at three ways to switch between noise cancellation, Transparency, and off, how to customize your Force Sensors including press speed and press duration, and how to enable noise cancellation when using just one AirPod Pro, and tips on using the volume swipe control with AirPods Pro 2.
We’ll also cover how to customize the force sensors on AirPods 3.
How to change AirPods controls
Changing left and right AirPods Pro/AirPods 3 Force Sensors:
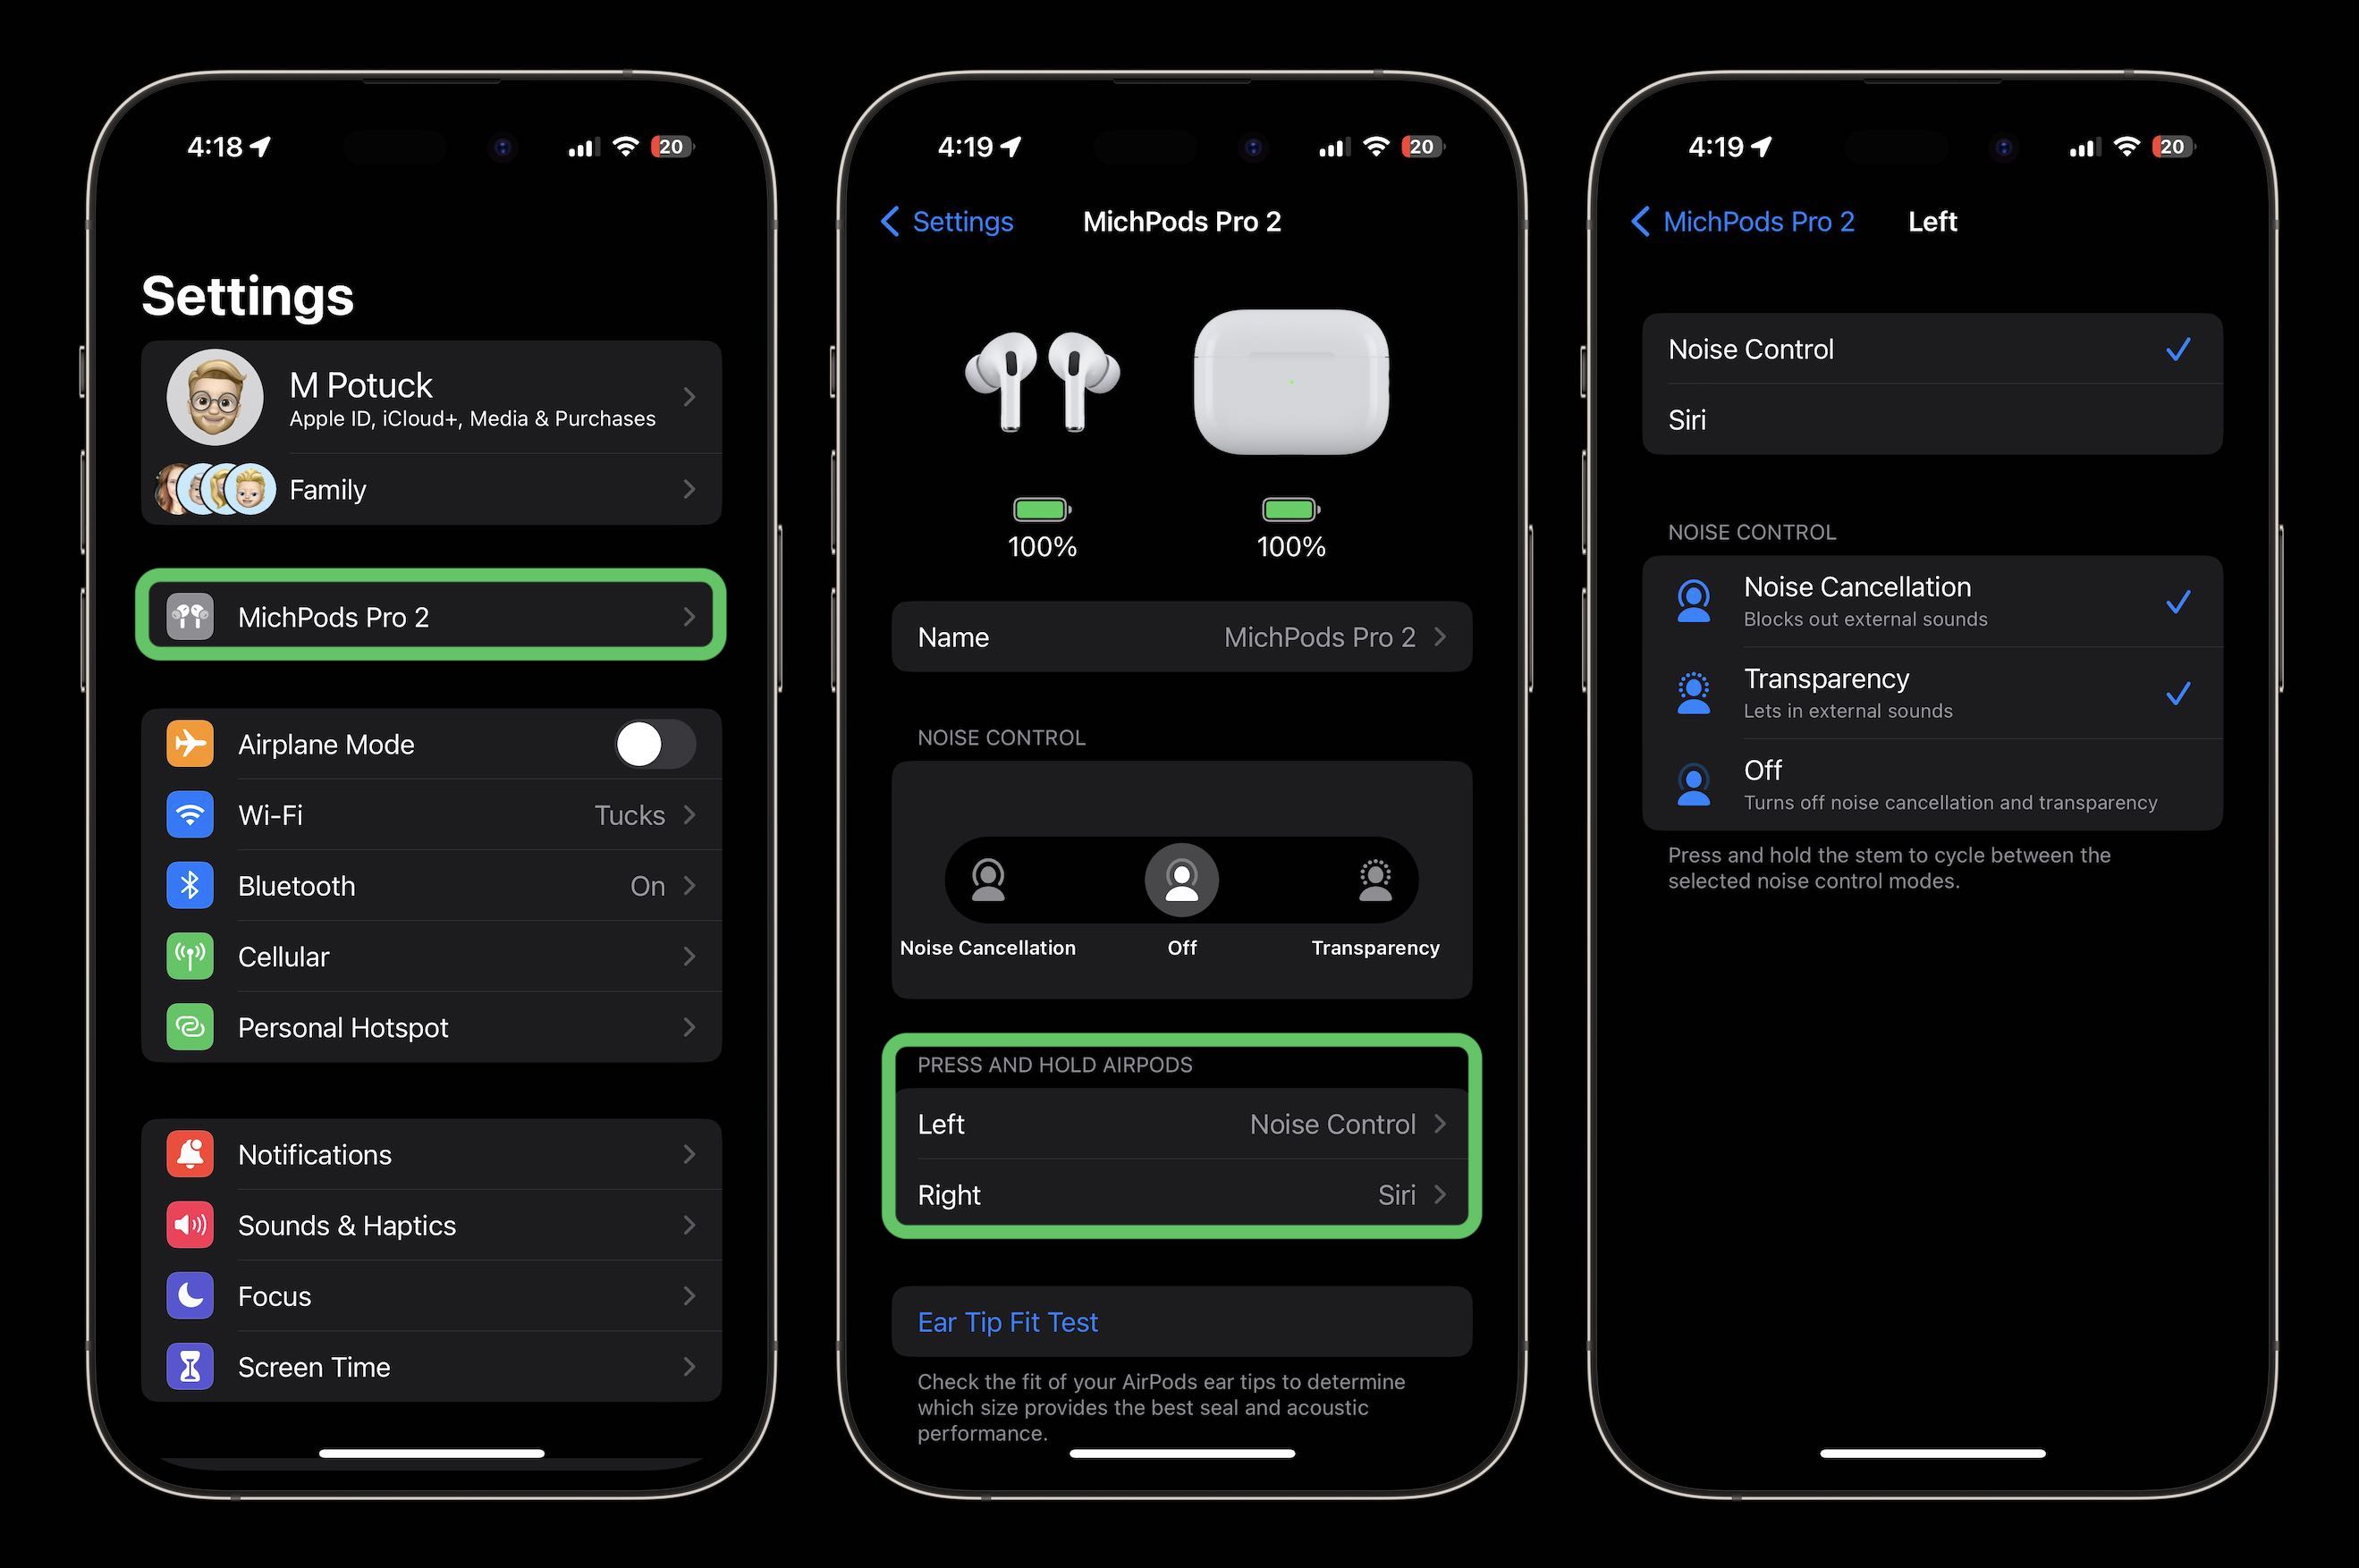
- On your iPhone, head to the Settings app
- Open your AirPods case near your iPhone to see them appear at the top > tap ’em
- Under “Press and Hold AirPods” choose Left or Right
- Customize what your AirPod Force Sensor activates
- You can also choose to include “Off” in the Noise Control controls
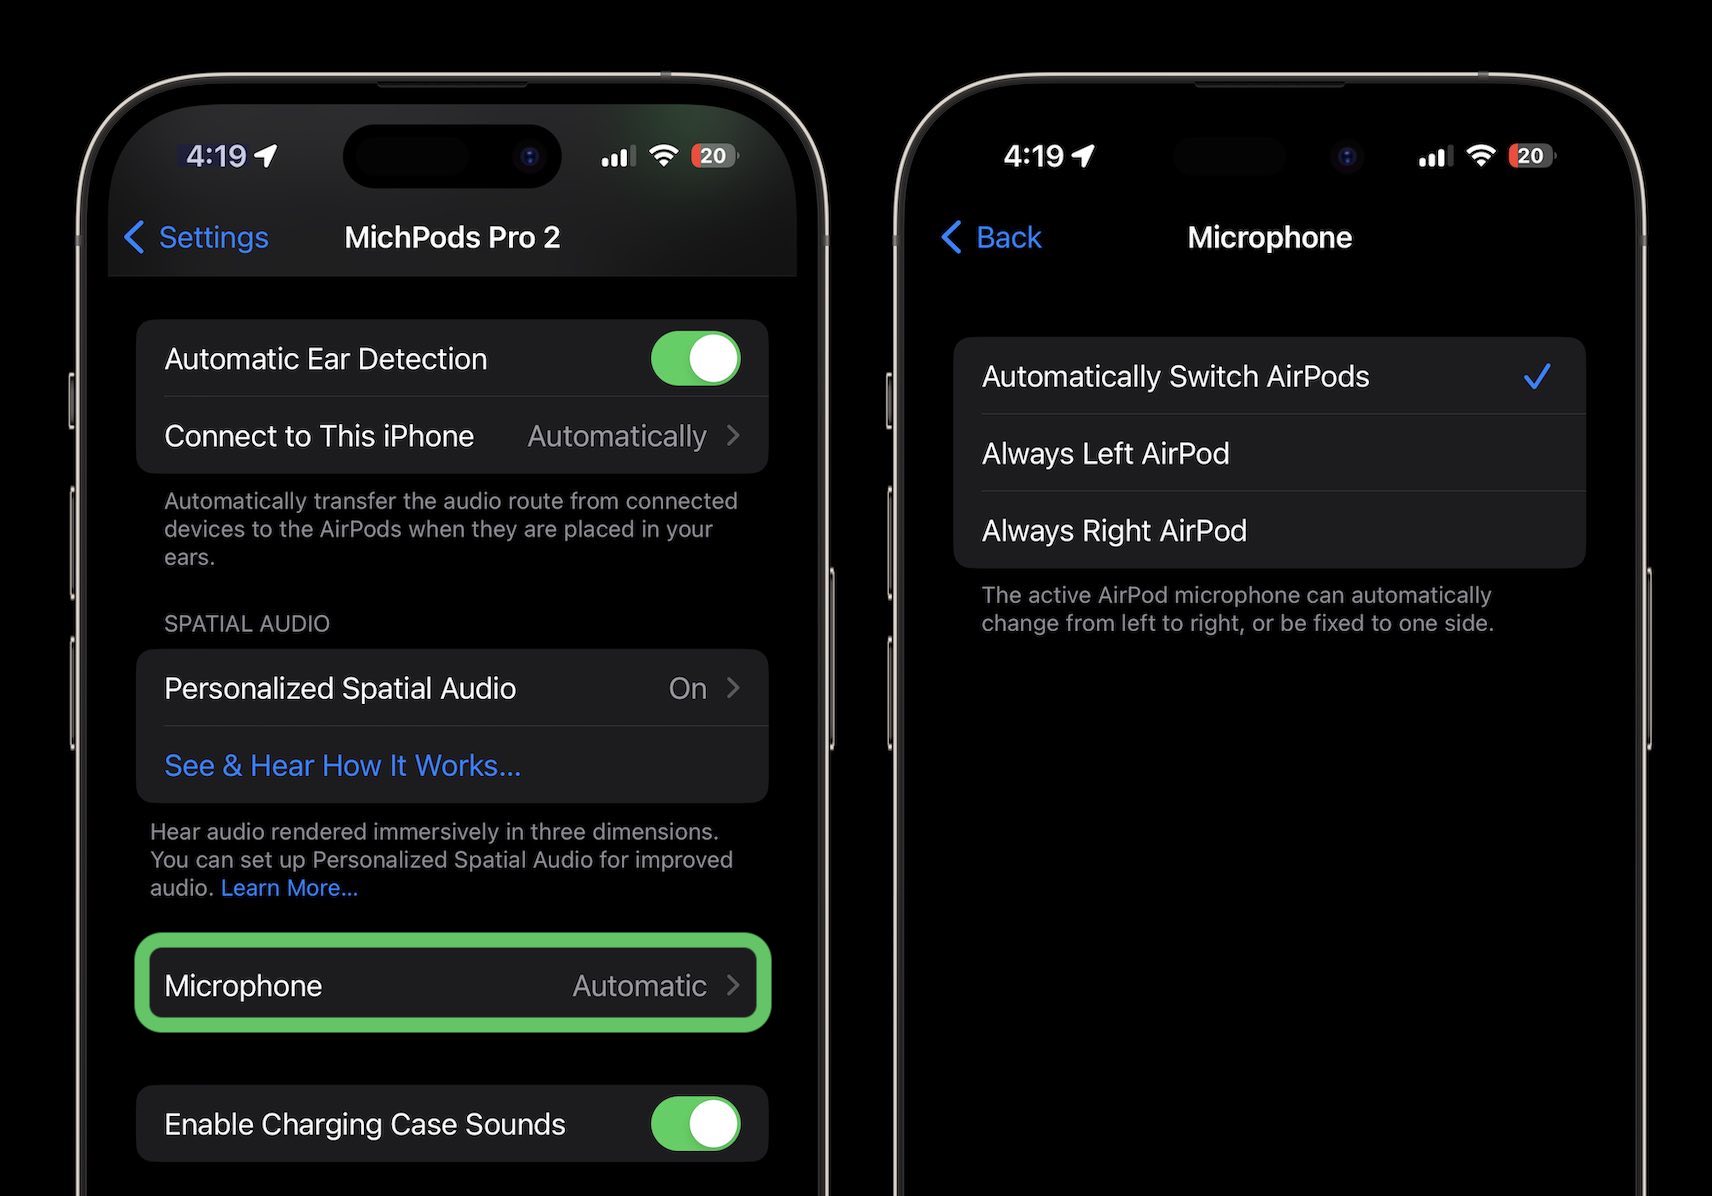
Another option at the bottom of this screen is to customize how the microphones in your AirPods Pro work.
Volume swipe control on AirPods Pro 2
AirPods Pro 2 introduced volume control via swipe on the earbud stem, but it can be a bit touchy. For some tips and tricks, check out our full guide:
How to change AirPods controls – press speed and duration:
- Open Settings then head to Accessibility
- Swipe down and tap AirPods
- Adjust your Press Speed and Press and Hold Duration by choosing something other than the default
- You can also enable Noise Cancellation with One AirPod by toggling it on at the bottom of this settings screen
If you’re not already familiar, here are all of the controls possible with AirPods Pro:
- Play and pause audio: Press the stem. To resume playback, press it again.
- Play the next track: Double-press the stem.
- Play the previous track: Triple-press the stem.
- Answer a call: When you receive a call, press the stem.
- Adjust volume: Lightly swipe up or down on the stem (2nd gen only)
- Switch between Noise Cancellation and Transparency mode: You can set either of your AirPods to perform this action when you press and hold the stem.
- Activate Siri: You can set either of your AirPods to perform this action when you press and hold the stem. See Set up Siri.
And here are the default AirPods 3 controls:
- Play and pause audio: Press the Force Sensor once. To resume playback, press it again.
- Play the next track: Double-press the Force Sensor.
- Play the previous track: Triple-press the Force Sensor.
- Answer a call: When you receive a call, press the Force Sensor.
- Activate Siri: Press and hold the Force Sensor, then ask questions, control apps, and more.
Read more 9to5Mac tutorials:
- How to change AirPods Pro ear tips and run the custom fit test
- What to do with old and dying AirPods: Recycling, replacing, and selling
- How to take a scrolling screenshot on iPhone
- Best USB-C and Thunderbolt displays for Mac
FTC: We use income earning auto affiliate links. More.


Comments