
In this hands-on video walkthrough, I’ll show you how to turn an eligible USB drive, one that you may already have laying around the house, into a handy macOS Monterey install disk. This is useful for facilitating upgrades to Monterey across multiple Mac computers. Be sure to subscribe to 9to5Mac on YouTube for more Mac-centric guides, tutorials, and how-tos.

It’s important to note that you don’t need to make a USB Installer to install macOS Monterey. You can use the App Store to download Monterey, or install macOS from Recovery. As noted at the outset, one of the primary benefits of creating a Monterey USB Install drive is to install Monterey on multiple computers.
Selecting a USB drive
Before following this tutorial, you’ll need to make sure you have access to a USB drive that can serve as the installation destination. In general, a USB flash drive will work, as long as it has at least 16GB of storage. In this particular tutorial, I utilize a spare SanDisk Extreme Portable SSD, because it’s all I had available at the moment. Admittedly the SanDisk SSD is overkill given the 1TB storage capacity.
If you’re purchasing a new USB drive to serve as an install drive, I highly recommend the SanDisk Ultra Dual Drive USB Type-C Flash Drive. First and foremost, it’s available with the needed 16GB capacity, but it also has a USB-C connection that plays nice with today’s Mac computers. Finally, I think you’ll find that it’s very price-friendly.
macOS Monterey USB installer video tutorial
Subscribe to 9to5Mac on YouTube for more videos

How to create a bootable macOS Monterey USB install drive
Step 1: Launch the Mac App Store, and download macOS Monterey.
Step 2: Once the download of macOS Monterey is finished, the installer will automatically launch. Close the installer via the menu bar or by using ⌘+Q.
Step 3: Connect the USB Drive, open the drive in Finder, and ensure that there’s nothing on it that you need. If there is, it’s important to back up any data on the drive that you need, because following these steps will purge the contents of the drive.
Note: APFS-formatted drives cannot be used with this tutorial. If the drive is formatted as APFS, or you’re not sure, open Disk Utility, select the drive, and click Erase. For format, be sure to choose Mac OS Extended (Journaled) and click Erase.

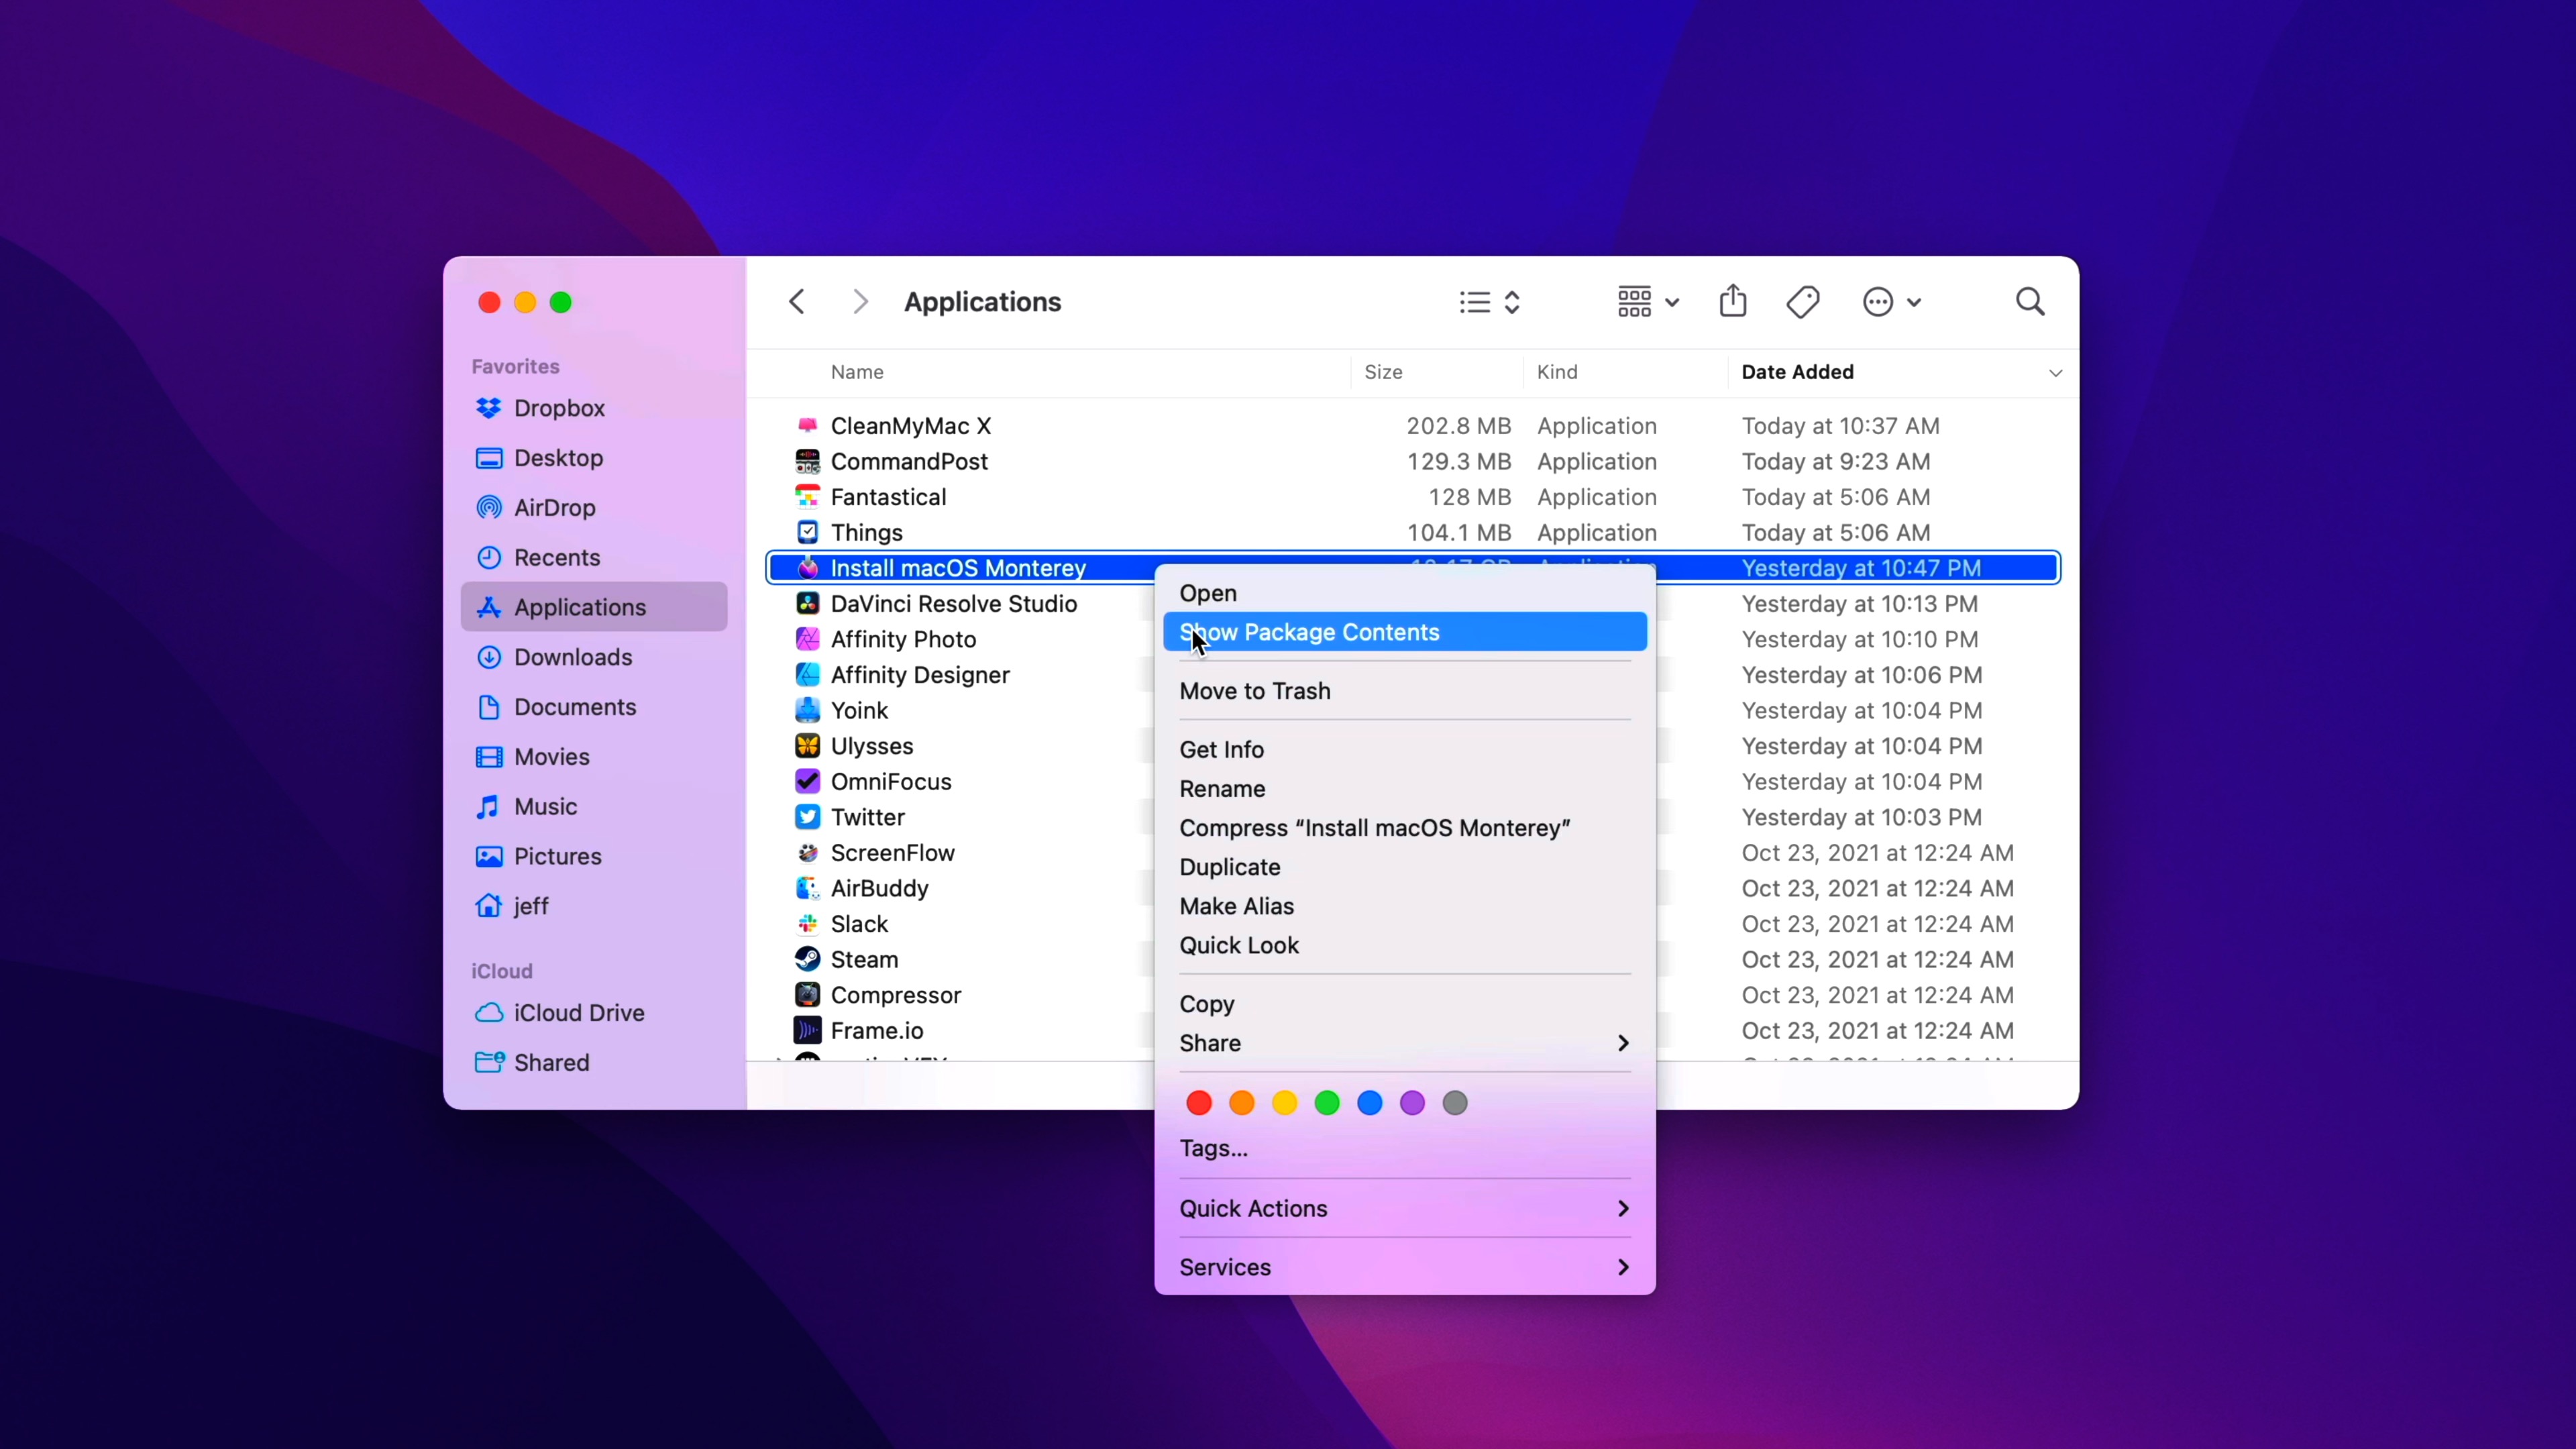
Step 4: Open Finder → Applications. Right-click on Install macOS Monterey → Show Package Contents.
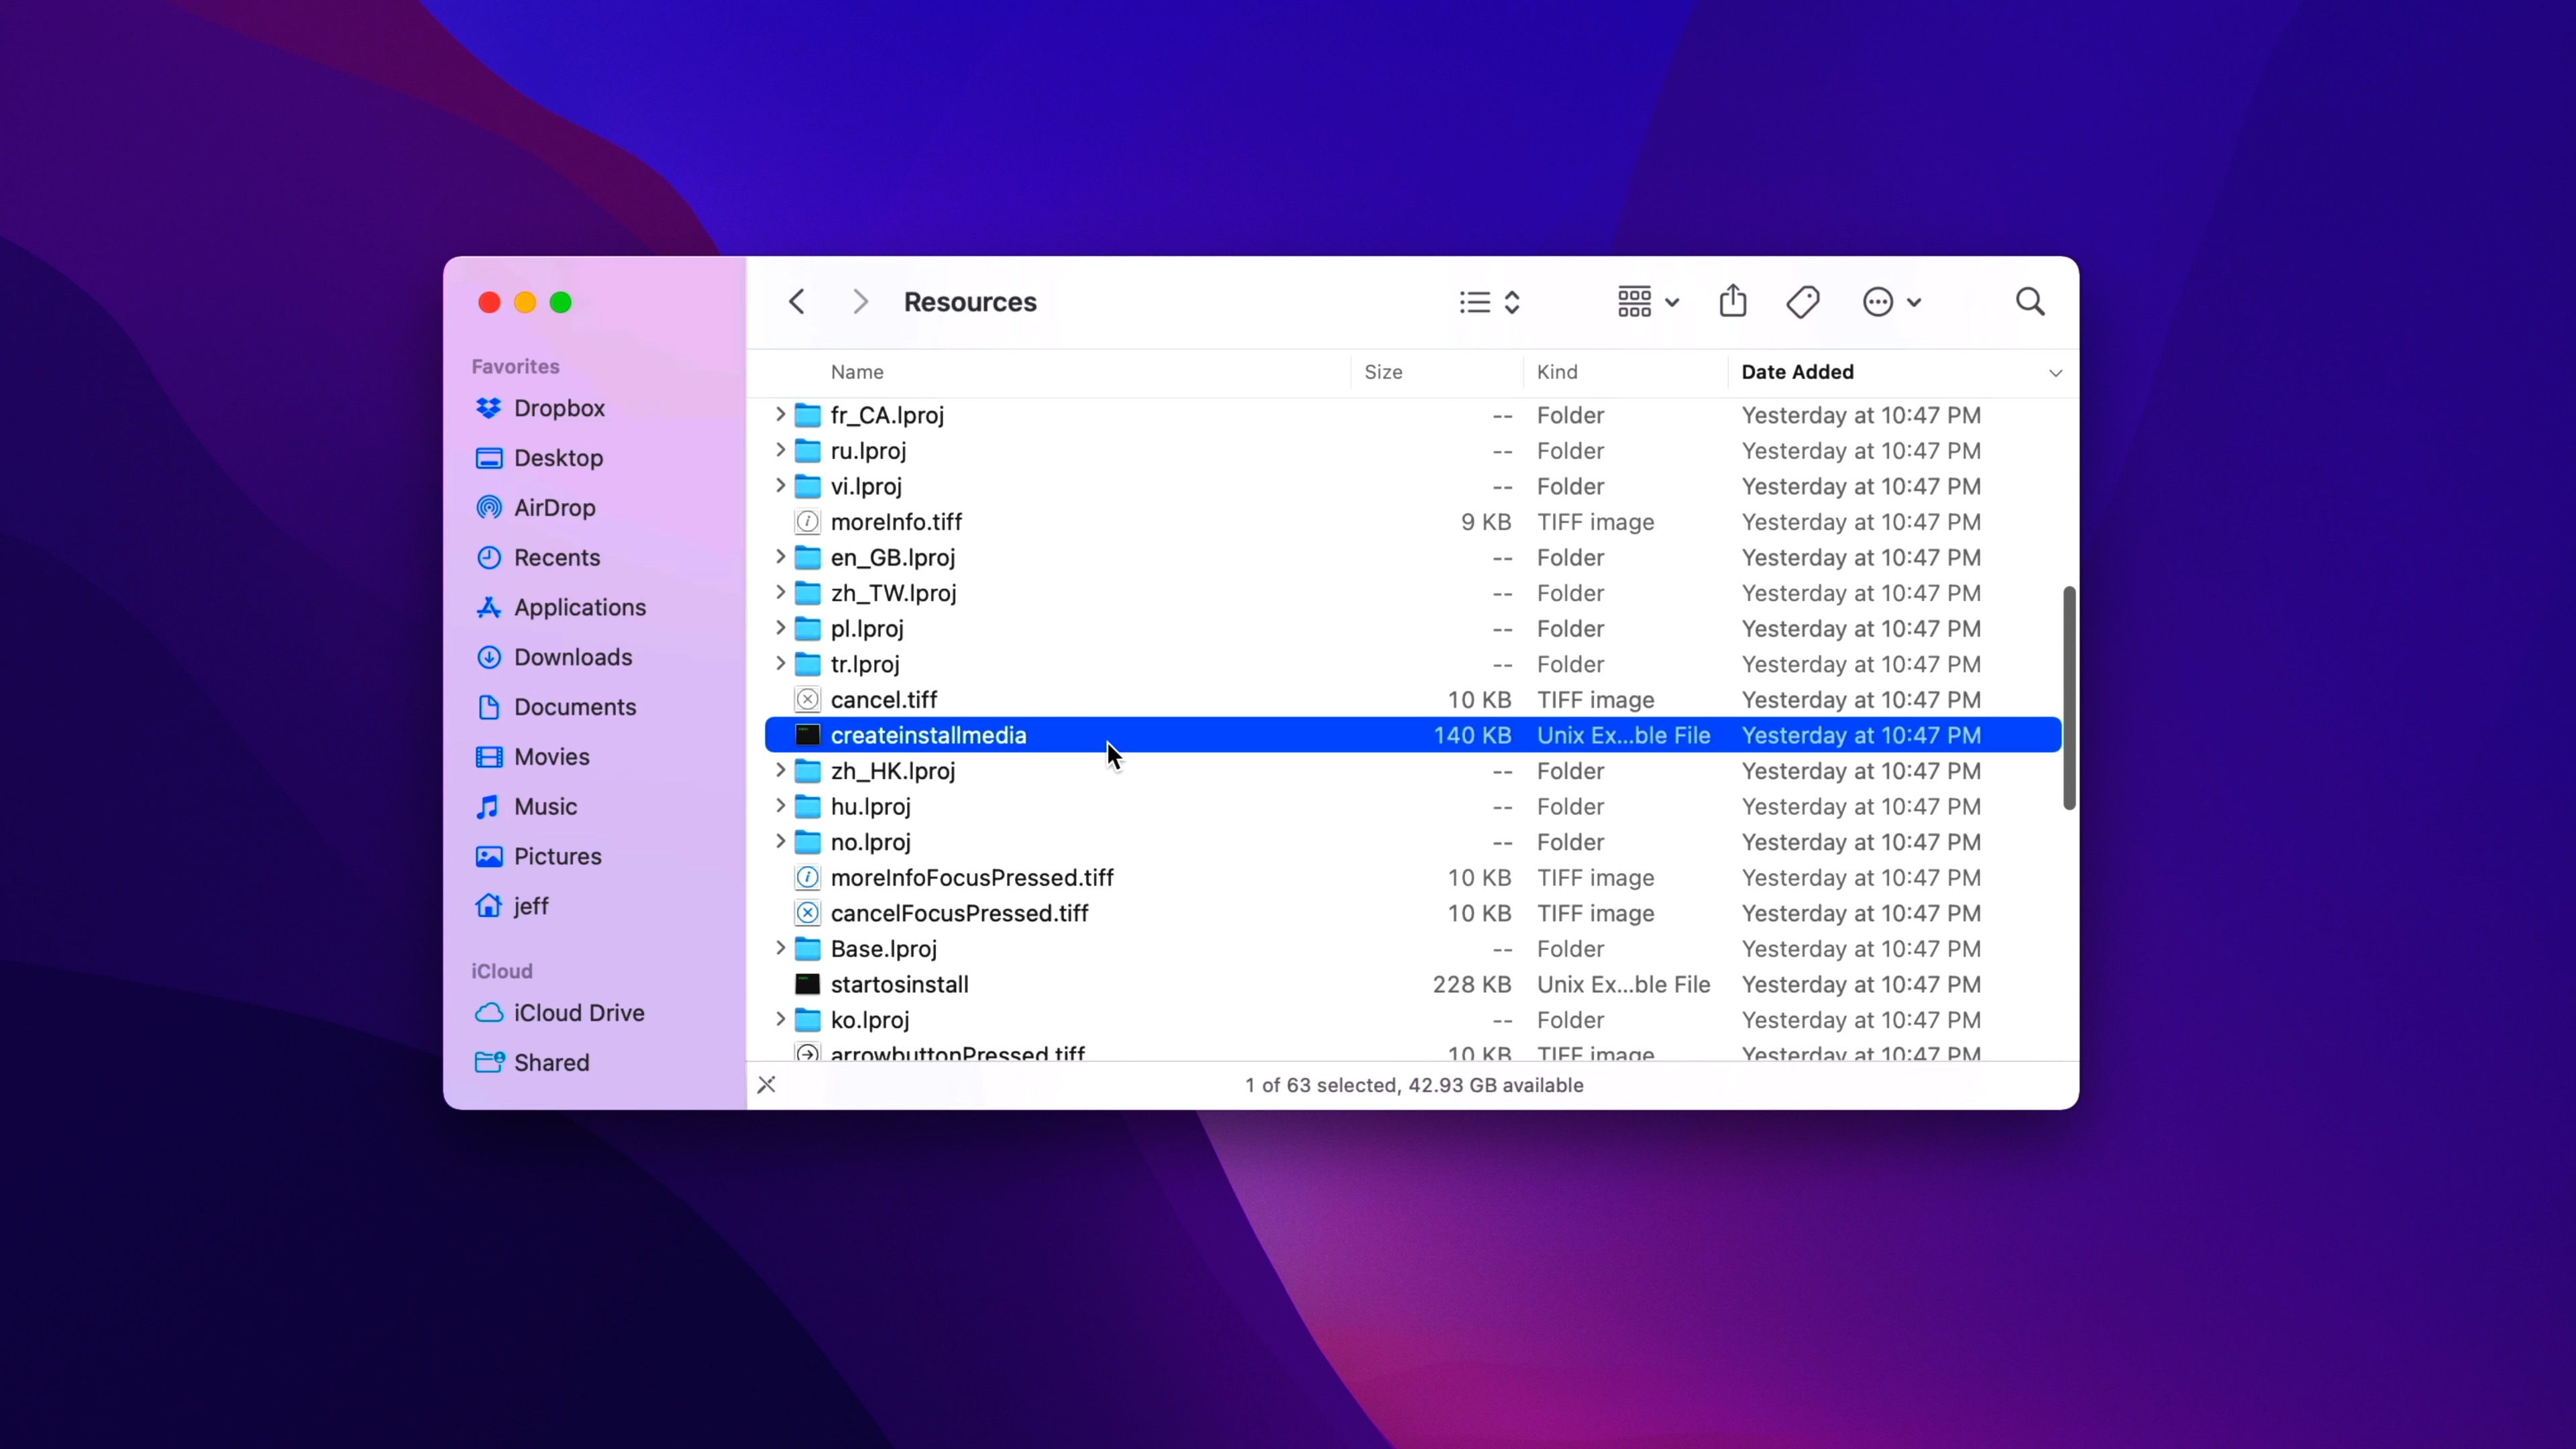
Step 5: Open Contents → Resources.
Step 6: Open a new Terminal window by navigating to Applications → Utilities → Terminal.
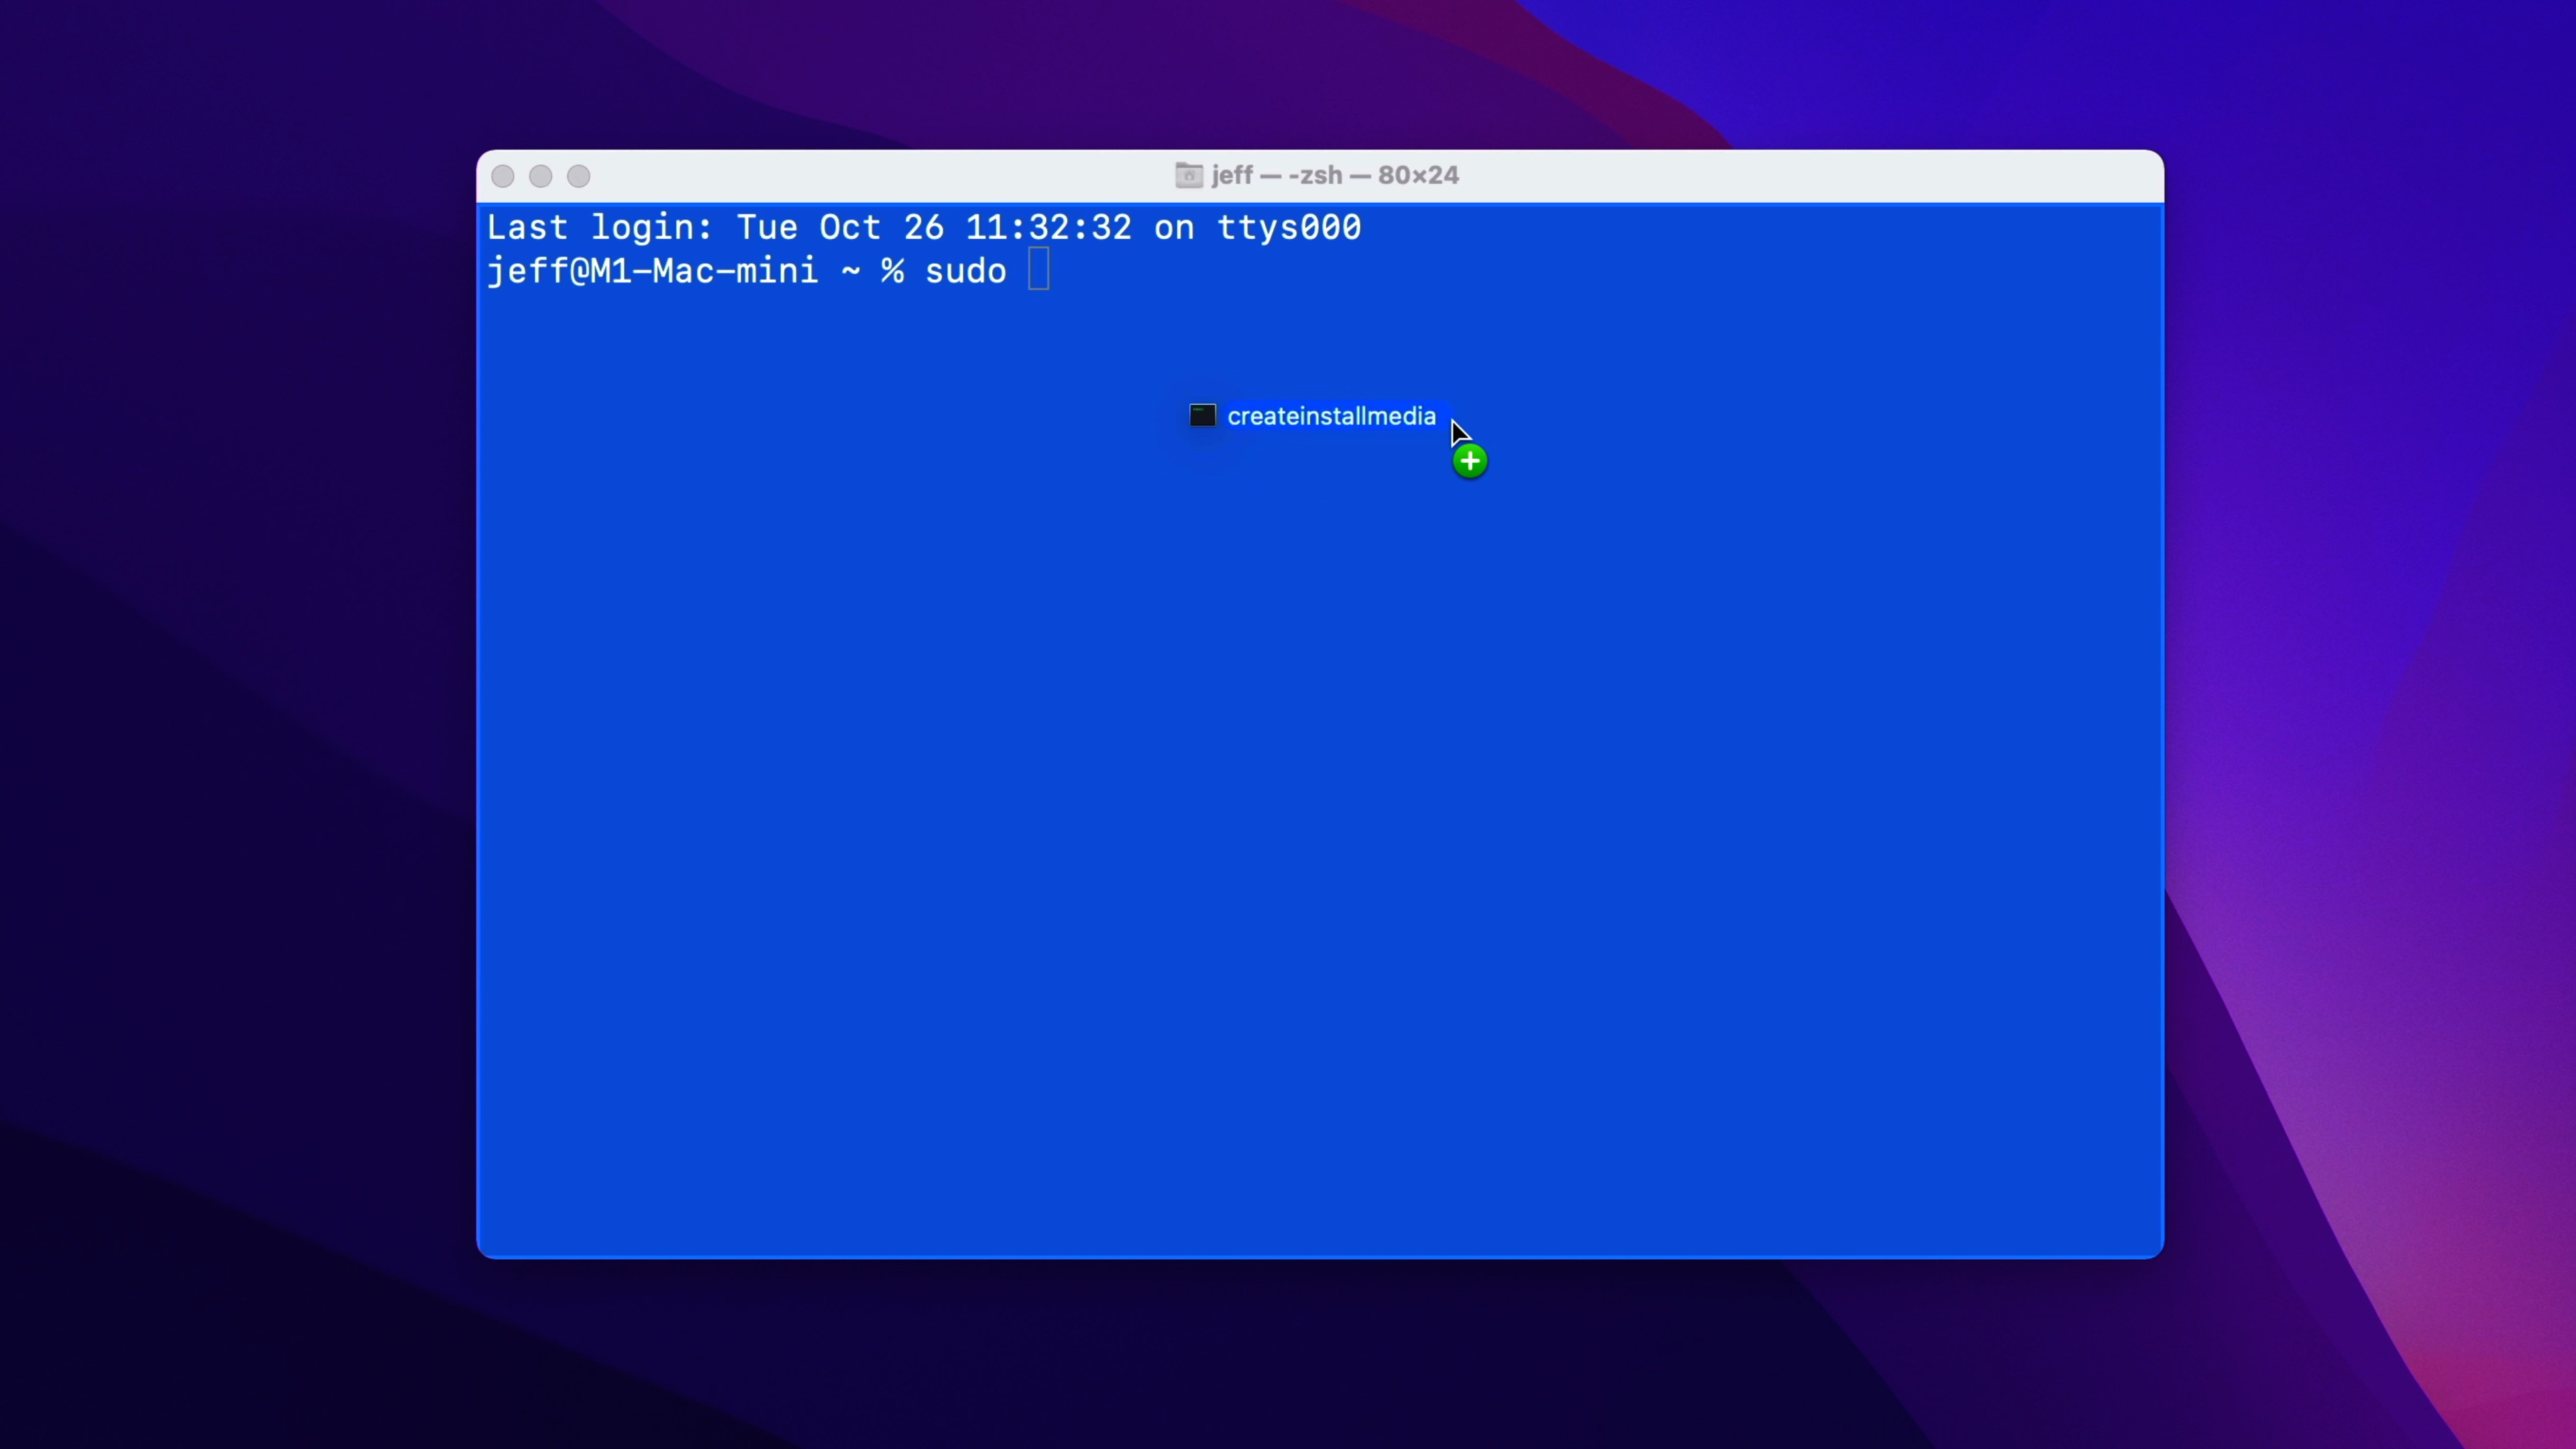
Step 7: Type sudo followed by a space in the Terminal window.

Step 8: Drag createinstallmedia into the Terminal window from the Resources folder opened in Step 5.
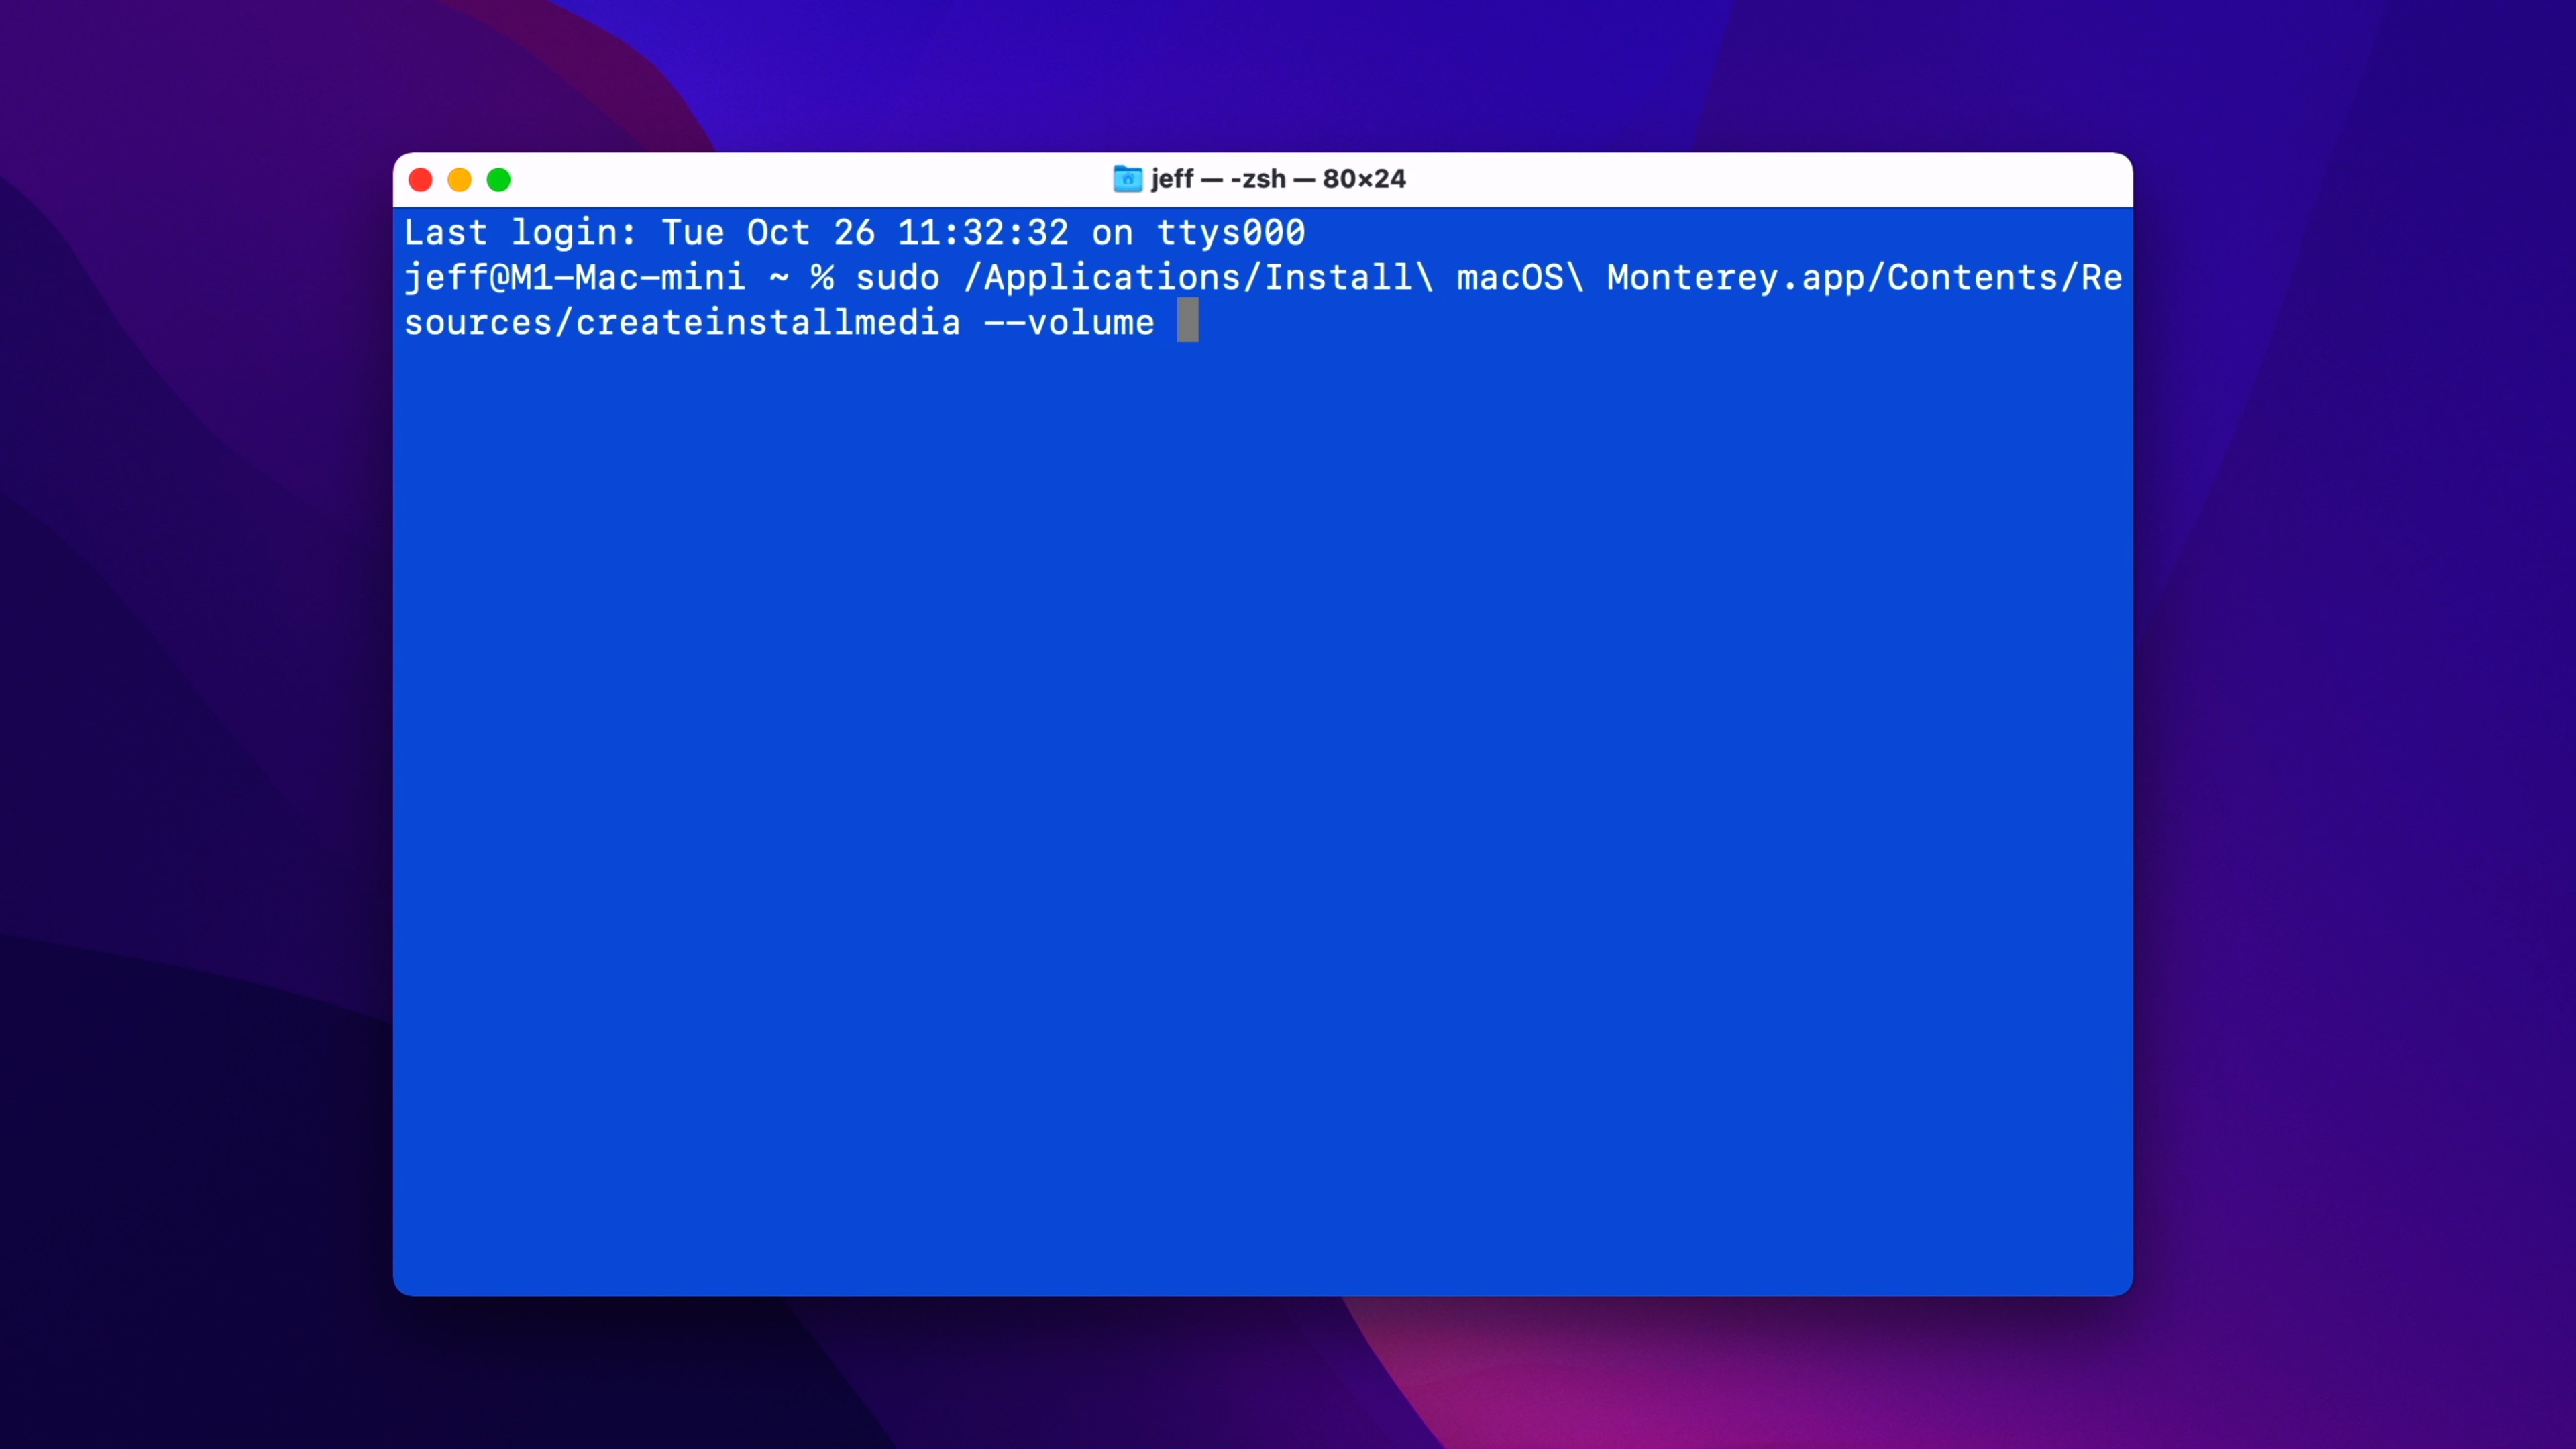
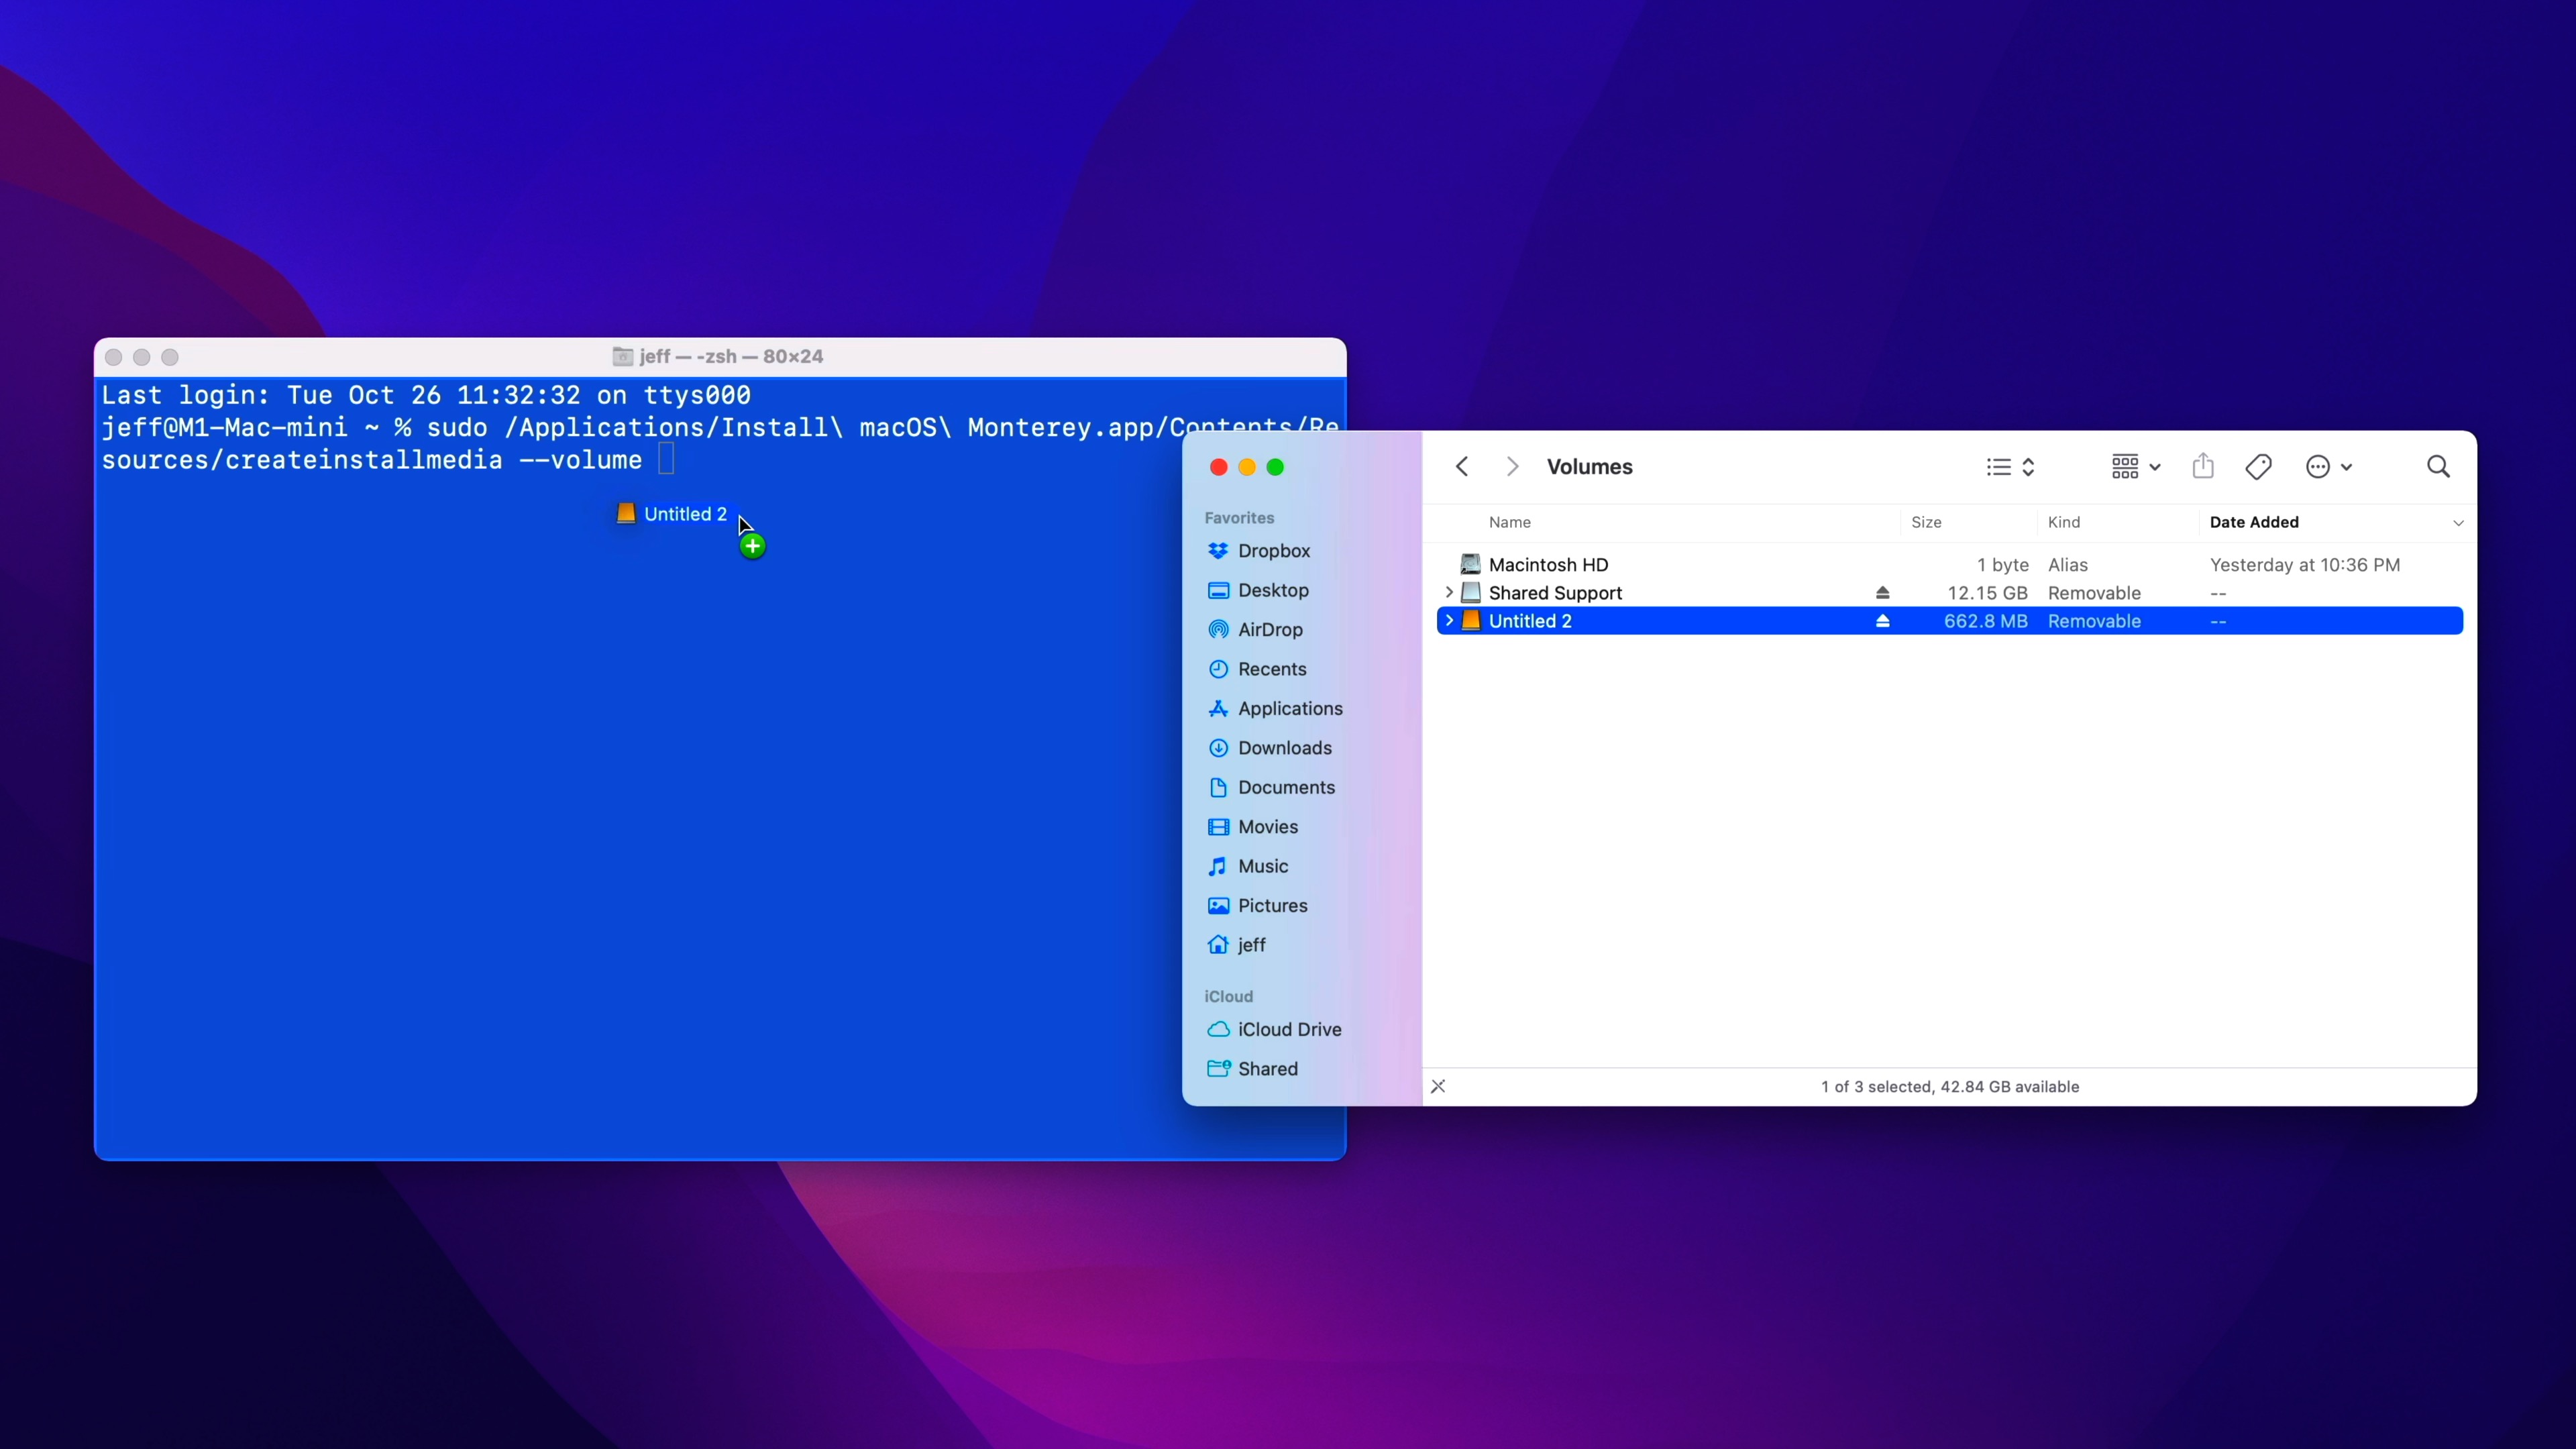
Step 9: Type --volume followed by a space.
Step 10: Open Finder → Go → Go To Folder…
Step 11: Type /Volumes and press Return.
Step 12: Drag the USB drive volume into the Terminal window.
Note: Be very sure to select the correct USB drive, or you risk affecting the wrong drive.
Step 13: Press the Return key on the keyboard to process the full Terminal command and enter your administrator password when asked.
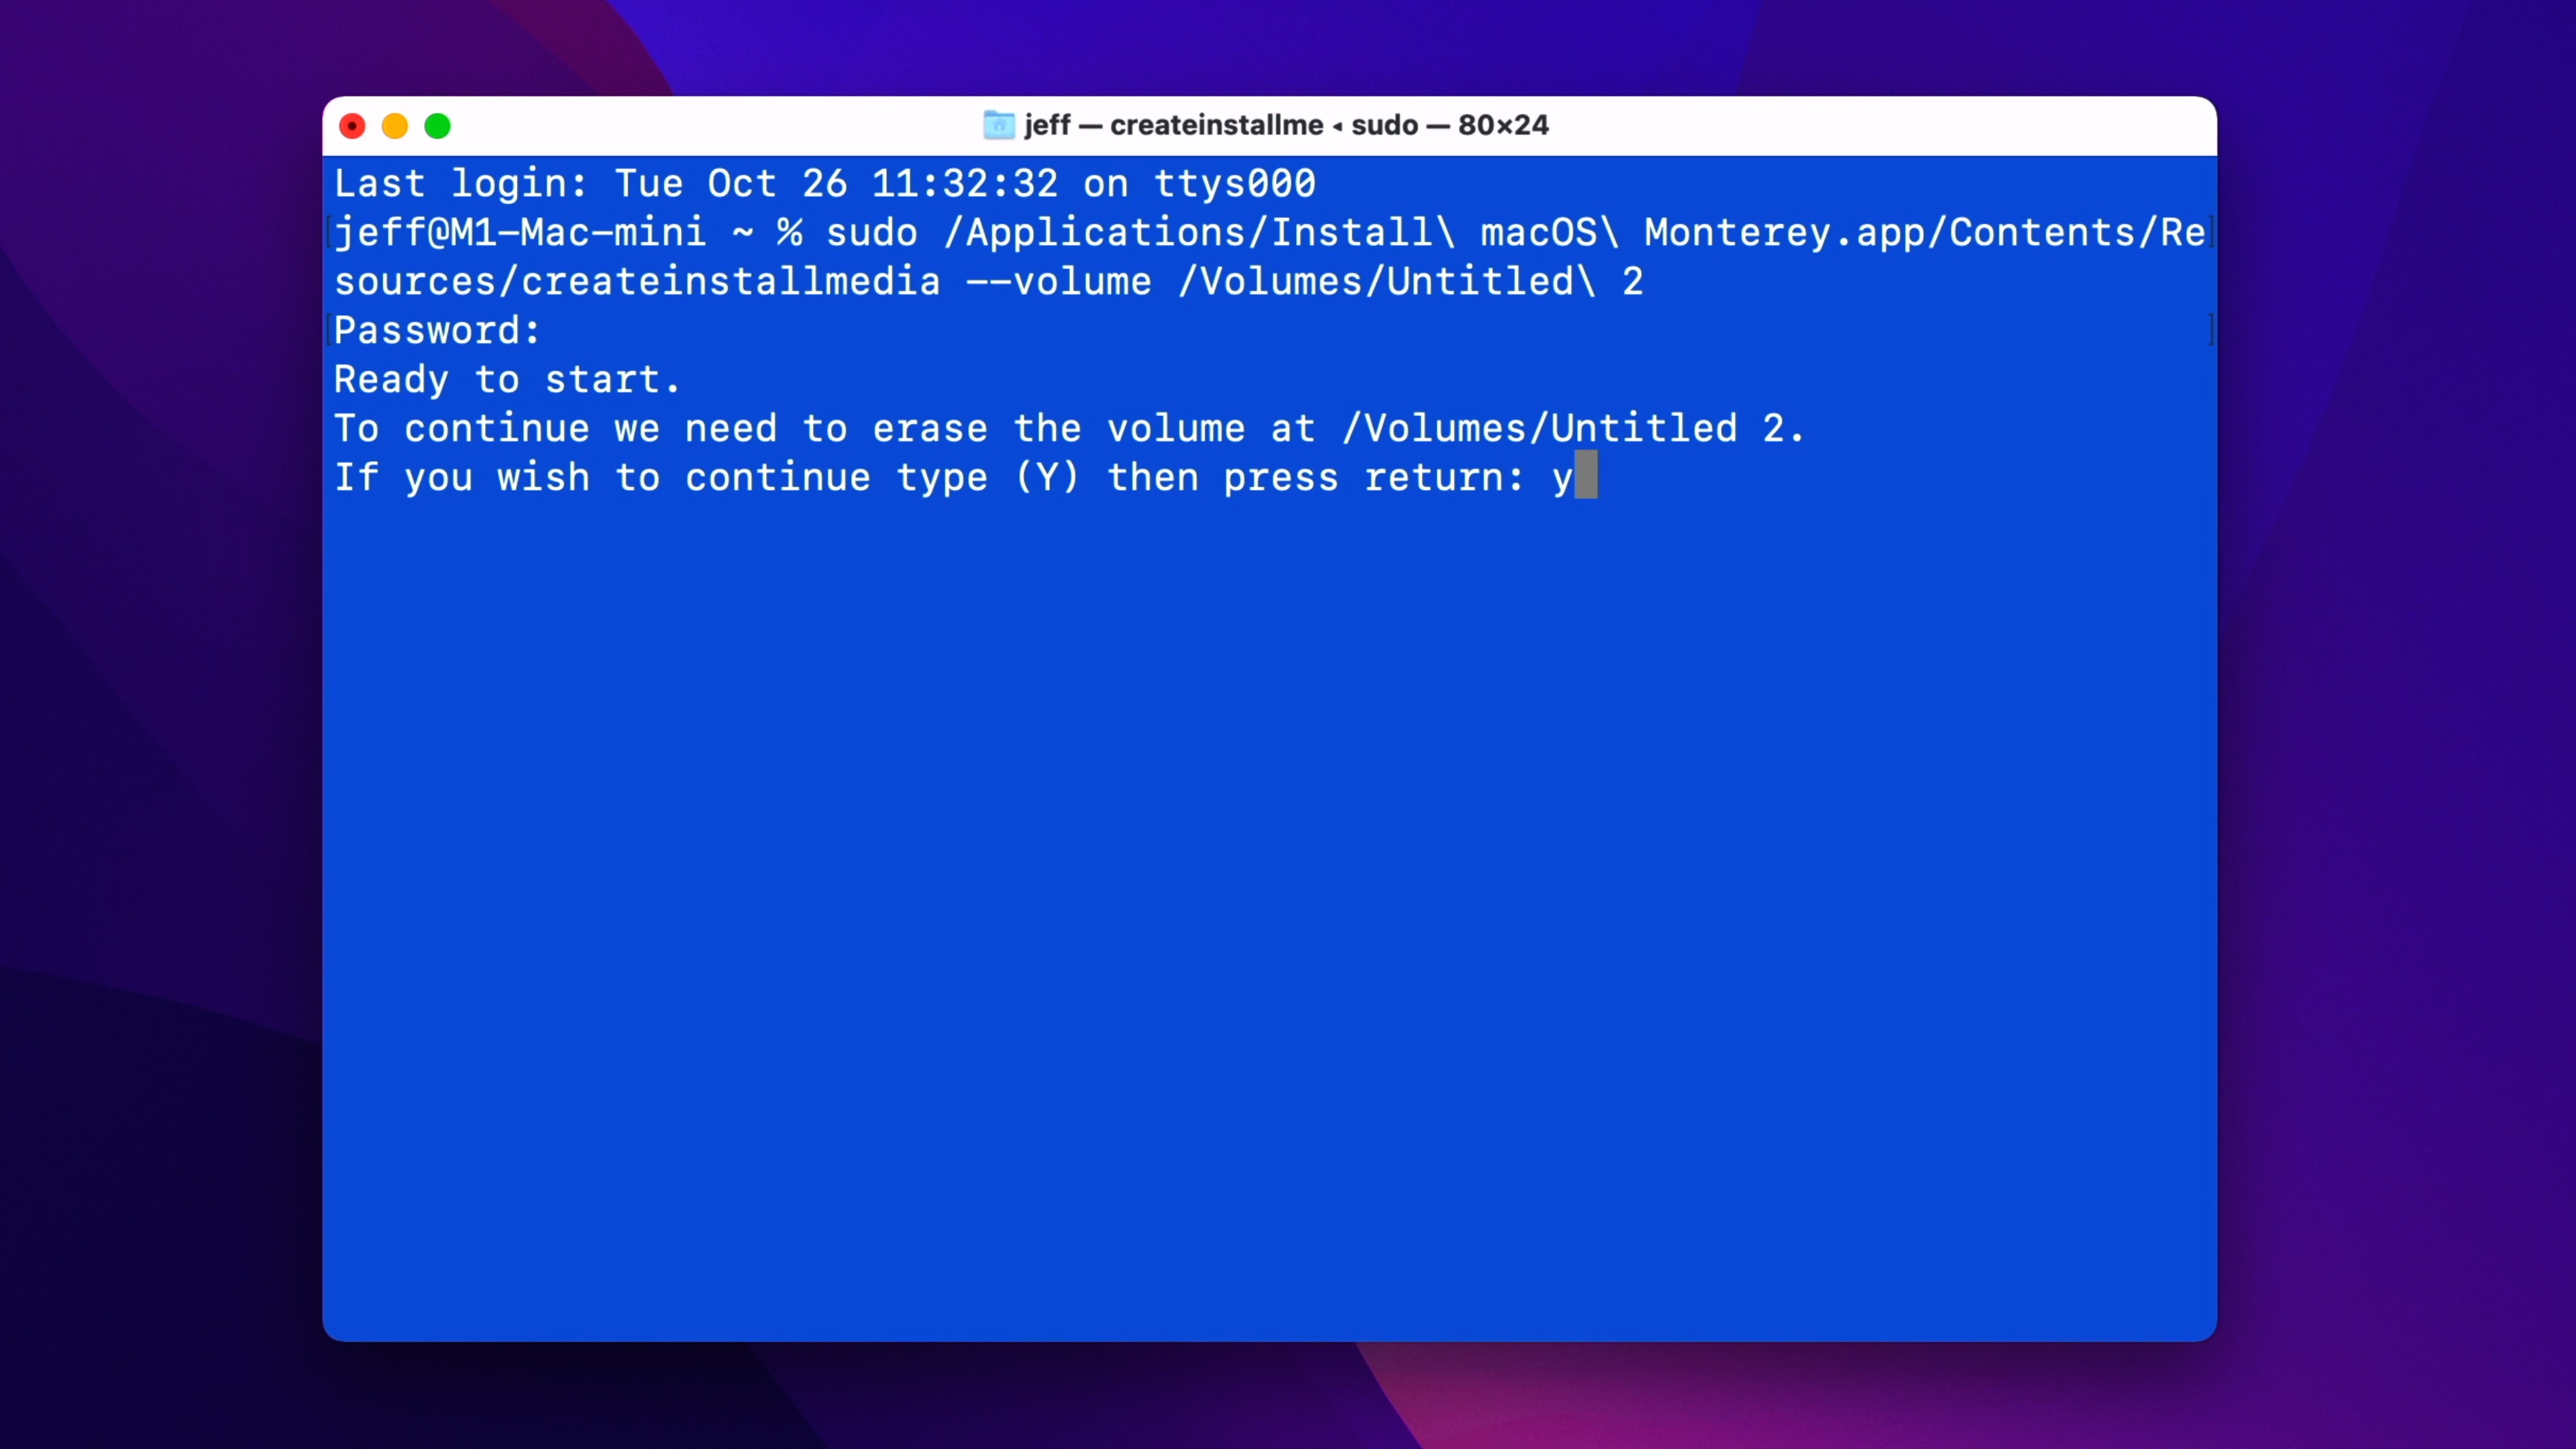
Step 14: When prompted, type a “y,” and press the Return key on you keyboard.
If you haven’t already provided permission, the Terminal utility may ask for access to files on the removable volume. If so, be sure to click OK to allow access.
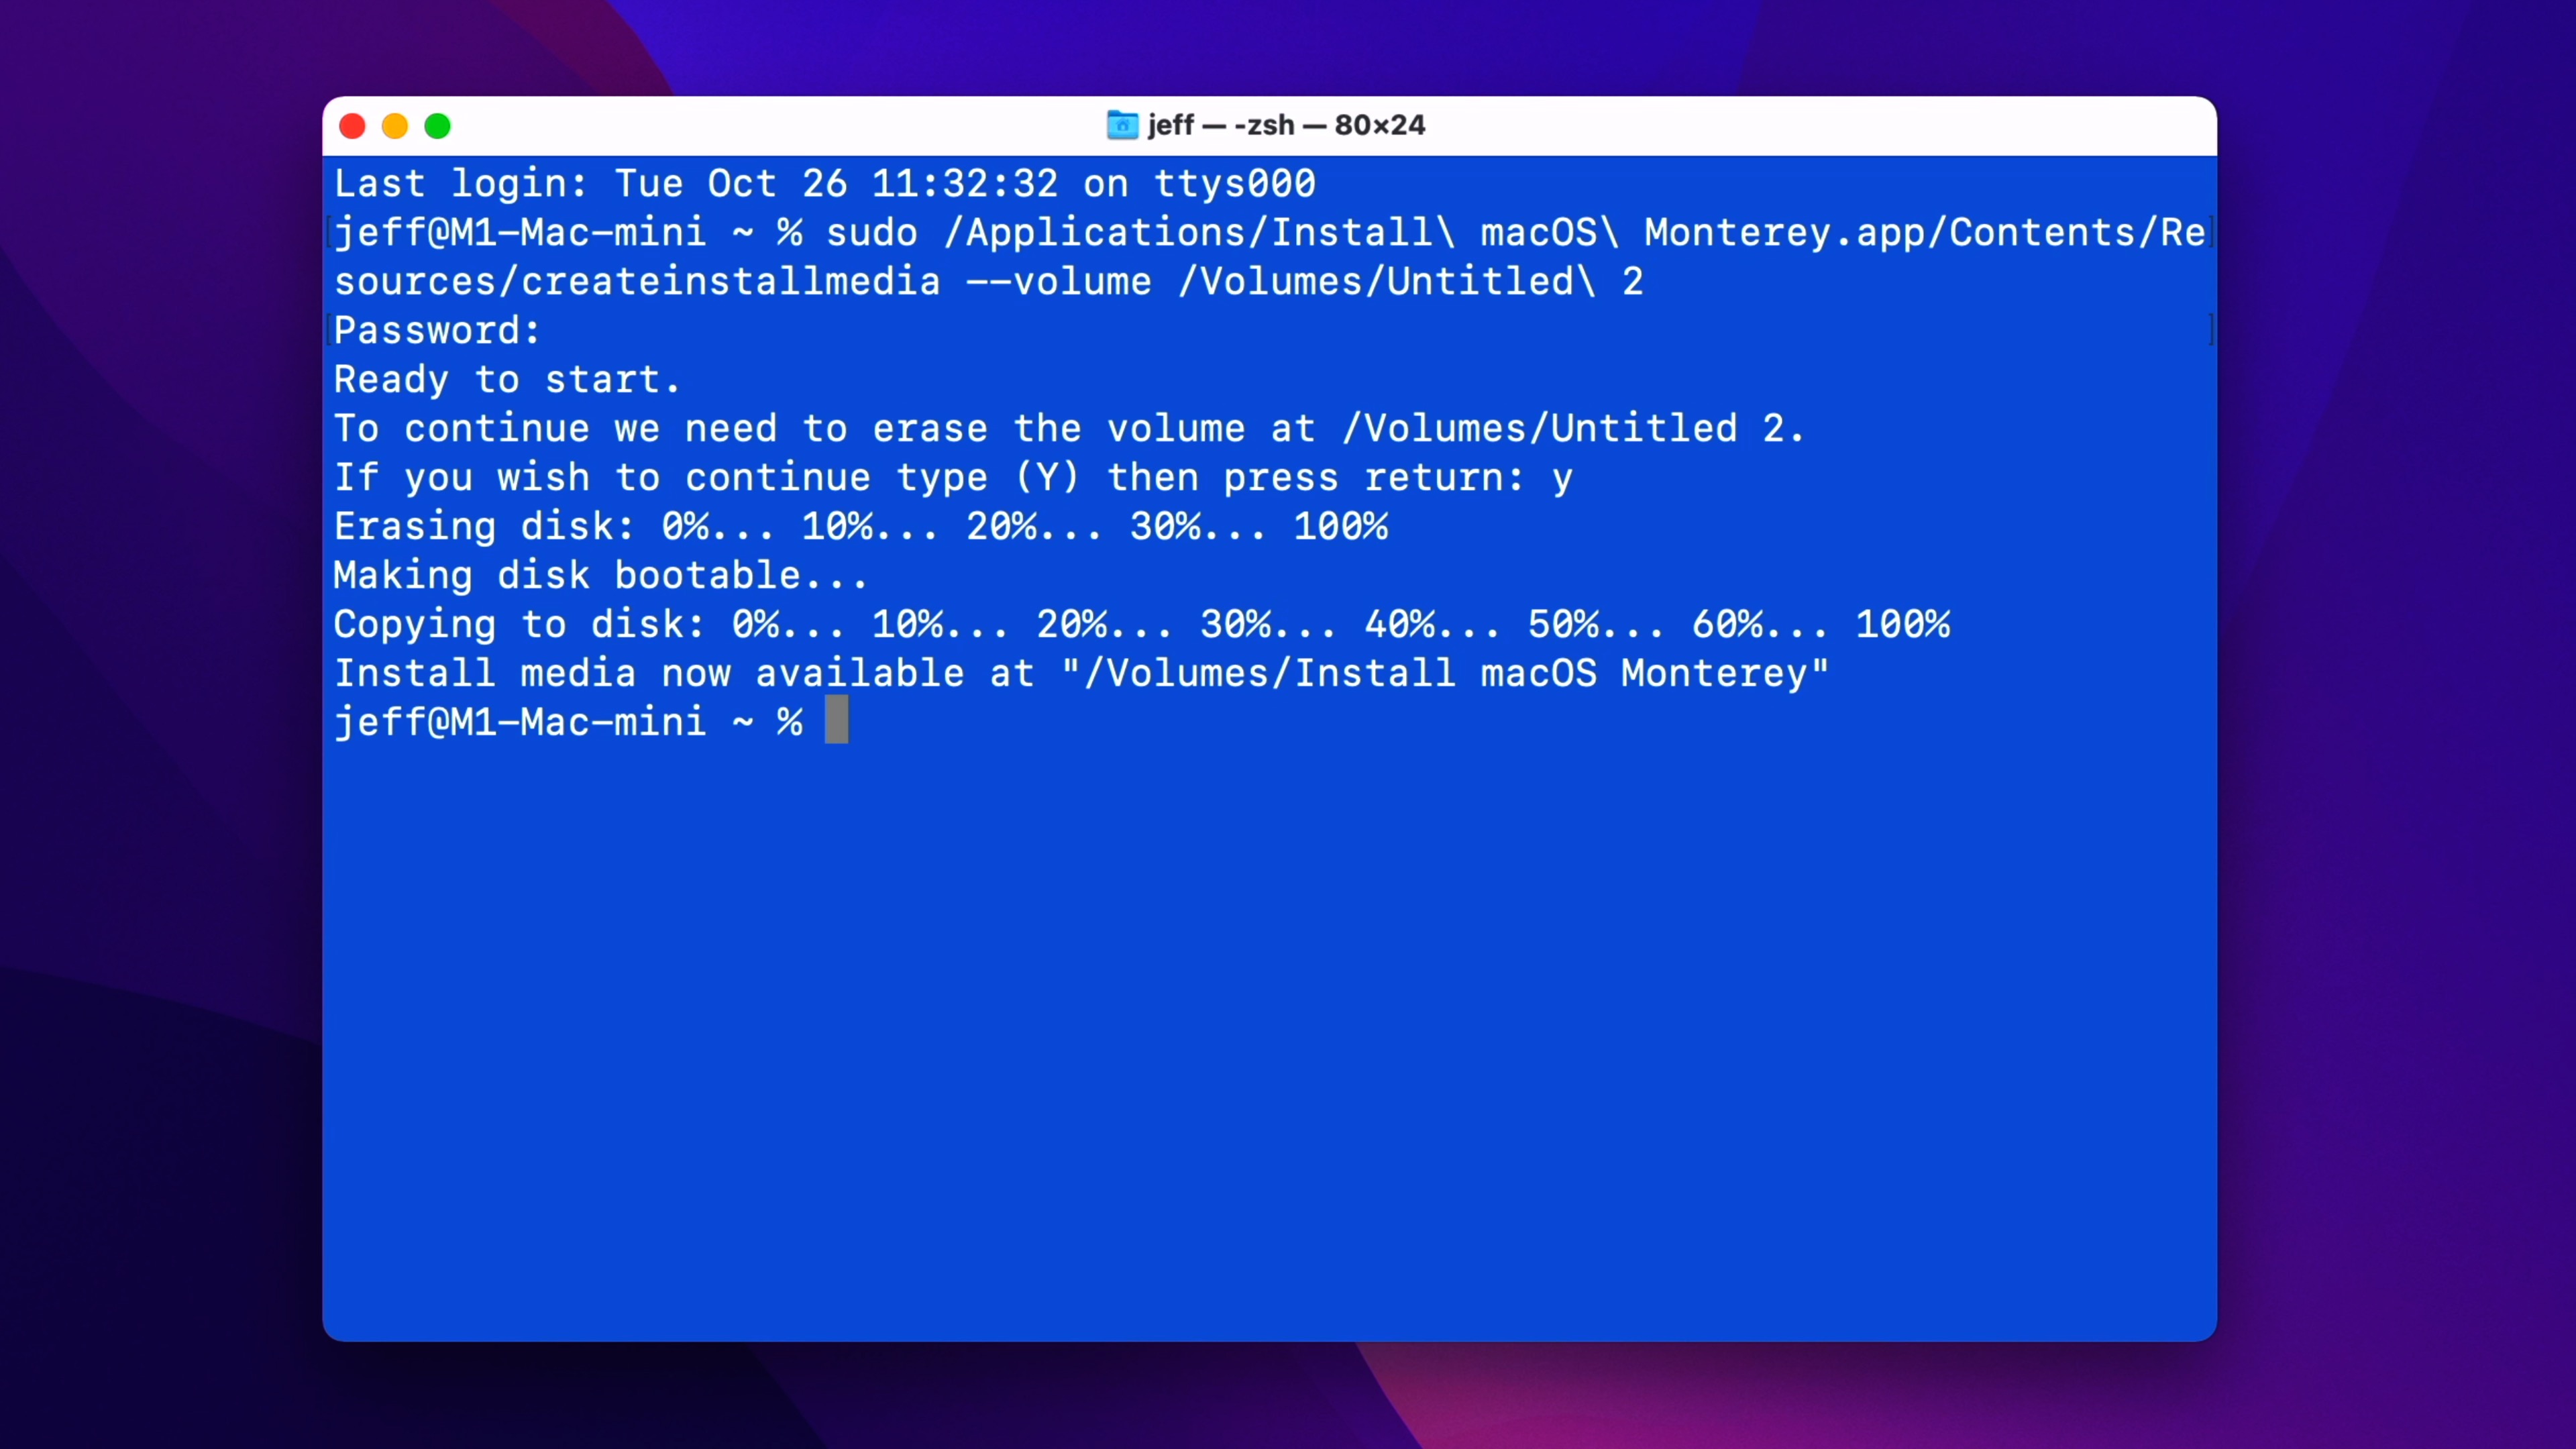
Step 15: The install process will begin by purging the contents of the connected USB drive, making the drive bootable, and copying the installer files to the drive. Because this process takes a few minutes to complete, please be patient.
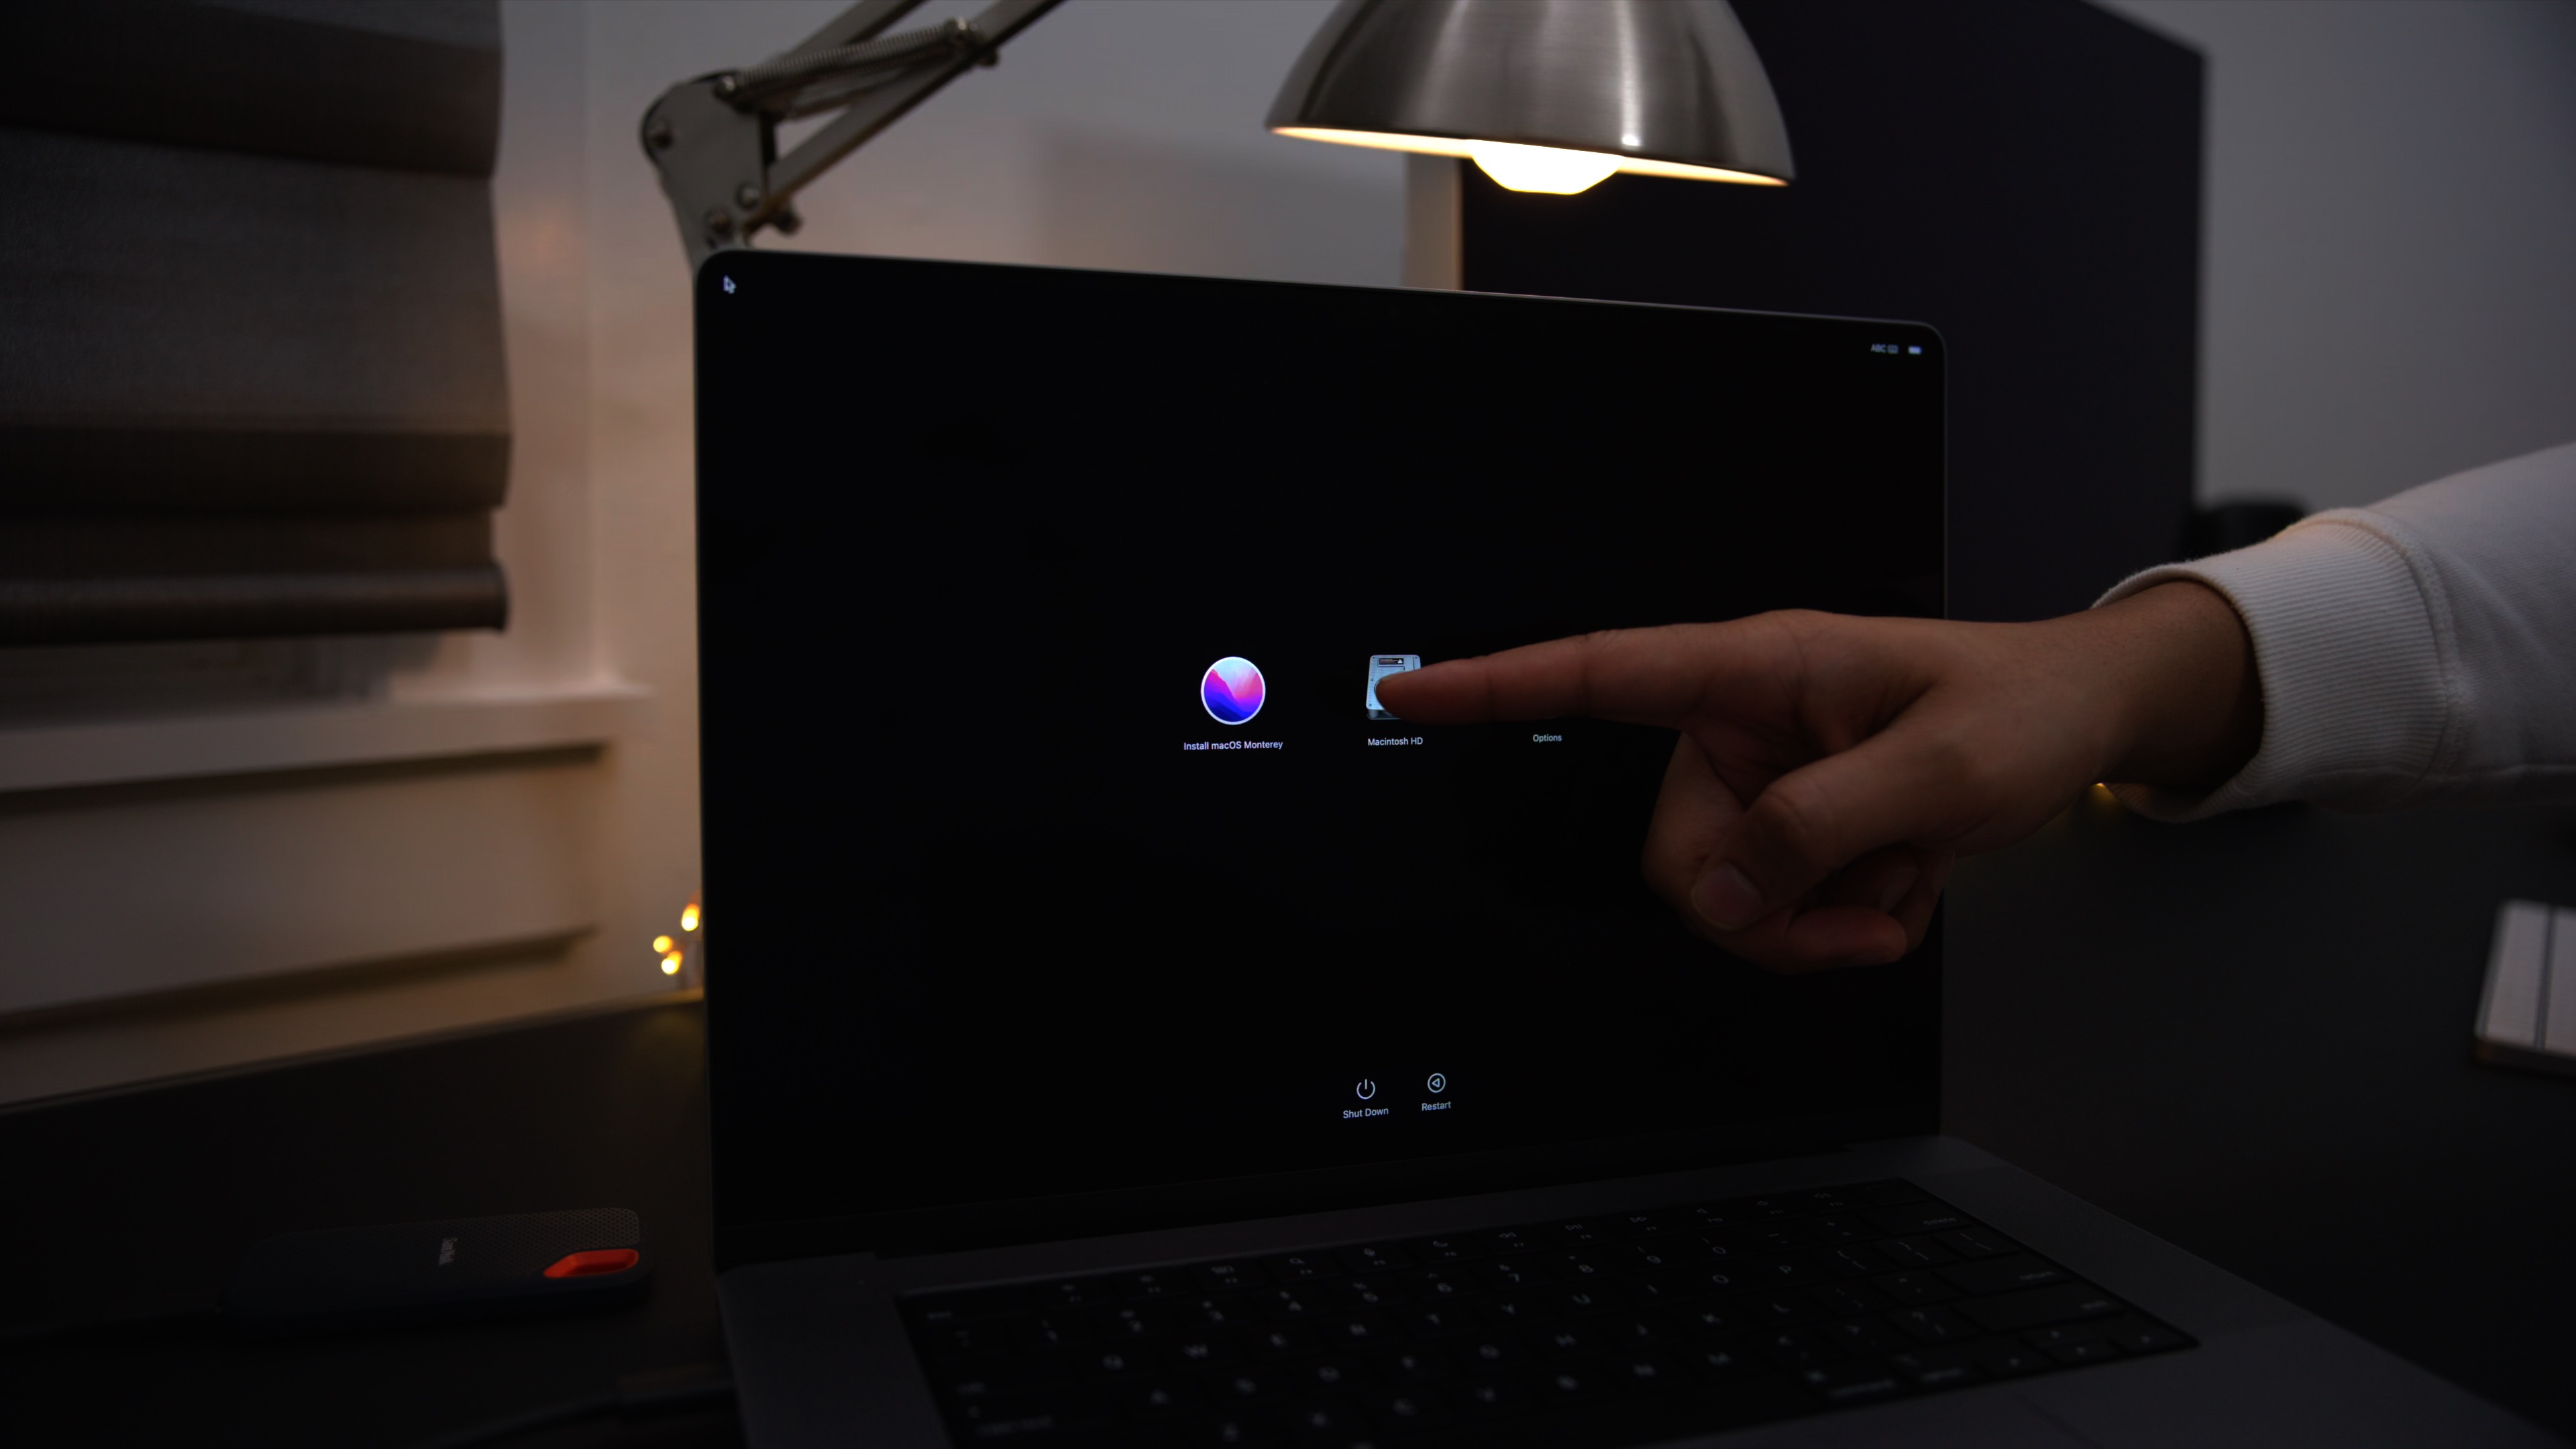
Using the macOS Monterey USB installer
To use the installer on a Mac featuring Apple silicon, shut down your Mac, connect the drive, and press and hold the power button until you see the Apple logo with the words Loading startup options beneath. After a little while, you should see the Install macOS Monterey appear as a startup option.


For Intel-based Macs, connect the USB installer drive, and press and hold the Option key after restarting your computer until you see the startup selector.
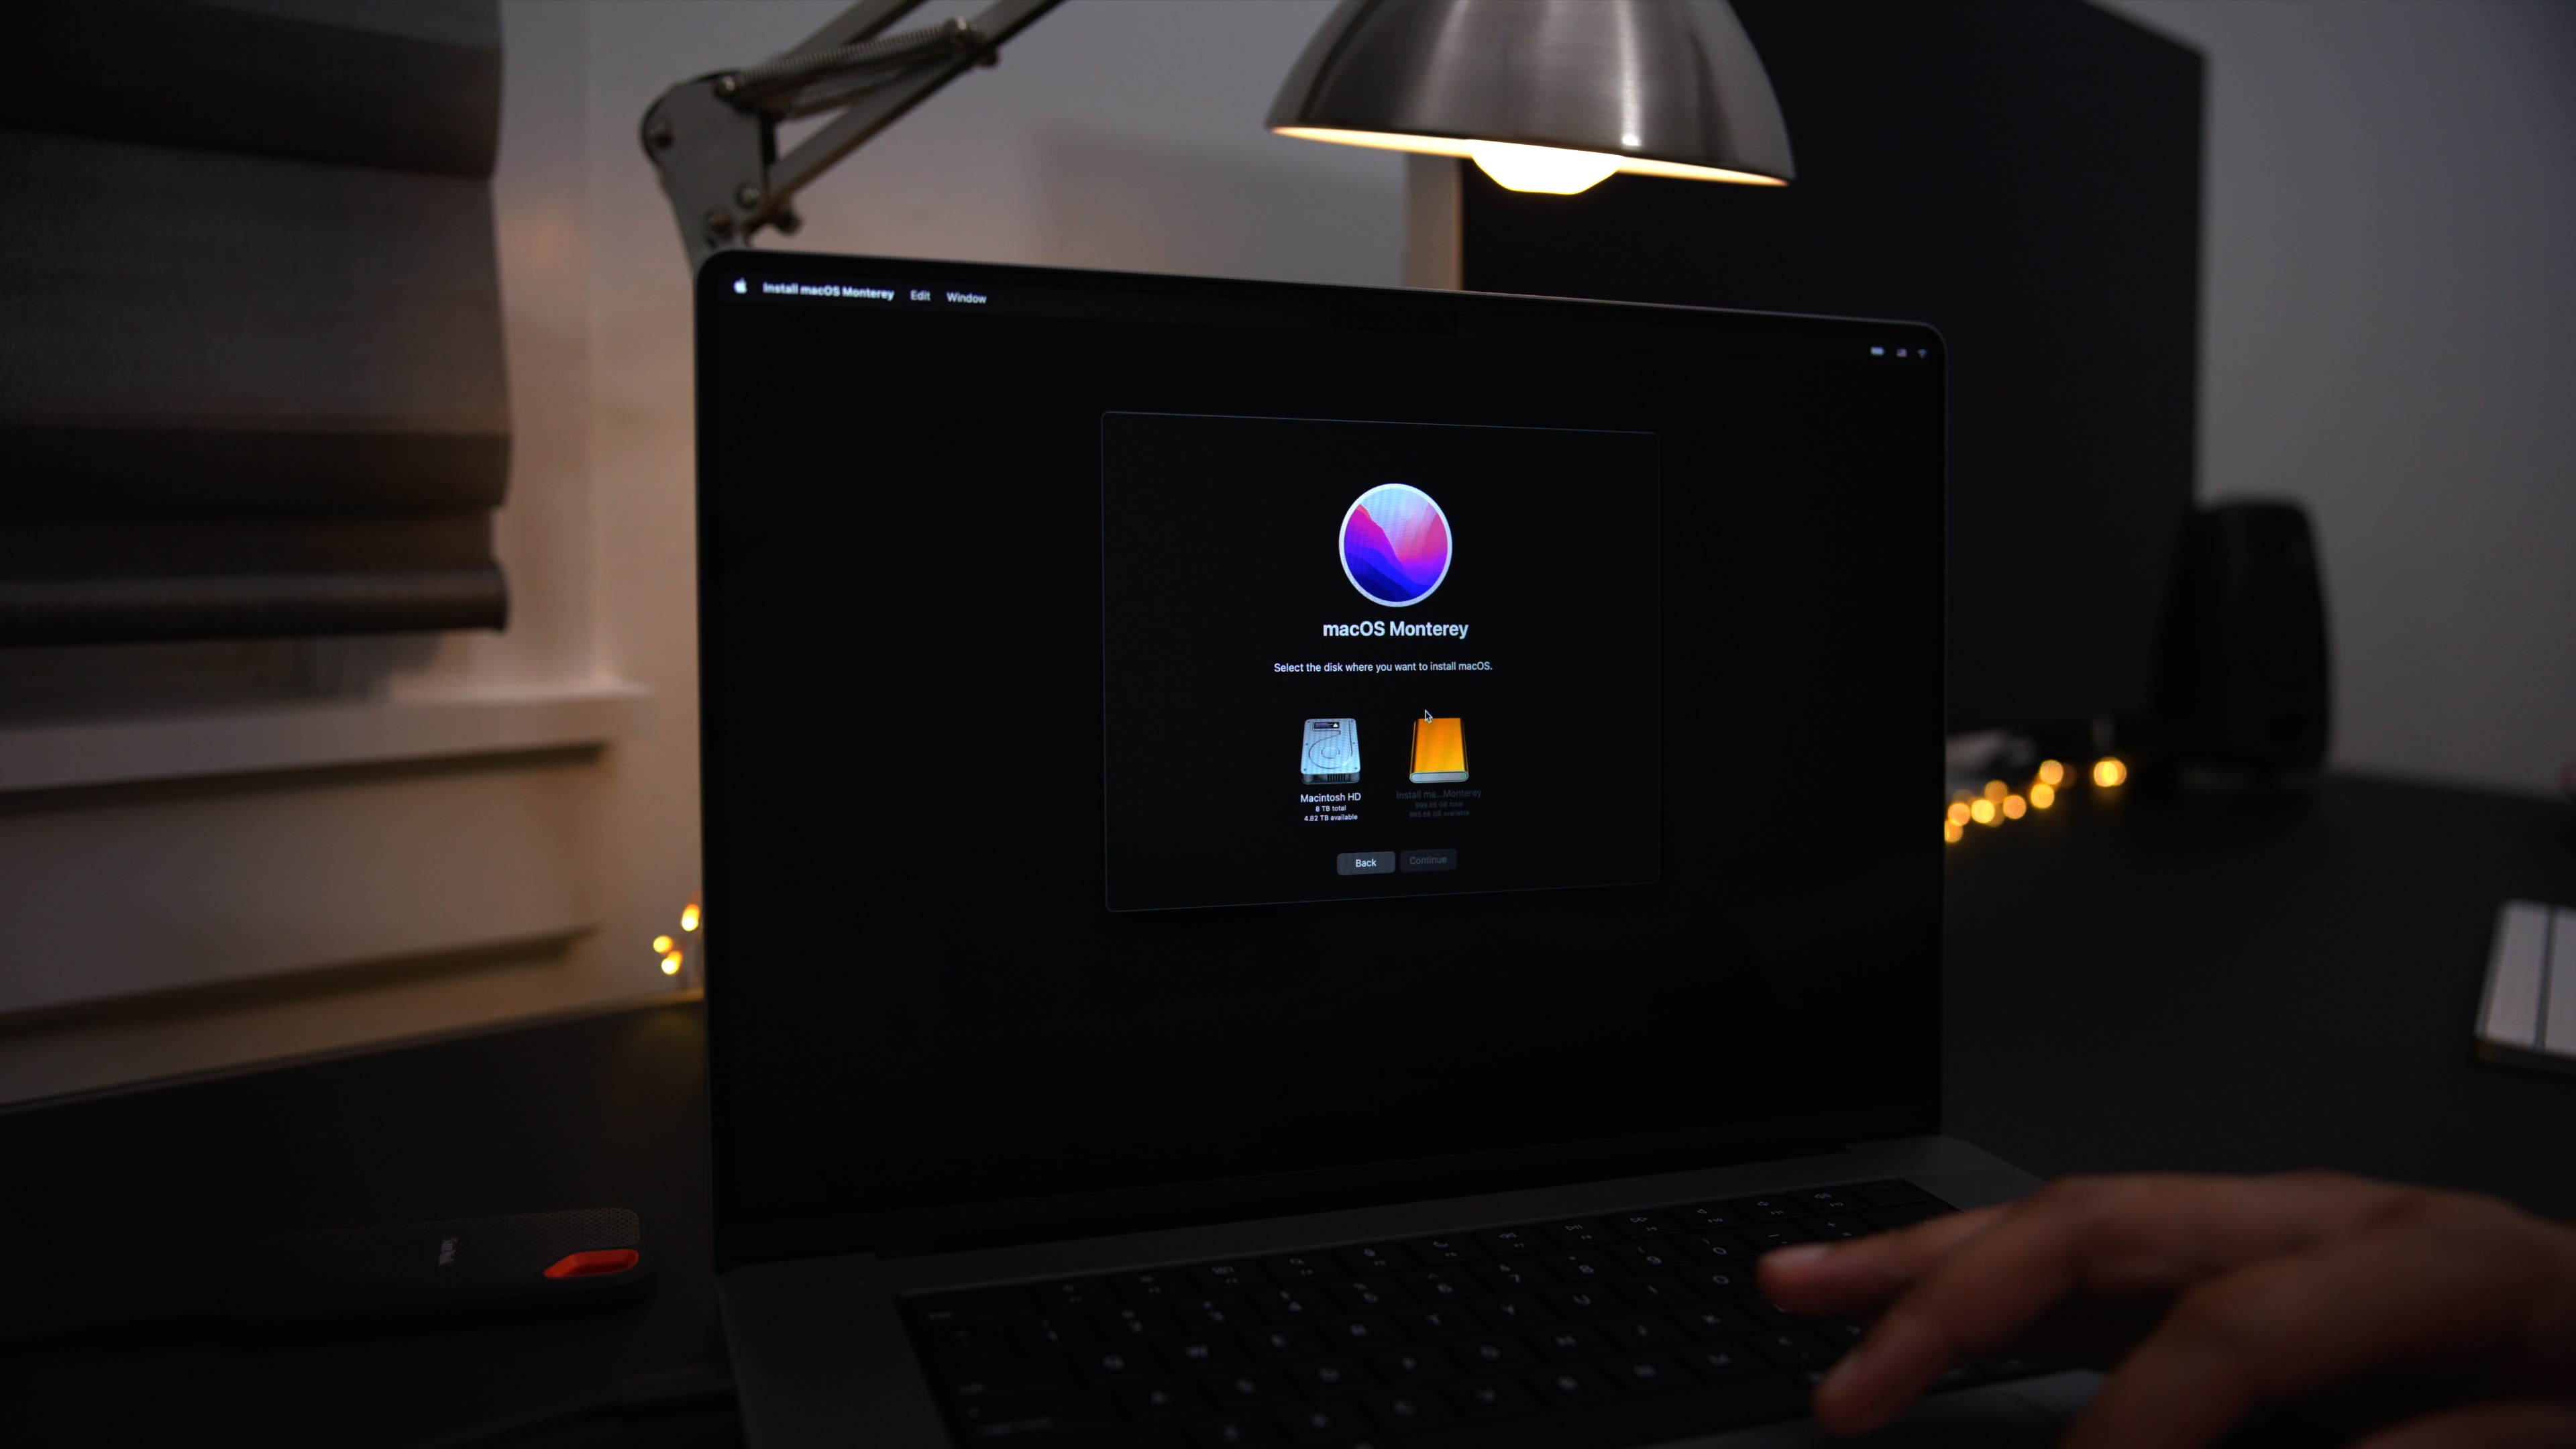
When installing macOS Monterey, you’ll have several options at your disposal, such as:
- Upgrading your existing macOS installation, going from macOS Big Sur or previous versions of macOS to macOS Monterey.
- Erasing your existing installation and start from scratch.
- Creating a separate APFS volume and install macOS Monterey there if you’d like to keep macOS Big Sur or previous version of macOS around. Read and/or watch our tutorial about creating separate APFS volumes for macOS for more details.
9to5Mac’s take
Although there are other options available for reinstalling macOS, such as the Mac App Store, or macOS Recovery, I like to keep a macOS USB installer handy, especially because I’m usually managing multiple Mac computers and do upgrades for friends and family members. Sound off in the comments below with your thoughts.
FTC: We use income earning auto affiliate links. More.


Comments