If you are moving from an old Synology to a new Synology NAS, or just want to keep two NAS in sync at all times, the simple-yet-effective solution I’ve found is to use Shared Folder Sync with rsync. You can set this up easily in the Synology web control panel. Here’s how.
I have recently upgraded from a two-bay Synology DS720+ to a four-bay Synology DS920+ model.The upgrade gives me a bit of extra performance and two extra drive bays for storage expandability. A NAS is a great companion to an Apple household as it can act as a Plex media server for all your devices, run HomeBridge for advanced HomeKit automation, back your Macs with Time Machine, and more. A full review of the DS920+ is coming soon.
However, upon receiving the new unit, my issue was how to copy across the data from the old NAS to the new one. I want to keep the old NAS in operation, so I couldn’t simply take out the hard drives and physical move the data that way. I also wanted a solution that could be performed in the background whilst the old NAS remained actively in use (our family relies on it for Plex access and other services).
I also wanted the ability to re-sync data in the future, if I added files to the old NAS before I had fully migrated to the new box. Connecting via physical cable wasn’t really an option, and it was unclear how that would be achieved.
The solution I found was to use the ‘advanced’ rsync service with Synology’s integrated Shared Folder Sync app. This turned out to be a very elegant and simple solution, and could be set up autonomously using the web UI, even though the steps were slightly non-obvious …
How to set up Shared Folder Sync from one NAS to another
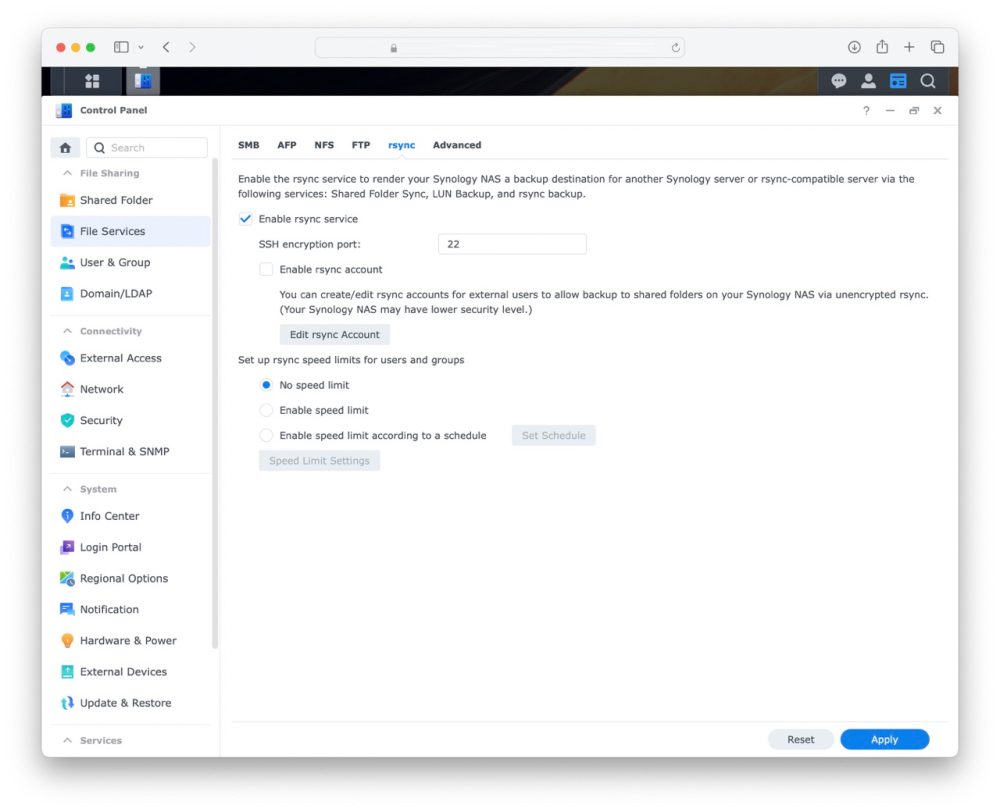
1. Log into the Synology DiskStation web portal on the new NAS, that’s the destination you want to copy/sync files to. Go to Control Panel -> File Services -> rsync and enable the rsync service.
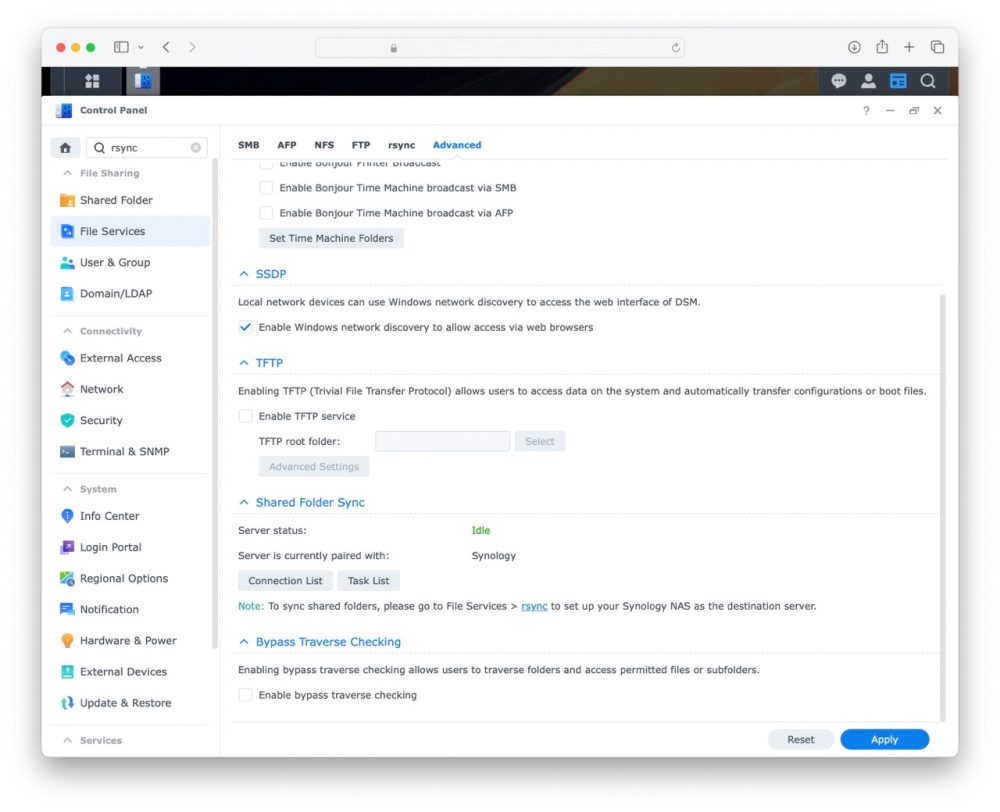
2. Log into the Synology DiskStation web portal on the old NAS, the one with the files to copy. Navigate to Control Panel -> File Services -> Advanced and scroll down to Shared Folder Sync.
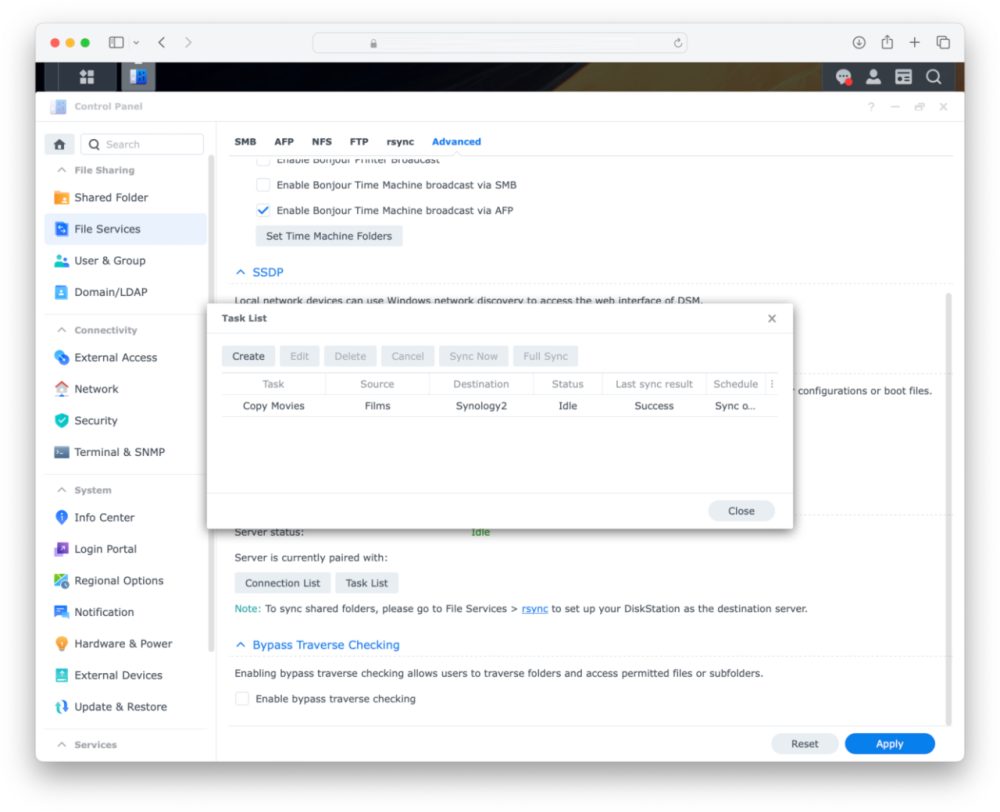
3. Click the Task List button and press Create. Select the source shared folder you want to copy. NOTE: If the directory/file names match with the destination, they will be renamed so they don’t clash with the sync process.
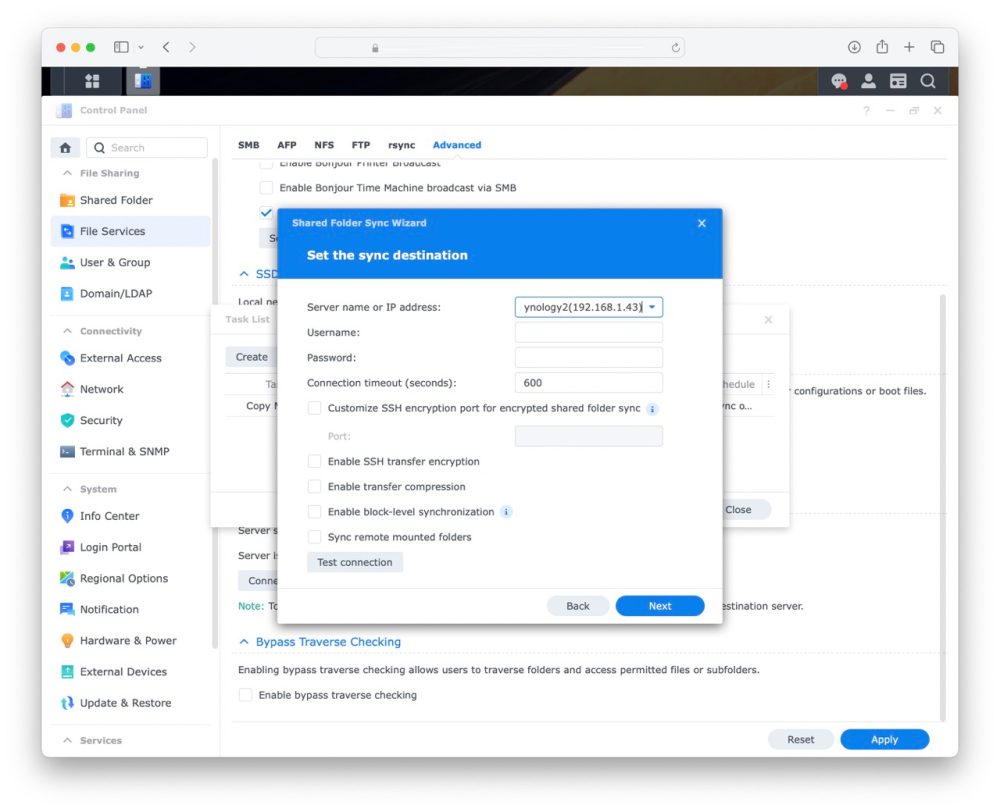
4. Follow the steps by pressing the Next button. In sync destination screen, the Synology should automatically detect the new Synology on your network, so you can simply select that and enter your login credentials.
… And that’s it! The files and folders will automatically start syncing over the network to the new NAS. If you add files later to the source, those will also get automatically copied across to the destination. To reduce traffic congestion on your local network, you can optionally configure the task to only run on a schedule at certain times of the day (like at night).
FTC: We use income earning auto affiliate links. More.


Comments