I’ve been a long time user of Synology NAS products, having first reviewed them on 9to5Mac in 2016. At the end of the last year upgraded to a 4-bay DS920+. Upgrading from a 2-bay to a 4-bay model has unlocked even more use cases for me, but I still get the impression that to most people, a NAS is a scary and uninviting concept.
Hopefully, in this post, I can highlight how a NAS can dramatically enhance your Apple experience, and that the whole venture is a relatively straightforward thing to integrate in your life, and get ongoing value …
What is a NAS?
Part of the apprehension I see when people mention this stuff is that the acronym itself, NAS, immediately makes the technology sound a lot more complicated than it really is. NAS stands for network-attached-storage, dating back to the days when a server mainframe would take up a whole room.
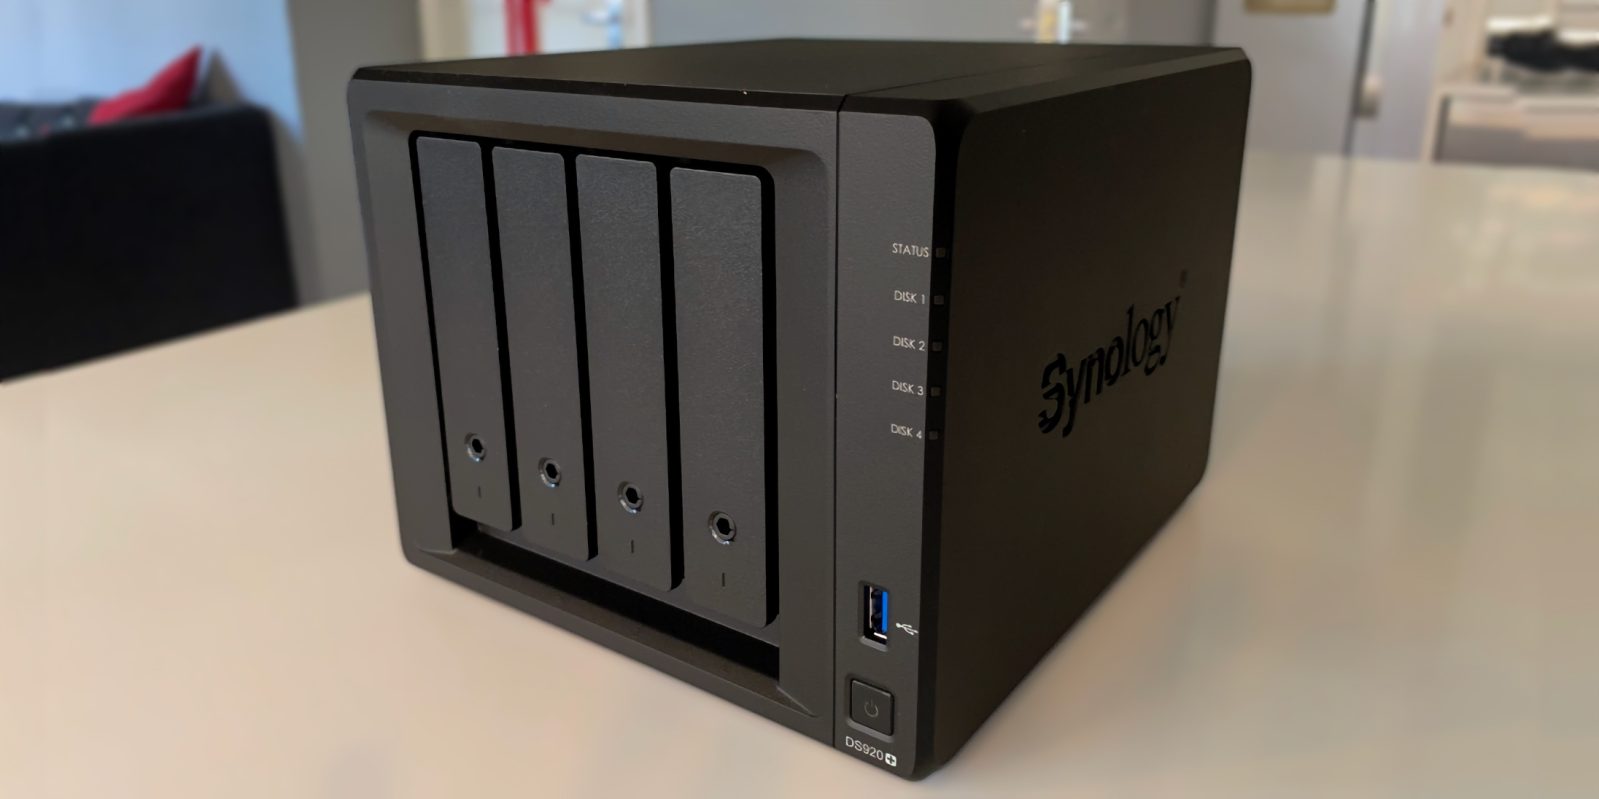
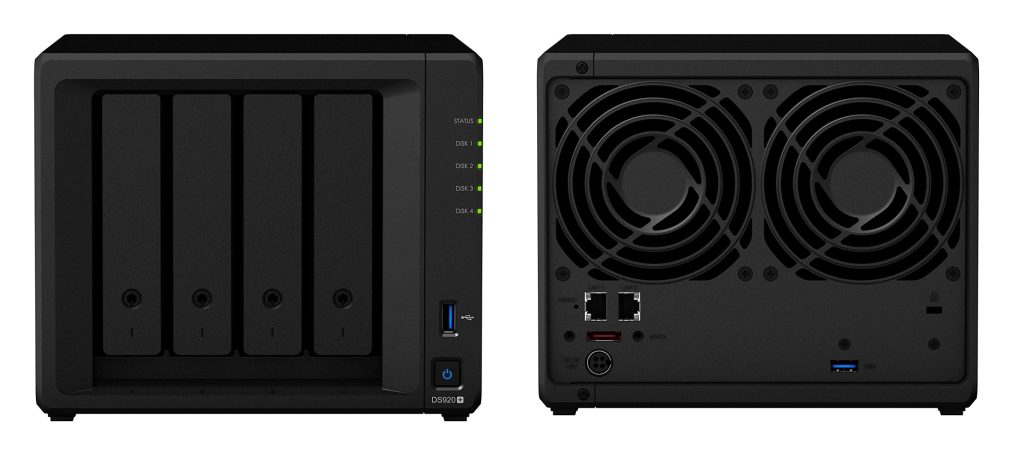
These days, a consumer NAS is quite simply a small PC-like box that integrates drive bays directly into it. So, the Synology DS920+ that I have is a compact black box that packs in a low-powered CPU, some RAM, and four drive bays for hard drives to slot into. On the back, you have some Ethernet and expansion ports.
When you plug it in, you configure and control it through a web interface that apes a desktop UI. This means ideally, you store the NAS in your home somewhere out of the way, out of sight, and let it do its job all day long without intervention.
There are a lot of NAS brands out there. I like Synology because I find their web UI simple and they have a large package ecosystem that makes many tasks literally one-click installs; more on that later. For a home consumer purpose, I think the main deciding factor is how much storage you will need.
Effectively, this means picking between a model with 2- or 4- drive bays.
The maximum available size for a single NAS drive is about 16 TB, at the moment. But due to their cost, you will probably want to opt for cheaper, smaller capacity, drives. I personally buy 8 or 10 TB NAS drives, as they strike a decent tradeoff between capacity and price.
If you plan on using one of the bays as a secondary backup, using the automatic ‘RAID’ functionality of a Synology NAS, that means you have ~10 TB of usable storage on a 2-bay NAS, with the second bay keep a 1:1 backup for redundancy. With a 4-bay NAS, you naturally have the ability to double effective usable space, but also more flexibility when it comes to redundancy policy: for instance, you could use only one bay for redundancy, and dedicate two of the four bays to data that you don’t need a second backup of — like re-downloadable, replaceable media.
This latter set up is actually a description of what I use, I have personal files stored onto one 8 TB volume, which is then automatically duplicated on another 8 TB hard drive situated in the second drive bay, in case the first one ever fails. The other two drive bays are filled with two more 8TB drives, but exposed as one logical volume, giving me 16 TB of space to fill with stuff.
Please note though, I used a 2-bay NAS very happily for many years. If you are just getting started, a cheaper 2-bay Synology is a perfectly good option for most people. Another factor to consider is noise. A 4-bay NAS will undoubtedly run louder than a 2-bay unit, as you have the fans of the NAS itself plus the sounds of the spinning disks. I am fortunate in that I have power and Ethernet running to the loft, so I can leave the NAS up there — out of sight and out of mind. Basement and garage are other good candidates. Of course, some home wiring arrangements simply aren’t set up to support that placement; consider a 2-bay NAS tucked inside a media center cabinet is a reasonable solution to mitigate the noise problem.
NAS vs Mac mini
So if a NAS is simple a small computer, why not buy a computer? The natural home server solution for an Apple-centric household may seem to be a Mac mini, intuitively. And it’s true that Mac minis can do everything a Synology or other NAS can. But there are a couple factors that make it inconvenient. For one, macOS is not primarily designed to be a server: the software stack is not designed to be running headless, with no display connected. Synology is ready out-of-the-box, with everything configurable through a web browser accessible on any device in the network. The Synology OS is also designed to run all the NAS duties you need; from scheduled tasks, long-running processes, automatic software updates and the like. With the Mac mini approach, you’d be starting from scratch — and probably find you need to plug in display/keyboard/mouse every time there’s a problem to debug.
The other disadvantage of a Mac mini is the storage factor. You can’t configure a Mac mini with mass built-in storage. So you’d need to buy a USB drive caddy or similar accessory. Then you have to figure out how to power everything, get those drives to mount automatically at startup, format the drives appropriately, set up RAID redundancy, etcetera etcetera … the list of stuff to do just goes on and on. The Synology is almost plug-and-play, with everything in one integrated enclosure. You can set up your disks using the Synology Storage Manager app in just a couple of clicks.
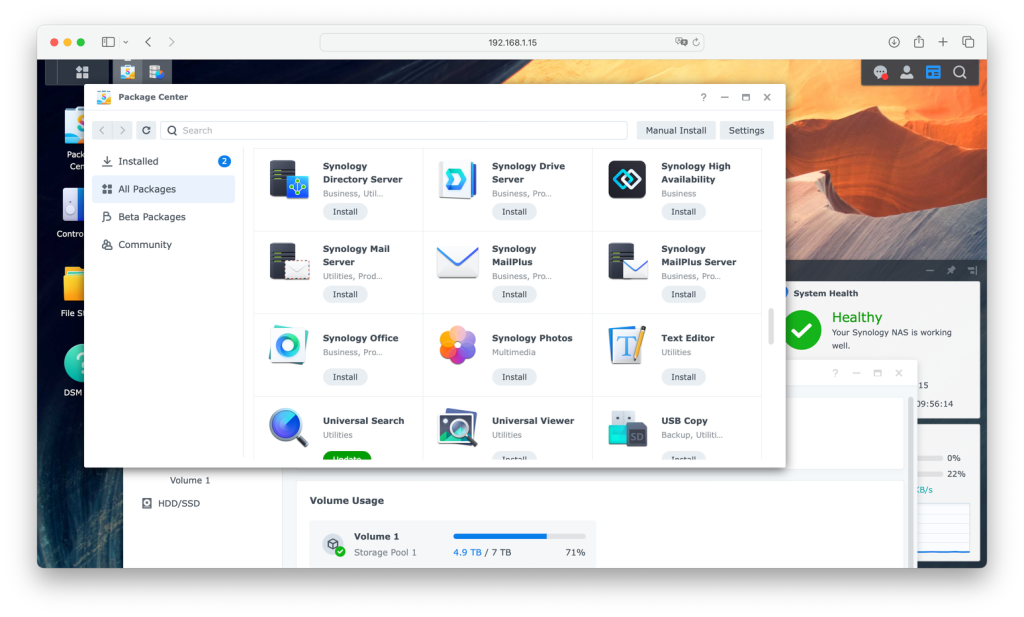
Also remember that most Mac software is expecting you to use a GUI, whereas everything available in the Synology Package Center is aimed at the headless server use case. I’ve owned a Synology for many years and never needed to resort to a command line. Synology has a huge repository of easy-to-install packages to let you do basically everything you can think you might want, without hassle. It’s just like an App Store for home server stuff, and almost everything is free to download. The Mac mini solution invites a myriad of problems the Synology just doesn’t have.
In terms of value for money, Synology boxes are not priced inexpensively, but they compare favourably to the cost of a Mac mini plus equivalent drive array accessory. If you want to save money, you can explore alternatives to Synology like FreeNAS running on a budget Windows machine, but that’s not a seamless stress-free path by any means.
What can you use a NAS for, as an Apple user?
Okay, so you’ve got one. What do you do with it?
Remember, A NAS is not magic. Stripped down to simple terms it’s a little computer with a ton of storage attached. This means it is incredibly flexible. You can use it run a VPN, file server, locally-hosted cloud Dropbox substitute, CCTV server and so much more. The Package Center is really the starting point; a repository of so much stuff. Installing a package is just like installing an app on your Mac. The packages will run automatically at boot, if appropriate, and you can configure the behavior through the web UI. You aren’t limited to just what’s in the Package Center; you can find even more packages on the web and sideload them. But I find that is rarely necessary.
Lots of potential, but let’s come down to brass tax. I think there’s three clear motivating reasons for getting a NAS to enhance your Apple ecosystem experience. These three things are certainly what I use mine for, extracting meaningful value on a daily basis.
Media server
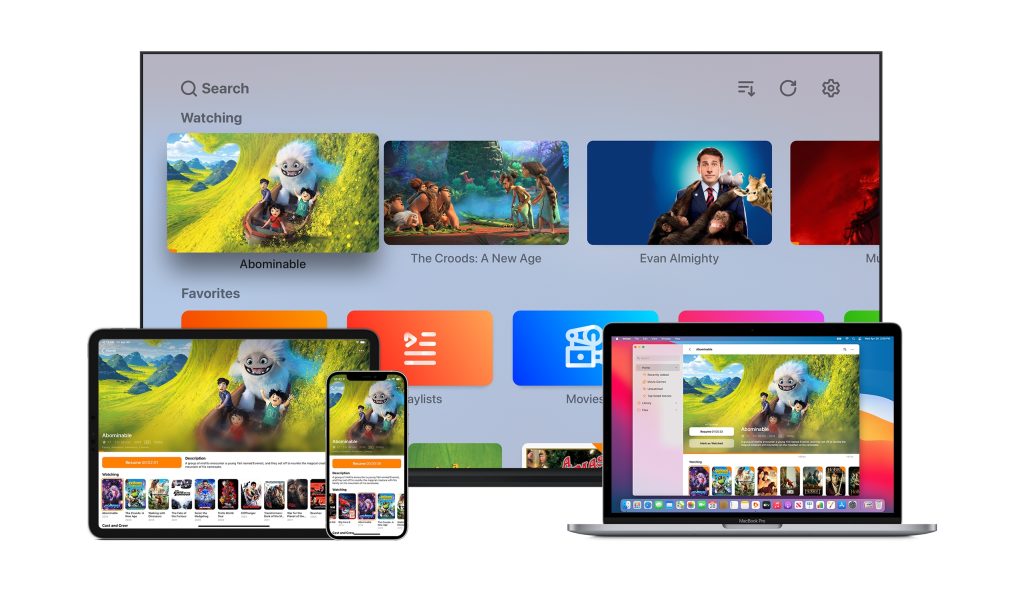
A great use of a pool of storage is hosting and archiving media. Trivially, you could just fill up a shared folder with movies, music, photos and files. That would let you access those files from any machine on the network. But to elevate the experience, Synology can run media server software. Synology itself offers a range of media center apps, like Video Station and Audio Station, but their client apps for iOS and Mac are somewhat lacking. Instead, I would recommend Plex or Infuse.
Both of these media server apps have rich clients for iPhone, iPad, Mac, Apple TV, Android, and more. It all feels like an impressively native experience. And set up is a cinch.
With your own media collection of TV shows and movies organized by folder on a Synology volume, Plex and Infuse can analyze the filesystem and present the content as a rich library, just like your own personal streaming service. TV shows and movies are matched automatically with album art, ratings, trailers and other metadata. These apps even track your watch queue, just like your own personal streaming service. By default, you can access this content within your home network. If you are going on a trip, use Plex on iOS to download content to watch offline. With a bit of router fiddling, you can even set up remote access to stream your library over the web and share it with others.
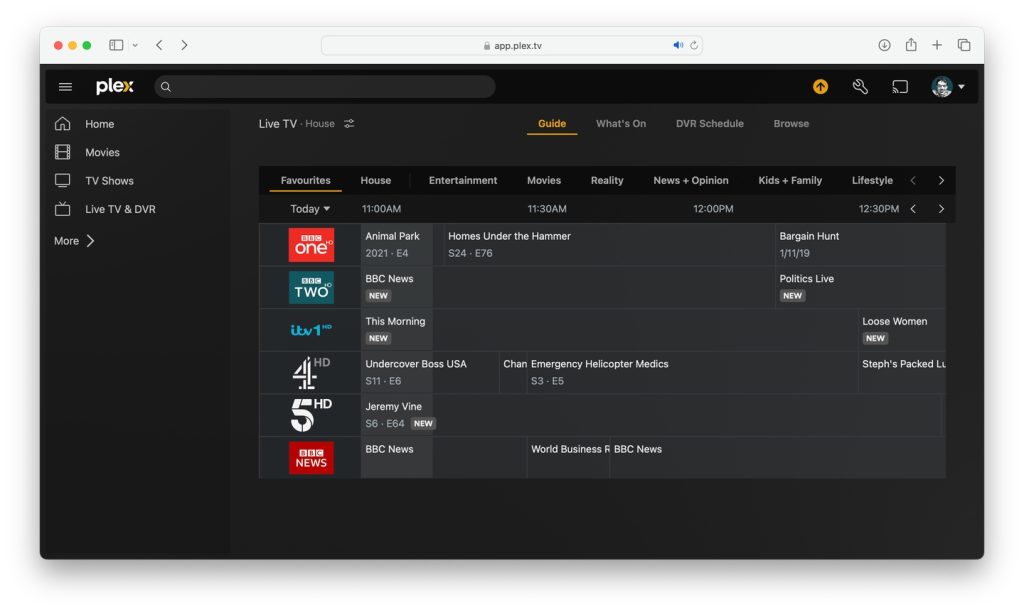
Using Plex and a HDHomeRun connected to an aerial, I even have a live TV experience with an EPG for all the broadcast channels, and the ability to schedule recordings like a DVR, with everything stored on the Synology and accessible to watch from any device. It’s remarkably cool, and useful.
Time Machine

Backing up your data is important. On iOS, iCloud makes this straightforward. But on the Mac, you can’t use iCloud to back up your entire machine. Time Machine is Apple’s built-in backup utility, and typically it is meant to be used with a secondary hard drive directly connected to the Mac. But you can also use a network file share as the target destination. A Synology NAS makes this easy: enable Time Machine in just a couple of steps and your Mac will clone its entire disk content to the Synology volume and automatically back up any new data, on a daily schedule. If you get a new Mac, you can simply restore your Time Machine backup to pick up right where you left off.
Time Machine keeps older versions of files, so you can restore individual files and folders if needed. Use the volume manager features in Synology to control how large your Time Machine backup can grow to. It’s generally recommended to allocate twice as much storage as the internal disk you are backing up. So, if you have a 1 TB Mac, you should create a dedicated 2 TB volume for Time Machine. Combine this with Synology’s RAID disk replication features, and you effectively get two local backups set up with very little effort.
Homebridge
Obviously, a lot of what a NAS is useful for is related to the fact that it has terabytes of space available to be used. But not everything you do with a NAS needs to be backed by gigabytes of files. As well as the various file server tasks you might imagine, you can also take advantage of the fact a Synology NAS is also an always-on computer running.
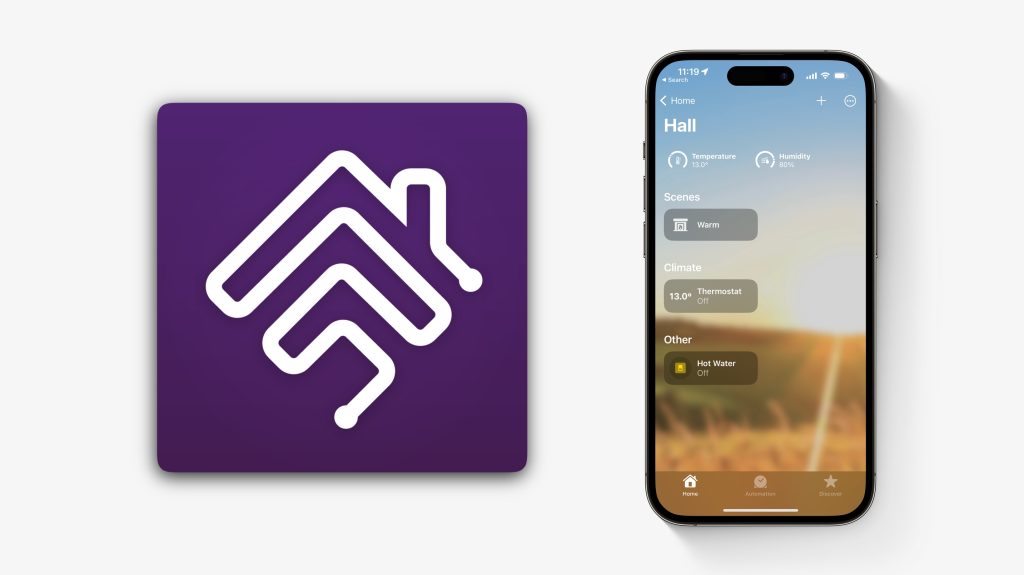
One example of this utility is Homebridge. Homebridge is a third-party plugin ecosystem for HomeKit, greatly extending the utility of the Home app. Homebridge allows many more types of accessories to work with Apple Home (and therefore be compatible with the Home app and controllable by Siri), as well as unlock far more sophisticated kinds of smart home automations — things that simply aren’t possible with what is officially exposed.
Again, I want to impress that this is not a scary prospect. You can install Homebridge very simply on the Synology and most Homebridge plugins have a visible UI control panel to configure them.
I think most people think of Homebridge as a way to get accessories that don’t support HomeKit at all into the Apple ecosystem. But even products that ostensibly support HomeKit natively can be handed by using Homebridge instead.
Top comment by Barry Smith
A fantastic article, especially listing a bunch of use cases for a NAS. On the point about a Mac mini isn't as useful as a dedicated Synology box, I would disagree. I have an old 2012 Mini that has a 6 bay thunderbolt enclosure connected to it (some drives are RAID, others combined so they show as one large drive - Disk Utility does this on a Mac). I run Plex, Homebridge and a couple other things. Regarding access to it, I connect via Share Screen on any other Mac on the network. I've set it to auto turn on after a power failure, have specific apps start on boot, etc. I guess that did take a bit more work than with Synology but I'm not locked into one manufacturer long term.
If you have an old mini laying around, this solution, while a bit more manual, would save money vs the Synology.
For example, I use a Tado smart heating controller for my home’s boiler and hot water system. It exposes the radiator thermostats through HomeKit — but not hot water! Luckily, Homebridge can fill in the gaps. With an easy-to-install third-party Tado plugin, I now have a hot water control exposed as a switch in the Home app too. Another completely different example is using Homebridge to have external weather conditions integrated as sensors in my ‘Garden’ room, so you can set up HomeKit automations based on the outside air temperature.
The Homebridge community have also developed solutions to common smart home feature requests that the Home app doesn’t fully solve. For instance, I use a plugin called Magic Occupancy to make my kitchen lights intelligently turn on and off based on a motion sensor, while also retaining the ability to turn them off manually at the light switch. These kind of multi-layered conditional automations are simply not expressible with standard HomeKit, but Homebridge makes it possible.
Conclusion
Of course, I can’t list every possible nuance and use case but I hope this post gives you an idea about what’s possibly with a Synology NAS, and that it is not a scary proposition. Simple iOS-friendly media server, automatic Time Machine backups, and enhanced HomeKit make for a good trifecta of a proposition, though. And although it might sound daunting, if you have any familiarity with using computers, you can manage a NAS. The Synology software makes everything really straightforward to set up. And once everything is installed the way you like it, you usually can leave it unattended for months at a time. It’s hard to live without one, once you’ve taken the plunge.
You can find out more about the entire Synology range on their website.
FTC: We use income earning auto affiliate links. More.


Comments