Apple’s latest desktop operating system, OS X Mavericks, is available today. In this post, we’ll take you through the steps required to protect your data by backing it up, upgrading the OS, and getting started with the latest version of OS X.
Before you get started, you’ll want to make sure you have everything you need. To backup your data, you’ll need an external hard drive with at least the same amount of storage as your hard drive (or a Time Capsule). You’ll also need to make sure your Mac is capable of running Mavericks (we’ll show you how below), and you’ll want to make sure you have an iTunes account to purchase the update.
Determining if you can upgrade
Before installing the update, you need to make sure that your machine is compatible with Mavericks. Most of the information we need to determine this is found on the “About This Mac” screen. To access it, click on the Apple icon on the upper left hand corner of your screen, then click on “About This Mac.”
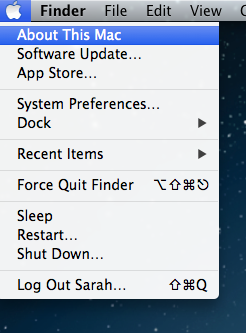
This screen will allow you to see which operating system you are running, check to see if your software is up to date, tell how much memory your machine has, and to get your serial number so you know which year it was purchased.

Because Mavericks is downloaded through the Mac App Store, you’ll need to be make sure the version number listed on the “About This Mac” screen is 10.6.8 or higher. If you do not have 10.6 (also known as Snow Leopard) you can purchase it online. Clicking on the “Software Update” button will check to see if there are any updates available for your machine. It is highly recommended to make sure your software is up to date before installing an operating system. You also need to have a minimum of 2 GB of memory.
Here is a complete list of machines that are compatible with OS X Mavericks:
- MacBook (Late 2008 Aluminum, or early 2009 or newer)
- iMac (mid 2007 or newer)
- Mac Mini (Early 2009 or newer)
- Mac Pro (Early 2008 or newer)
- Xserve (early 2009)
- MacBook Pro (mid/late 2007 or newer)
- MacBook Air (late 2008 or newer)
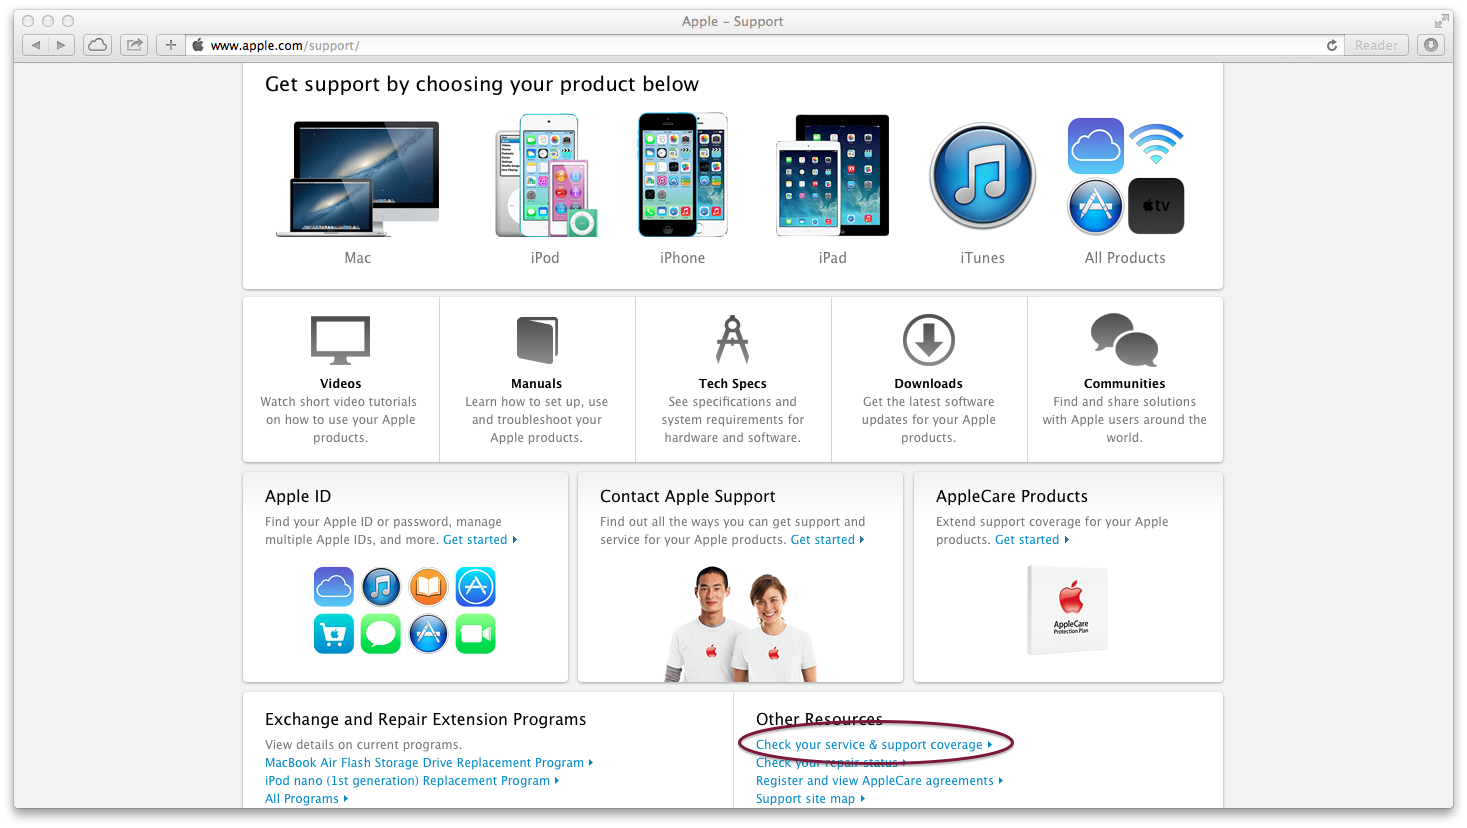
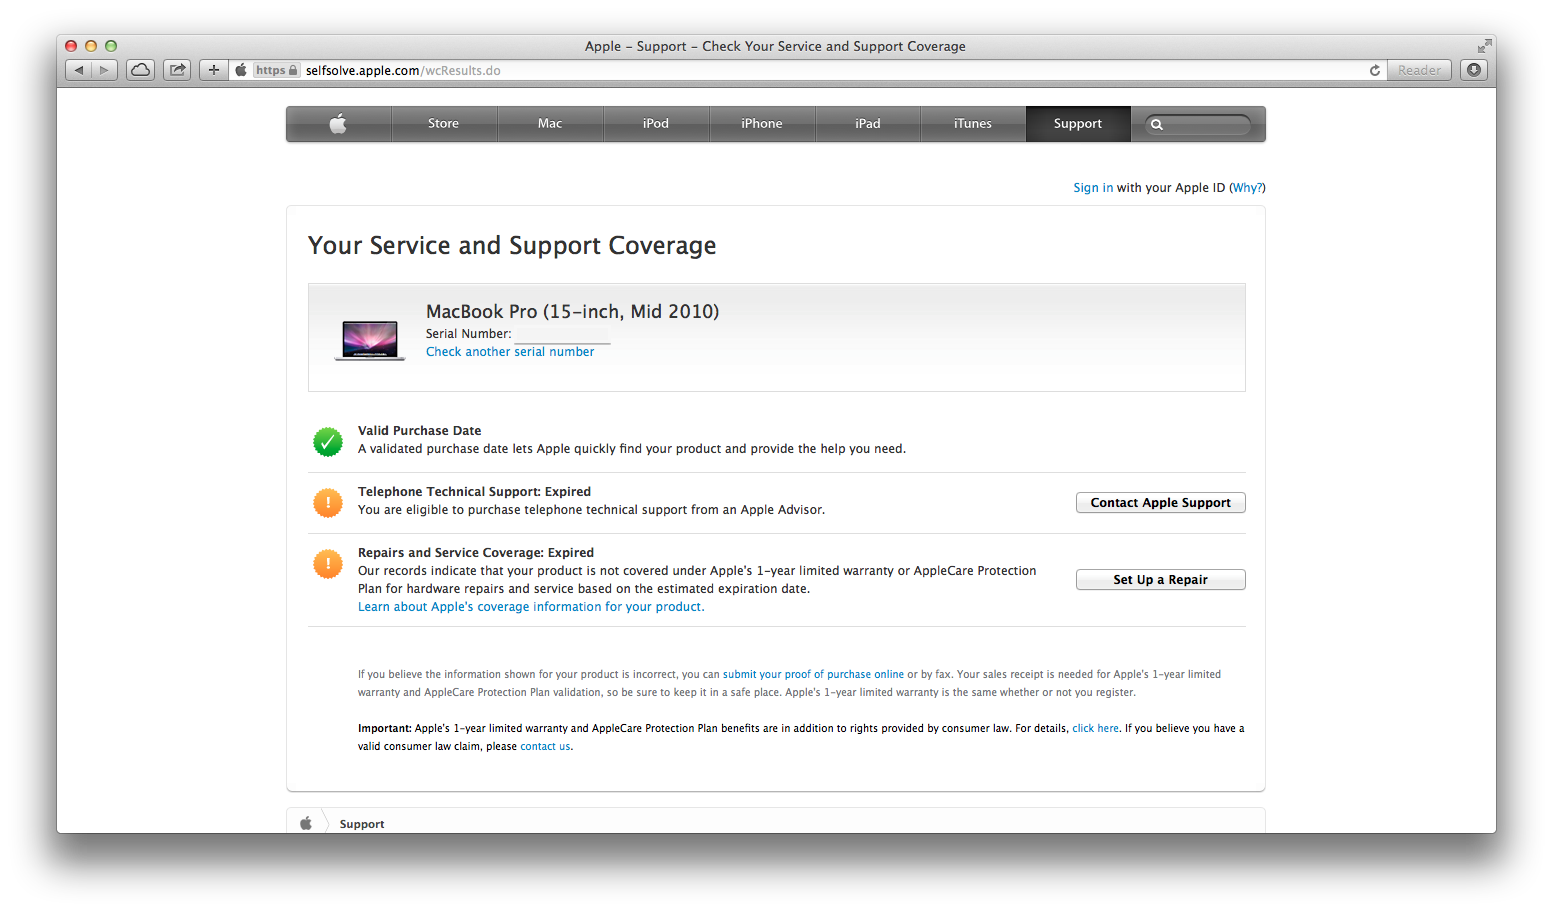
If you are not sure what year you purchased your machine, you can find out on Apple’s support page. Underneath “Other Resources” on the lower right hand side click on “Check Your Service & Support Coverage.”
Then you need to enter in your machine’s serial number. Using “About This Mac,” clicking on the “Version” label twice shows you the computer’s serial number.
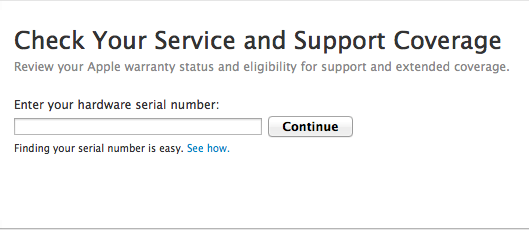
Clicking on “Continue” will then bring up your Mac’s information. It will tell you what type of Mac you have, the screen size, the year it was purchased, and whether you are currently covered under AppleCare.
Backing up your data
If your machine is supported by Mavericks, it is recommended that you have a backup of your data before updating.
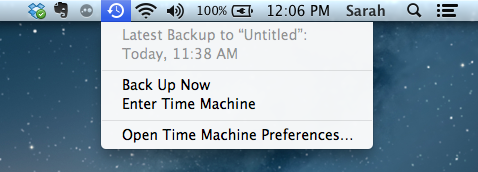
If you are already using Time Machine, it is really easy to double check to see when your data was last backed up and to force Time Machine to do another backup if needed. Just click the Time Machine icon to see when when your last backup was completed. If you need to do another backup, just click on “Back Up Now.”
If you are not backing up using Time Machine, let’s discuss the different methods of backing up your Mac using Time Machine. You have two different options: using a Time Capsule, or using a third party external hard-drive.
1. Backing up to Time Capsule. To set up your AirPort Time Capsule for backups, open up System Preferences and then click on “Time Machine.” Then click “Select Disk” and select your Time Capsule from the list that appears.

2. Backing up to external hard-drive. When you plug in any external hard drive for the first time, a pop-up will appear asking if you would like to use it for Time Machine.
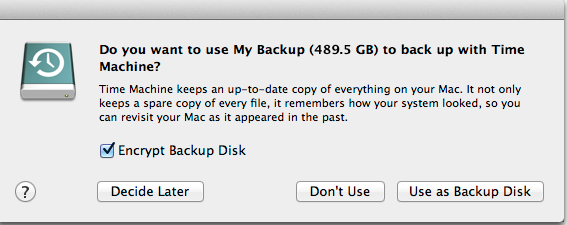
Checking encrypt backup data will allow you to encrypt the Time Machine backup using FileVault 2. It is up to you if you want to encrypt the backup. Doing so will give you an extra layer of protection by requiring a password to access the backup later, but encrypting the data can noticeably slow down the backup process.
Clicking on “Use as Backup Disk” will select that external hard drive to use with Time Machine. Since the initial backup could take several hours, I would recommend doing it overnight so that you do not interrupt the process. After the initial backup, Time Machine makes hourly backups of only the files that were changed as long as the drive is connected. If the drive isn’t connected when it’s time for a backup, Time Machine will simply wait until the drive is connected again and continue as normal.
In addition to a Time Machine backup, or instead of a Time Machine backup you can use an online backup services, although this can be much slower than using a local disk since it has to upload your data to the cloud and is not natively supported by OS X.
Installing Mavericks
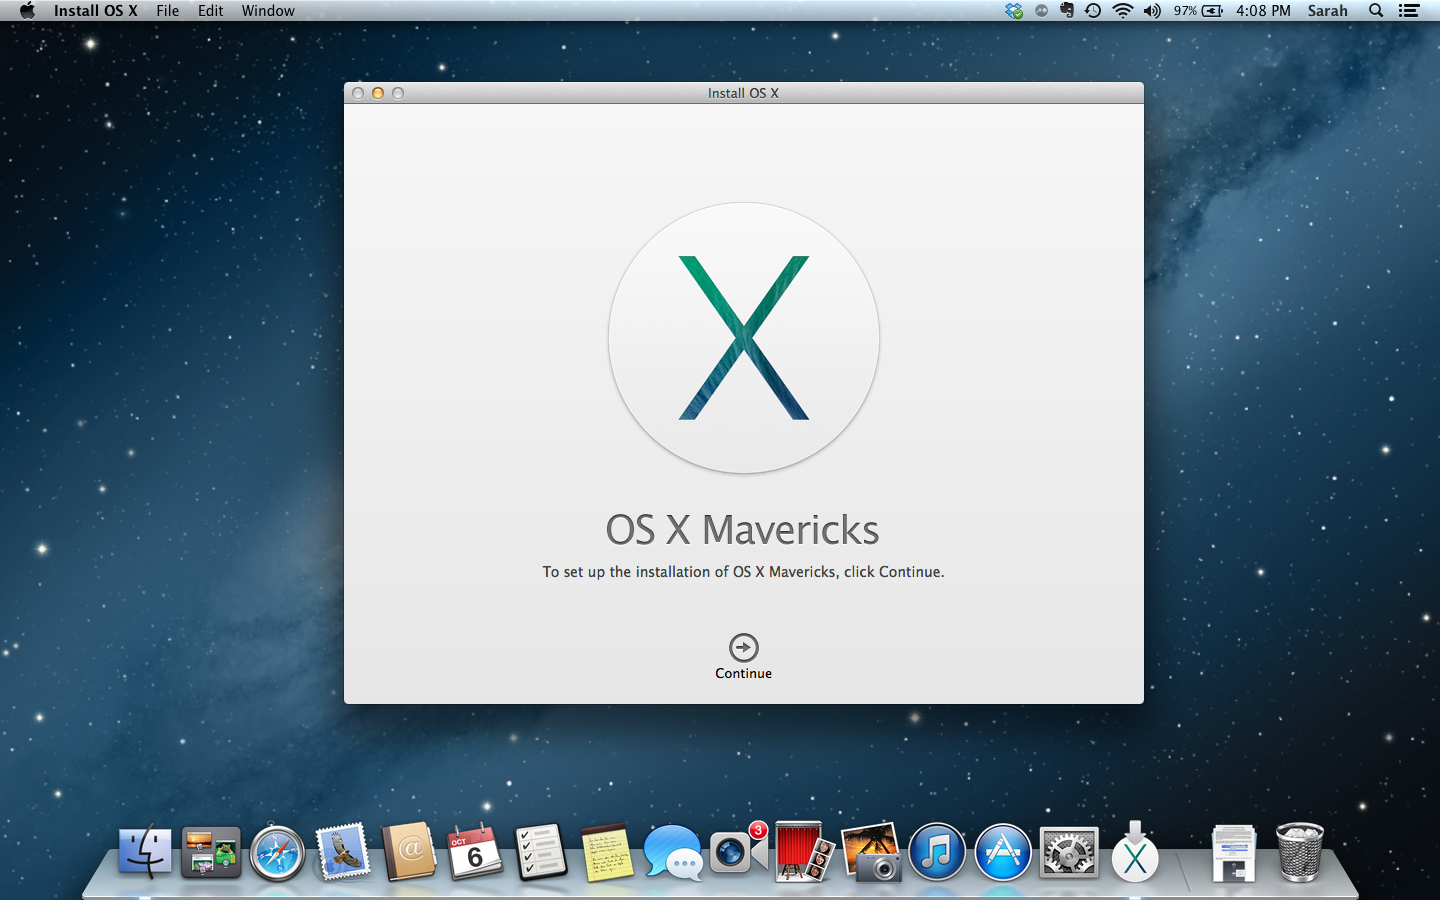
Once your machine is all backed up, you are ready to download Mavericks from the App Store. The download is free and takes about an hour to finish, depending on your Internet speed. Once it finishes downloading, the installer will open automatically and you will be prompted to begin. To install, press the “Continue” button.
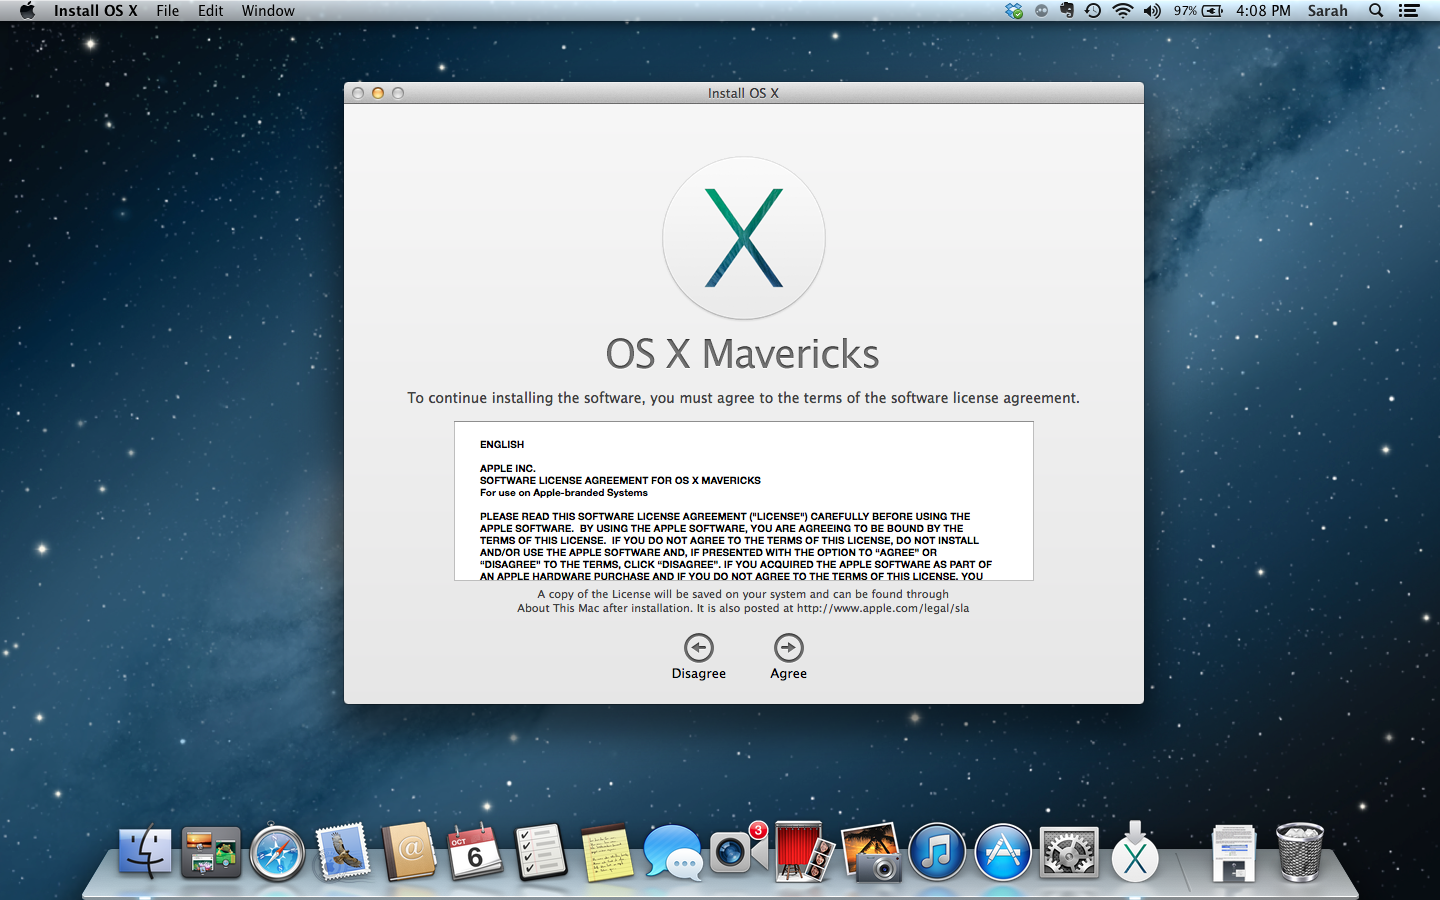
The first part of the installation process just involves agreeing to Apple’s term and conditions. To continue, press the “Agree” button. If you decide later that you want to read (or re-read) all of the terms and conditions, you can find them on Apple’s website.
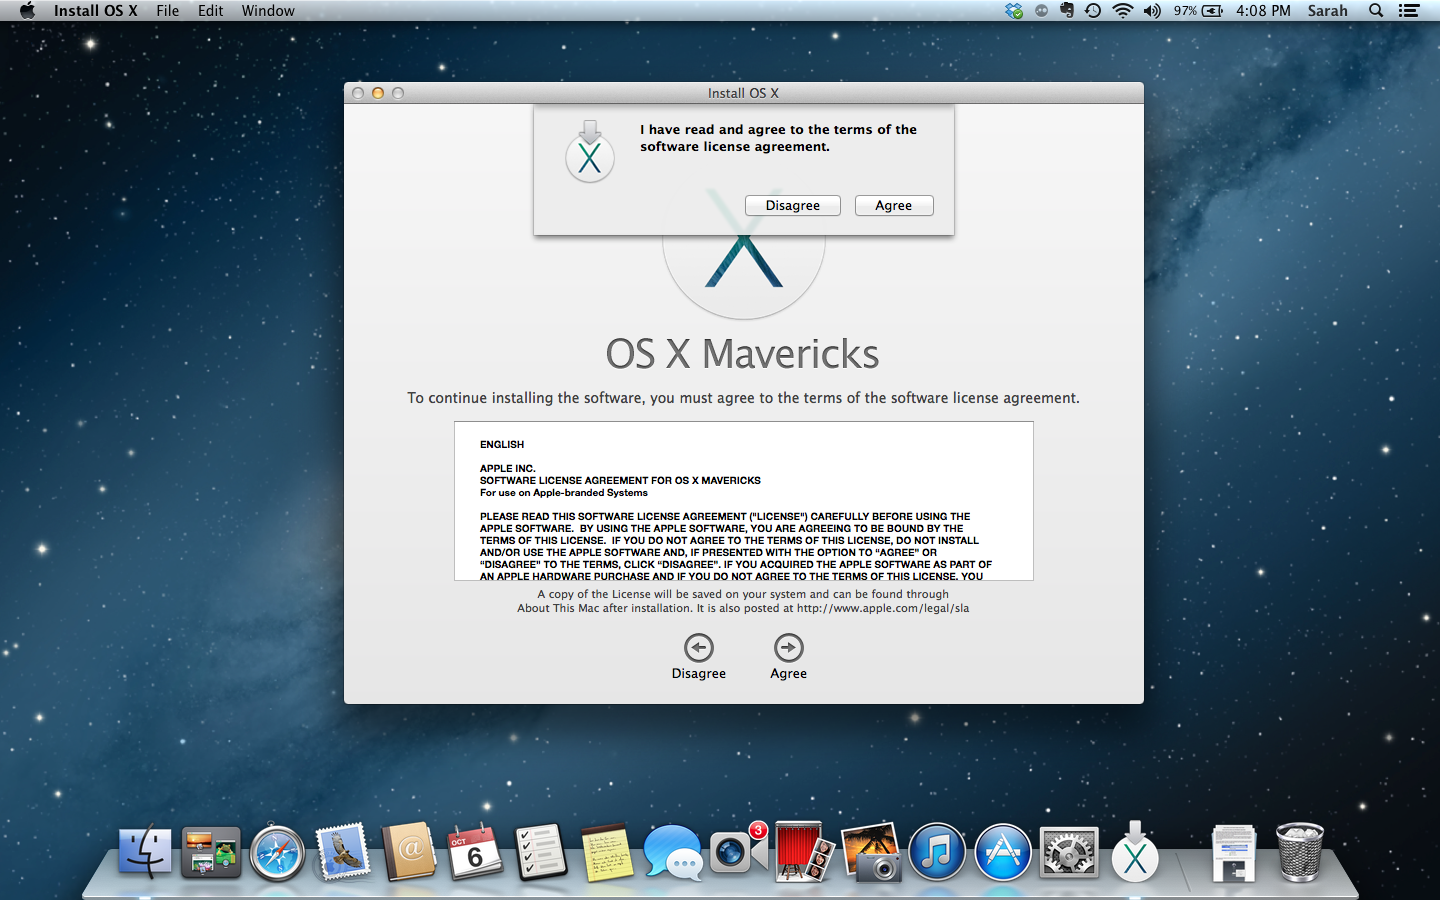
You’ll need to confirm once again that you read the terms and conditions.
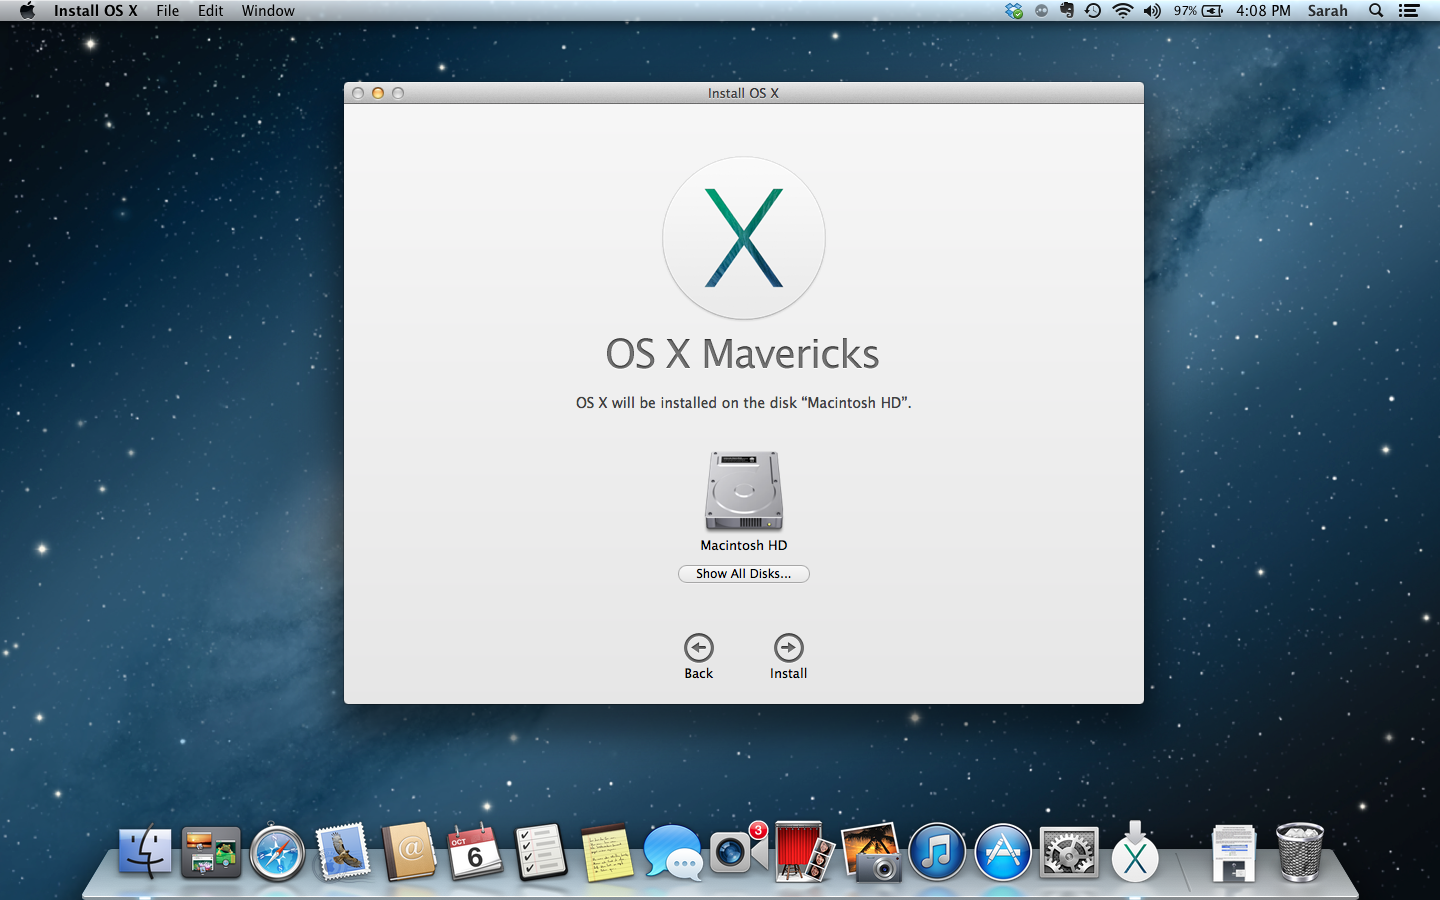
Next you’ll need to choose which drive you want to install Mavericks on. For most people this should be your internal hard drive, and is often the only choice unless you have a backup drive or other external storage plugged in. For advanced users who either partition their hard drive, or have multiple hard drives in their machine, choose the installation drive that best meets your needs.
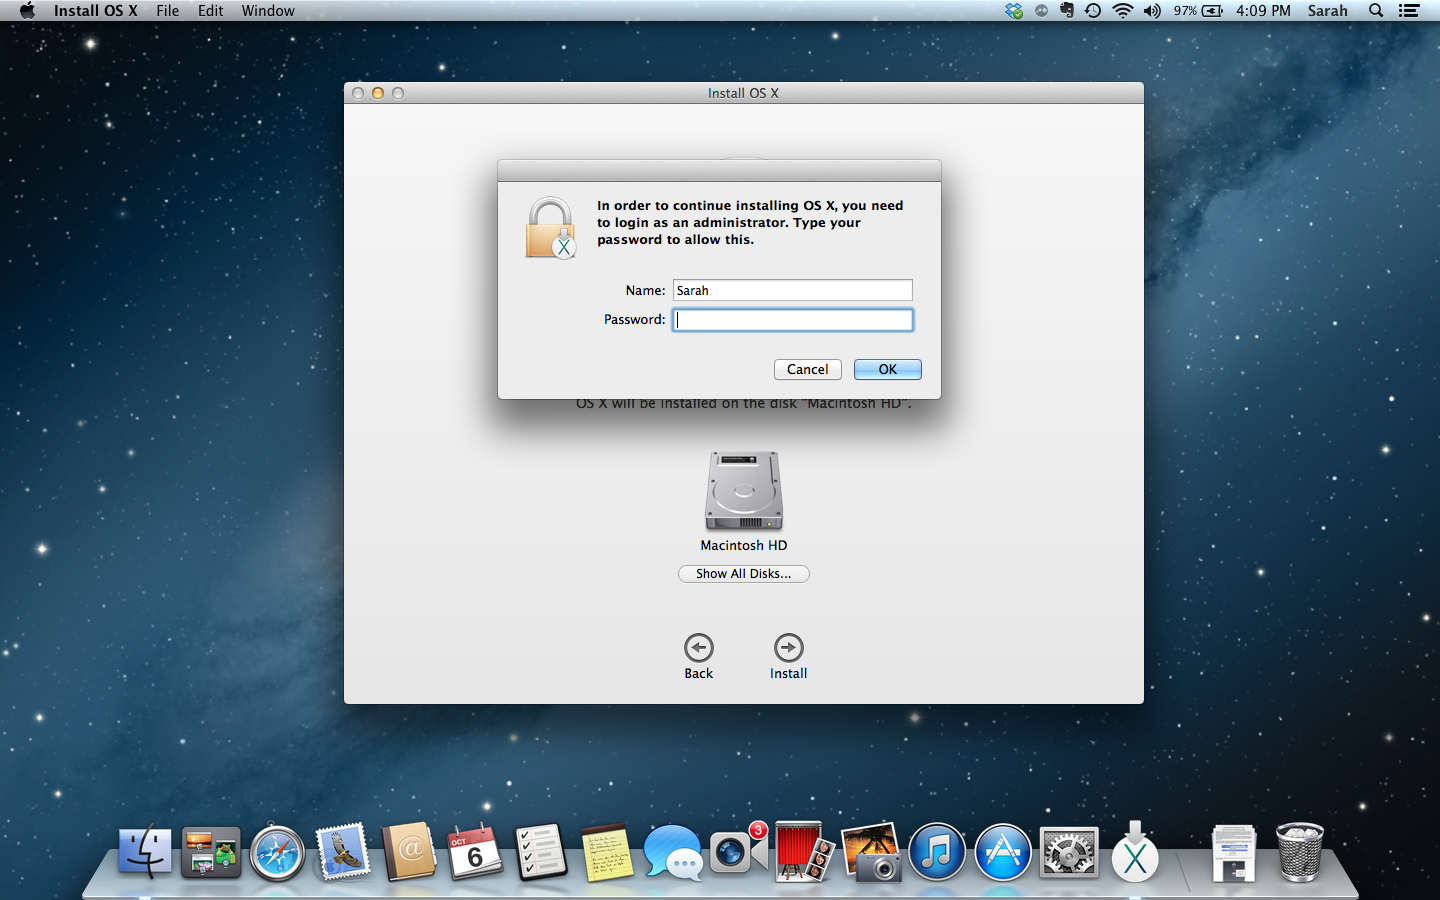
In order to continue installing you do need to enter in your administrator password for the computer. Usually this password is different from your Apple ID. This password is used when you log in to your computer, and is sometimes required for settings changes. Not all users on the computer are administrators so it is important to make sure you enter in the administrator’s information. If you have more than one account on your machine, the administrator is usually the first account that was setup.
After entering in the administrator account information, OS X Mavericks prepares to install.
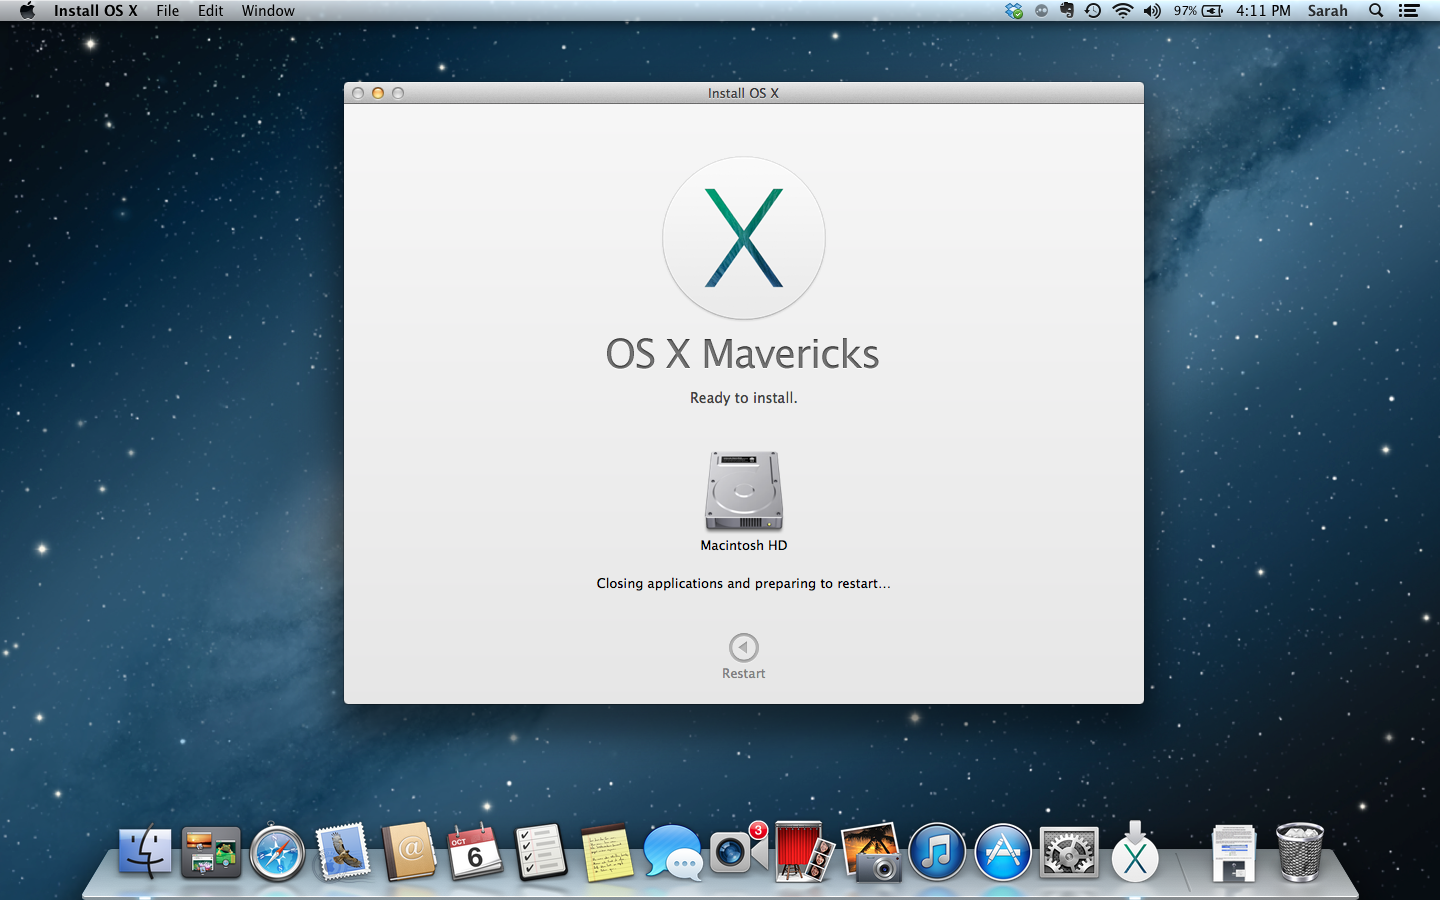
After a few minutes, your computer will automatically reboot to continue the installation process.

The computer will boot to a black screen with a gray box showing you the current installation progress. It usually gives an initial install time of forty-four minutes, when it actually takes closer to an hour and twenty minutes to install depending on the speed of your machine.
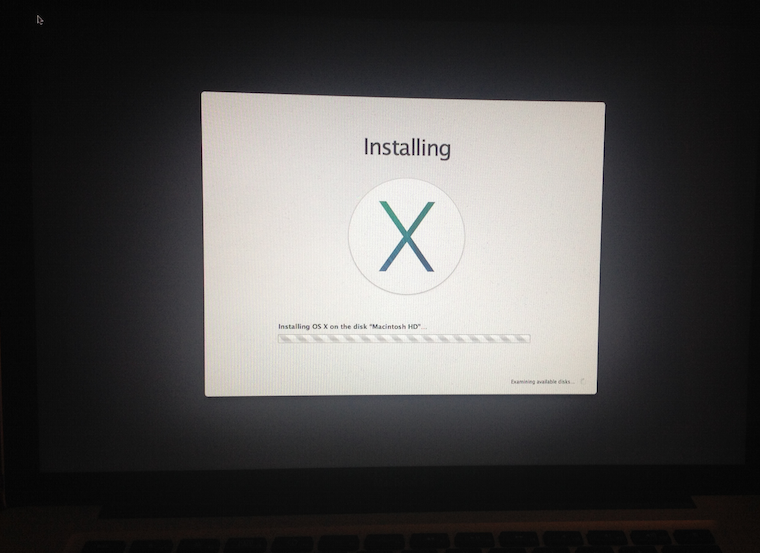
If the progress bar seems to get stuck at “Less than a minute remaining,” don’t worry. This message is almost always wrong and takes much longer than it says. Don’t try to reboot your computer during this step.
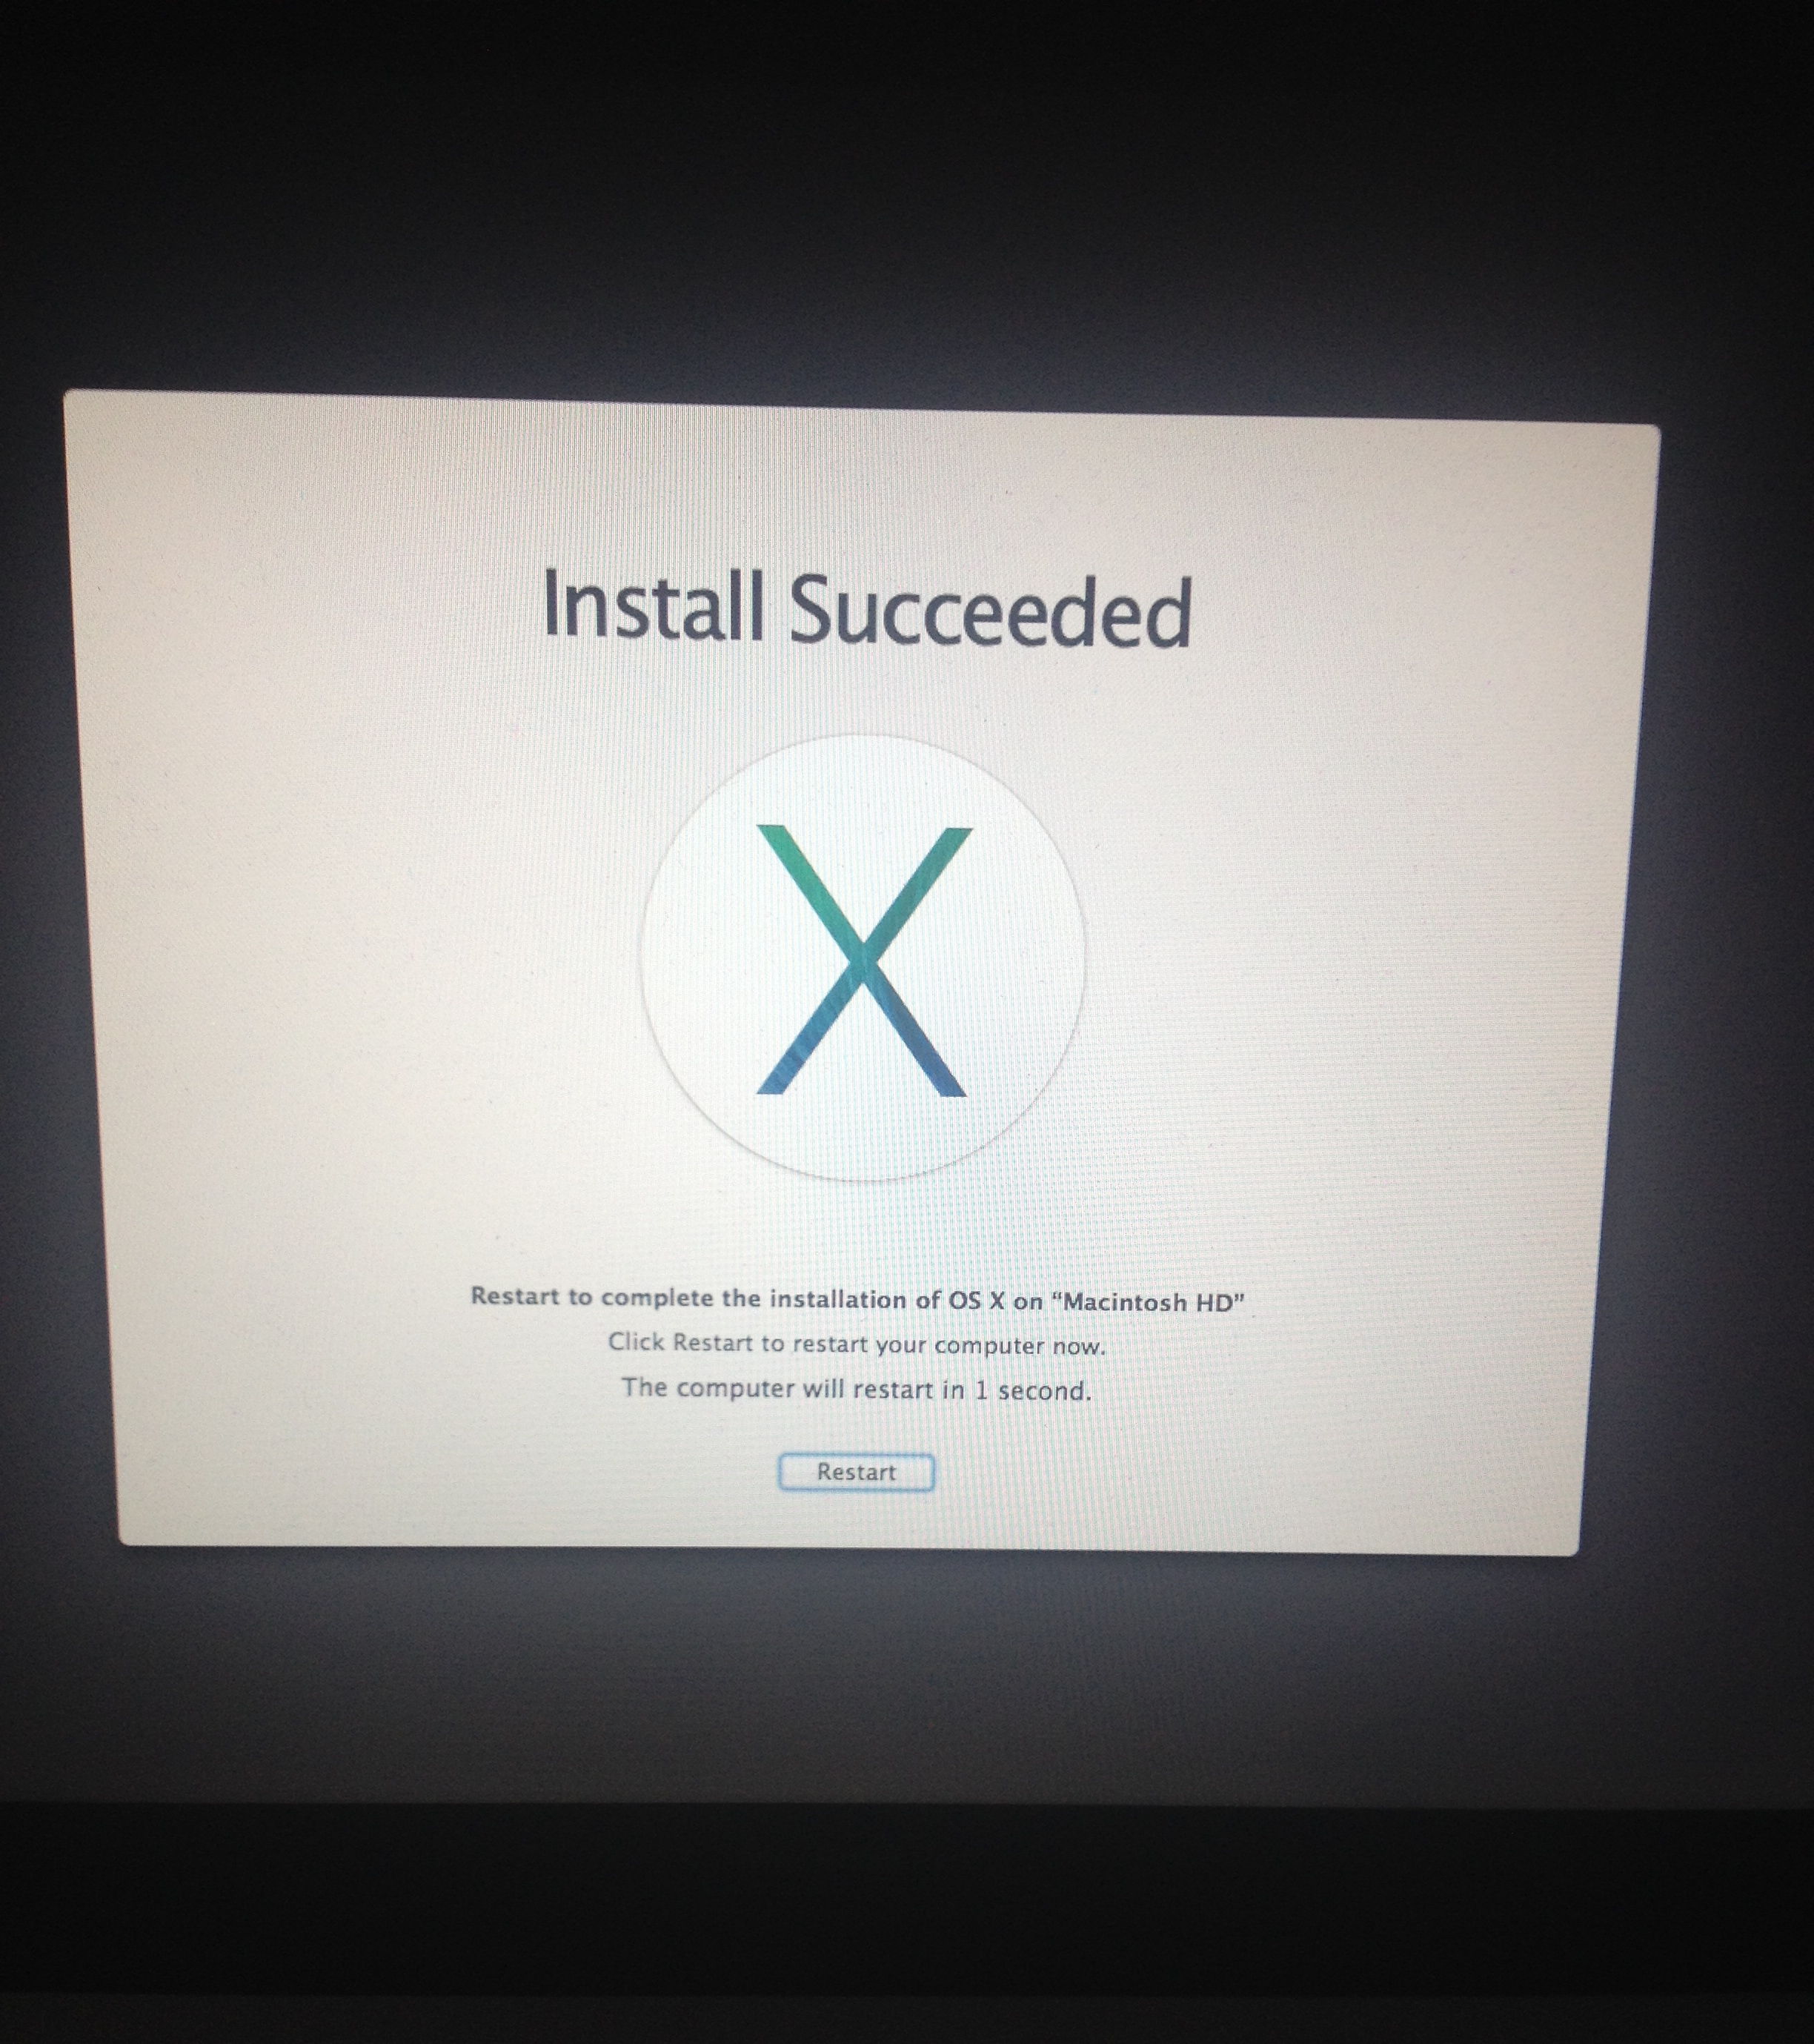
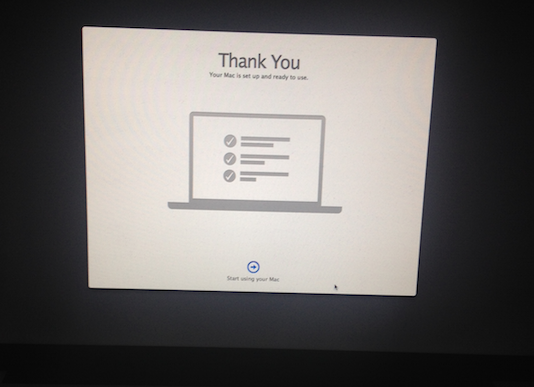
When the installation is finished, you’ll be presented with a message that the installation succeeded. Your computer will reboot one last time. You are now running OS X Mavericks. Once the reboot finishes, there are a few additional steps you’ll need to complete to get back to using your Mac.
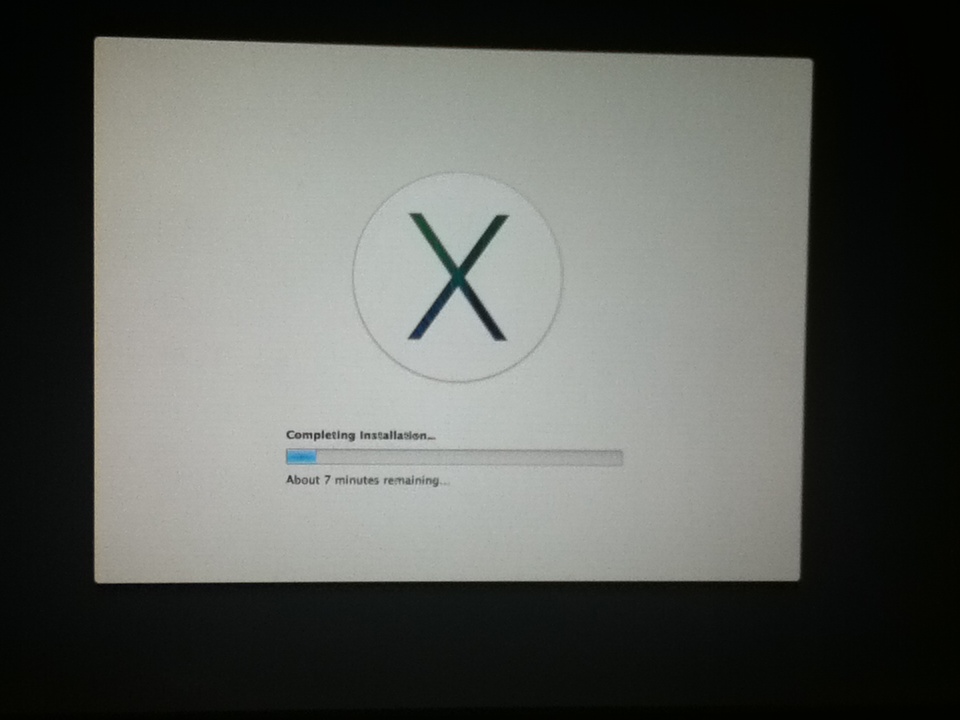
Even though the installation is complete, there are a few more things the installer has to do before you can resume using your Mac. This process takes a few minutes, but goes much faster than the previous step.
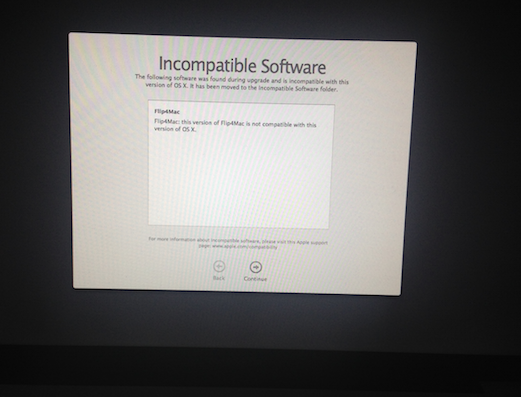
While it is installing, it detects if there is any old incompatible software on your machine. If you have any incompatible software it alerts you that it has been moved to an “Incompatible Software” folder.
To start using the machine click the “Start Using Your Mac” button. At this point, depending on which version of OS X you upgraded from, you might need to complete a few extra steps, such as logging into (or setting up) an iCloud account. These don’t take very long and they’re very straightforward.
When you are on the desktop for the first time, two notifications will appear in the upper right hand corner of the screen, which is where alerts and notifications appear from Notification Center. The first one lets you know that your Mac will be optimized for use with Mavericks, which will impact the performance and the battery life until it is completed. Clicking on “Close” will dismiss this notification.

The second notification welcomes you to Mavericks and offers a tour of the new operating system.
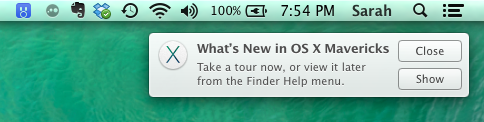
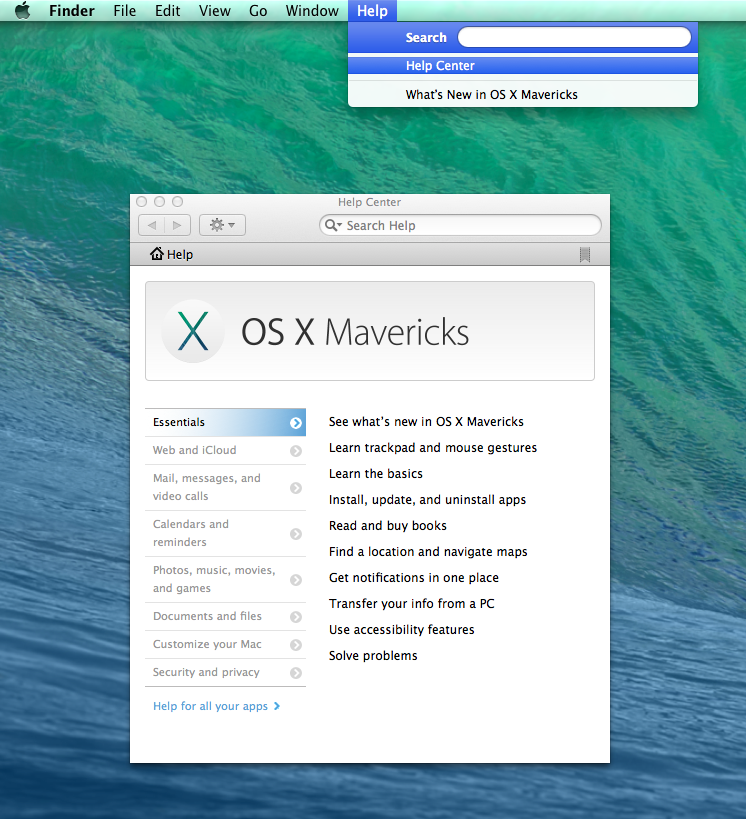
Pressing on the “Show” button will take you to a page on Apple’s site that details the changes in Mavericks. You can always view “What’s New in OS X Mavericks” later via the Help menu in the Finder. The first option, “Help Center,” brings you to OS X Mavericks user guide. The second option, “What’s New in OS X Mavericks,” will take you to Apple’s page highlighting some of the new features.
Congratulations! You are now setup and running on OS X Mavericks. Over the next few days we will be publishing several how-to articles to help you get the most out of your upgraded Mac. Keep checking back for more helpful tips and tricks from 9to5Mac.
FTC: We use income earning auto affiliate links. More.


$20? maybe you should check this before posting?
Wait? $20? I thought it was free.
It is free. The article must have been written even before the today’s event.
NVM. It says free in the article. Somehow I thought you wrote $20. Yeah, I really need to go to sleep…
Go home you are drunk! .. J … Kidding
haha
not 20 bucks but free ;D you should edit that. Does 9to5mac offer a guide for creating a bootable usb stick with the macappstore mavericks version?
It’s actually free. :D
“Once your machine is all backed up, you are ready to purchase Mavericks from the App Store for $20.”
Really???
“Once your machine is all backed up, you are ready to purchase Mavericks from the App Store for $20.”
Uh … might wanna change that Mountain Lion template, given that Mavericks is free XD
Will there be a way to do a clean install?
if i just go ahead and update it….. will i lose all my previous data?
I updated 2 days ago, and I lost all my data, technically, because after backing up on Time Machine, it seems restoring my files is now impossible. Help!
Same Here
Mavericks is now live guys!
If I have the GM, should I download again the version from the App Store?
I think that is because the article got changed after it was published.
so i have the 1st GM, do i have to update? it shows “update” in the store
Let’s see… you know there are more GMs than the GM you have. You know the GM you have is not the most recent GM. And you know that it says update.
WHAT IN THE NAME OF JOHN RHYS-DAVIES PANTYHOSE DO YOU THINK?!
i havent backed up my files. will the installation cleanup everything?
I’m gonna backup my MBP, restore it to factory, update to Mavericks, then restore my backup.
I just clicked install and it was up and running before I could finish reading this article. The mac feels so much faster, it’s incredible.
If you don’t get the optimization notification, does it mean it’s already done?
I went through the install, no problem. After it rebooted, I went through the final install. It’s been stuck at less than a minute for almost an hour now. Should I be concerned? What can I do to fix this?
Is there a way to see a list of the “incompatible software” BEFORE installing Mavericks?
Roaring Apps is a great resource for this. You just have to check it yourself.
http://roaringapps.com/apps
Don’t forget to update Glims before installing. The old version freezes Safari 7.
If you bought a use mac, and its meet the requirement to be upgraded. Do I need the original iTunes username and password from the owner or I can use my own?
You can and should use your own iTunes user name and password for everything you do on the computer.
Maverick is worth ONE feature alone…pre-cached Application icons! Woohoo!!!!
please help I downloaded the new mavericks download without saving my iPhoto library and now its telling me that my library can’t be open does that mean i lost all my pictures or is there a way to get my library back???? please help!!!!! I am freaking out!!!
Update iPhoto, for heaven’s sake.
please someone answer me…
i dont care about my other data, however i have a 2000 GB folder located on download folder which i did not have a backup for….
i dont have access to a external hard drive…
now my question is if i upgrade to Mavericks, what will happen to that folder?
If you care about it, perhaps it’s time to buy that external hard drive. Otherwise, what would you do if your Mac HD suddenly failed? Data recovery firms charge a fortune.
Mavericks makes my iMac works slowly and now have applications, like Mail, are not working.
I’m unhappy with Mavericks.
is the backup only an insurance if went wrong or will be the HDD realy deleted? du i have to restore my timemmachine backup after installing OSX Mavericks?
I just installed Maverick and I lost all my pictures for the last 4 years .Nothing in iPhoto..Can someone help me to restore my 4 year long work?The suggestion of “backup”is OK,I just read it after the installation.”About this Mac”info shows 150 giga of pictures,but where to find them?Any help will be appreciated! Highly!
You’re lucky you lost photos only. I lost all my data–or at least i can no longer access them on my external hard drive I used for back up. #$%$#%#@%
Help – I didn’t read all this before installing OS X. I do have Time Machine back up but now how do I get my data back? I mean how to I transfer my data from Time Machine to my upgraded Mac? (Sorry, I’m kind of computer illiterate).
Can I download the new OS and have it stored on the external hard drive?
I started the installation process 7 hours ago and its still just half done :( is there something wrong? Can I restart the Mac and try to reinstall? Will I lose data?
why can’t they make safari function like the other browsers (chrome and firefox) that have a favorite star in the url bar? at least one would know whether the address has already been bookmarked. this is the main reason i’ve never liked safari, along with the inability to search in the url bar. basic stuff, apple.
I downloaded the Mavericks. After the reboot, it started installation but them it tells that I should have more 1.2MB of memory free to clomplete installation. How do I manage to erase some files in this stage? I tried creating a reinitialization disk on another computer to use on this but it does not recognizes the pen drive. Any clue on how to manage it?
What if I want to go back to the old OS X, how do I do it? I use time machine. The reason for this is, my Epson V600 scanner software does not work with this new OS X 10.9. It’s a new scanner that worked fine with the older version OS X 10.8.5
When you back up to time machine, does backing up on one of your accounts, back up ALL accounts, or would I need to log into each account separately and back them all up to time machine, one by one before doing install?
Mine installs and is at Time remaining: less than a minute – for three hours already? I do believe it takes longer, but that much longer?? Anyone with some insight??
I was wondering if anybody on here can help.I have “really fallen and can’t get up” – I have an old mac running leopard version 10.5.8 and I bought a mavericks machine. When I fire up “migration assistant” on the new mac it tells me that i need to upgrade the OS on my leopard machine but there are no upgrades available. Net result is I have a new mac and no files. Please help. Once again apologise if this is the wrong forum
I have installed OS X Mavericks onto my Mid 2010 MacBook Pro, and it has severely decreased the battery life of my computer. It lost 10% battery in 5 minutes today. Is this a temporary thing, or is my battery life going to be poor from now on with the new software? Thanks!