
Apple’s iPhones became Flickr’s most popular camera phones in 2008 and most popular cameras overall soon thereafter, but even now, iPhones constitute only 9.6% of the photo-sharing site’s userbase. Despite the iPhone’s undeniable popularity, over 90% of photographers are using other cameras: Canon has a 13.4% share, Nikon 9.3%, Samsung 5.6%, and Sony 4.2%, with tons of other brands following close behind. While the cameras in phones continue to improve every year, they’re not the best tools for photography — they’re just the ones most people carry with them all the time.
If you shoot photos with a DSLR or point-and-shoot camera, you probably aren’t sending images directly to the Internet from the camera itself. You probably come back home, transfer your photos to your computer, then edit and share them with Adobe’s Photoshop Lightroom or one of Apple’s three photo management apps — iPhoto, Aperture, or the beta version of Photos.
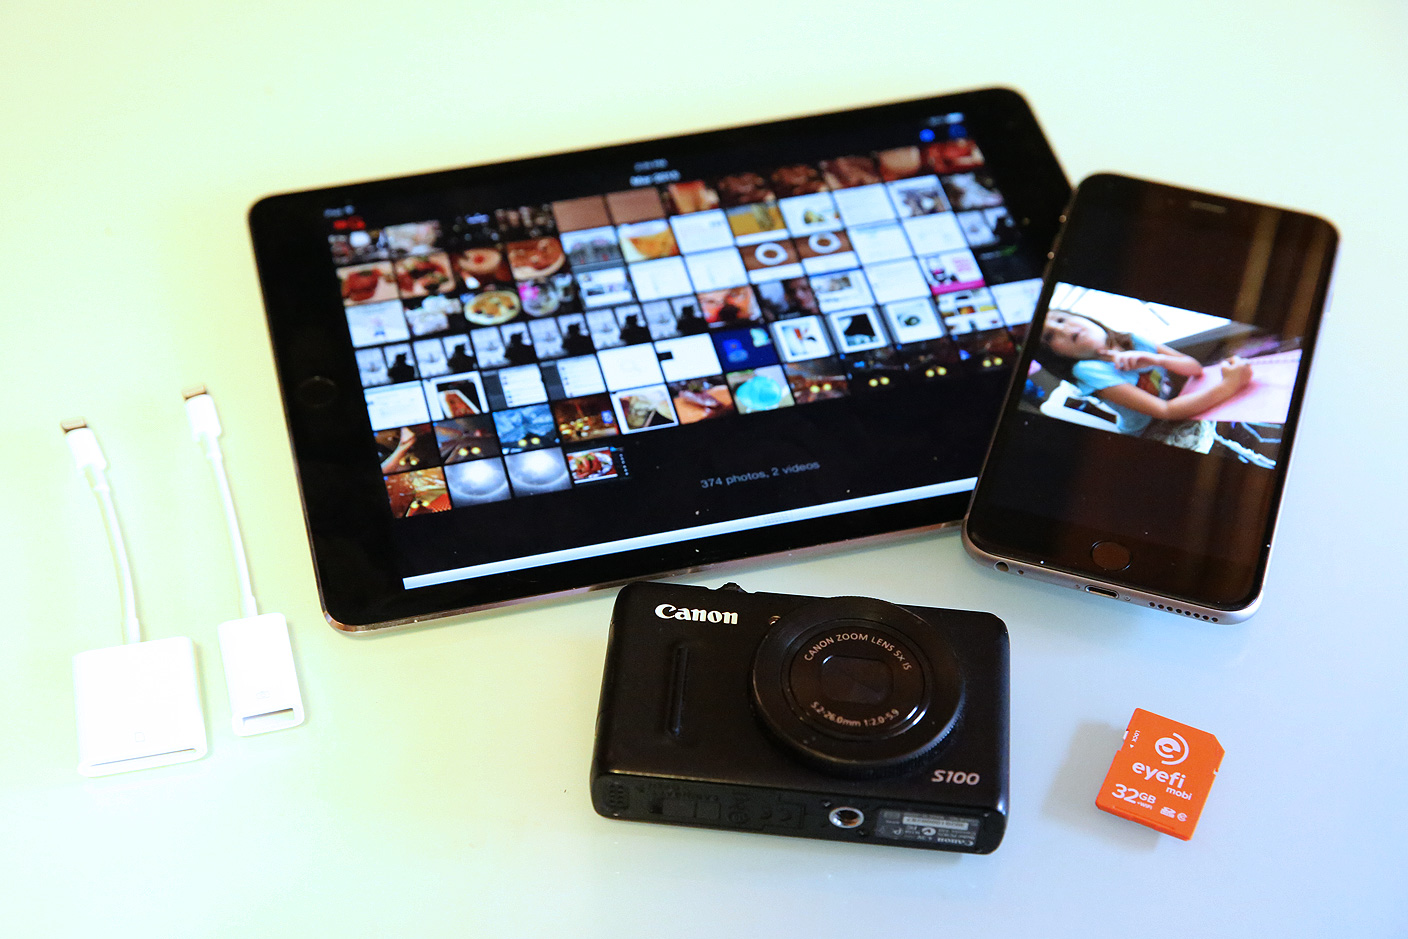
For around $30, your iPhone or iPad can change the way you shoot, edit, and share photos. Using the right accessories and apps, you can easily publish DSLR-quality photos a minute after snapping them. I’ve been doing this for years, and it works incredibly well; today, it’s actually better than at any time in the past, thanks to recent iPhone and iPad hardware improvements. This new How-To guide will walk you through everything you’ll need to know to use your iPhone or iPad as a photo editing and sharing station, looking at photo transferring accessories, editing software, and sharing options…
A Quick Overview: Transferring, Editing, and Sharing Photos
Bringing a standalone camera’s photos to the Internet through your iPhone or iPad requires three steps: transferring images onto your iOS device, running them through an editing app for color-correction, and then sending them to one or more people. Transferring can be accomplished wirelessly or with a wired adapter, each starting at $30. Editing can be done using your choice of free or paid tools. And sharing can be as private as sending an email, or as public as posting to a photo sharing service. My goal is to give you options so you can pick what’s best for your own needs.
Transferring Photos From Camera to iOS
There are two key ways to transfer your camera’s photos to your iPad or iPhone: over Wi-Fi using one of several accessories, or using a wired adapter. I personally recommend the Wi-Fi solutions, which work on iPhones, iPads, and iPod touches, not just iPads.
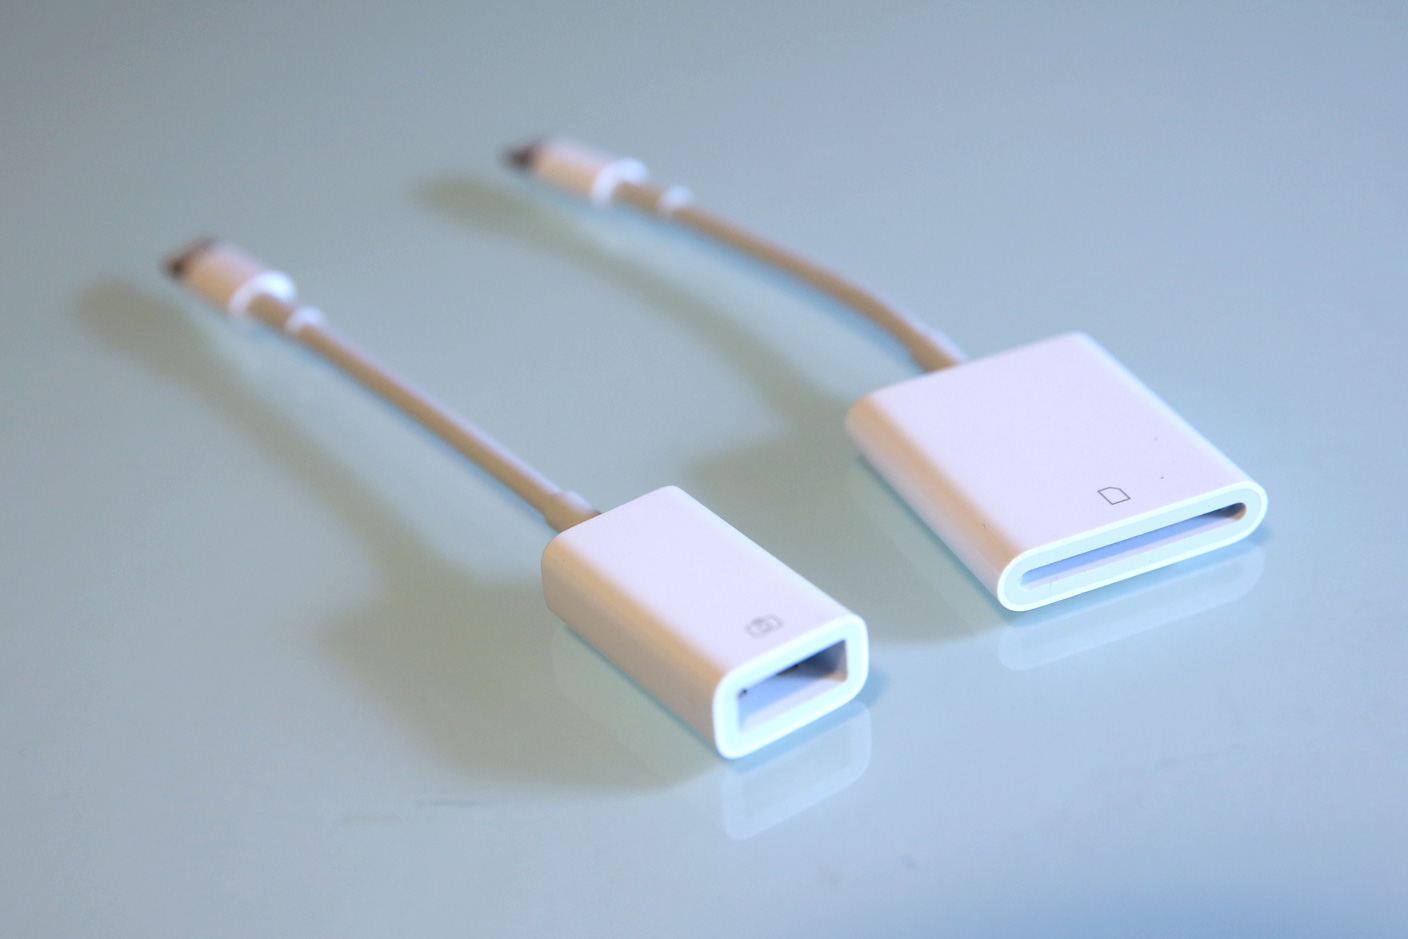
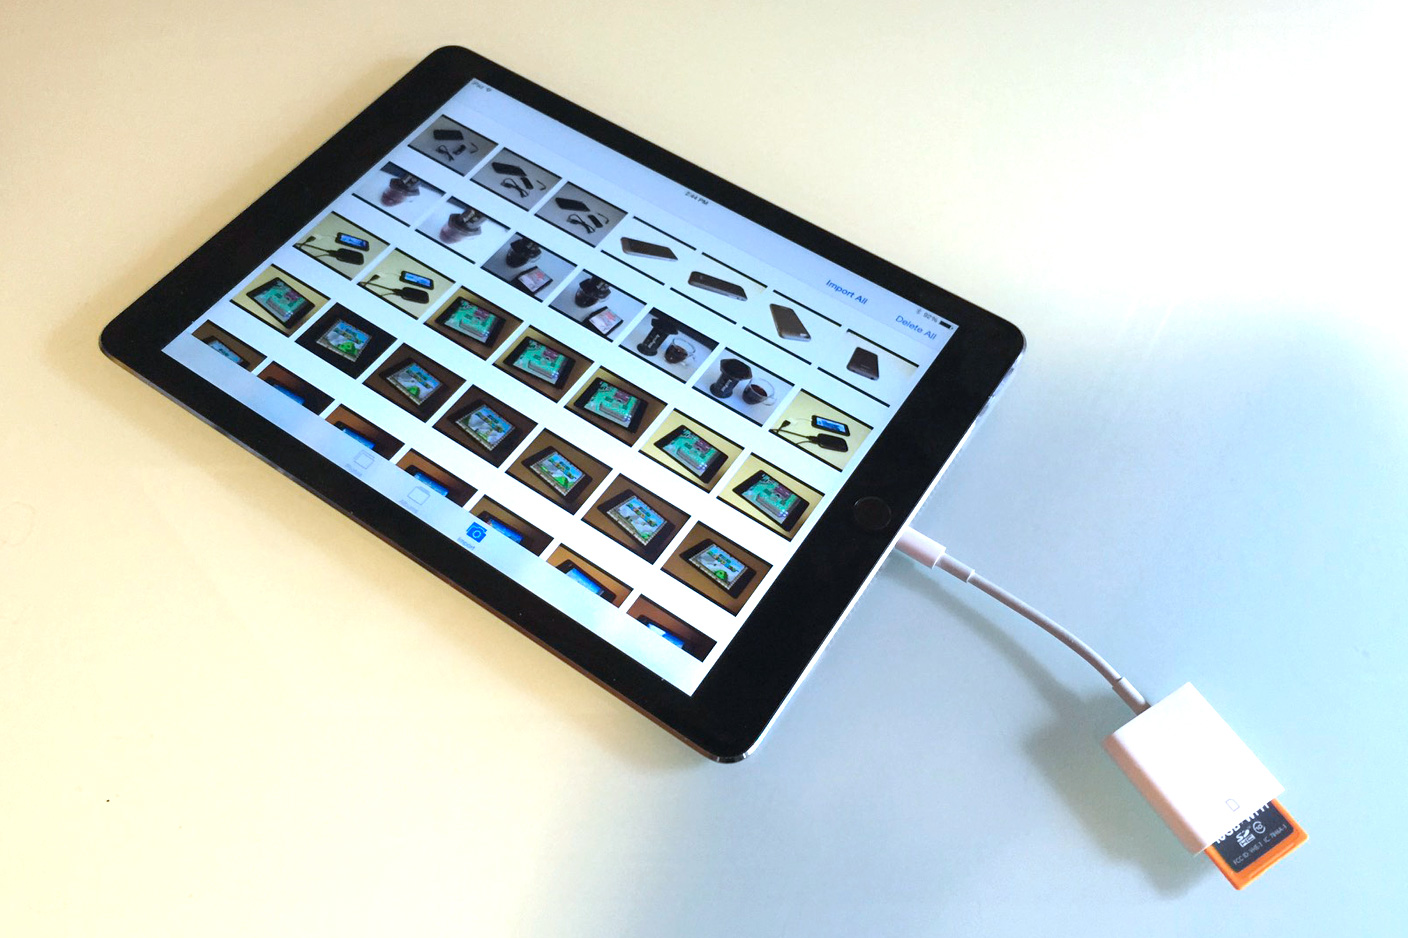
Wired camera adapters only work on iPads — a limitation likely imposed by Apple to reduce battery drain on its smaller devices. If you’re going wired, your safest options are Apple’s Lightning to SD Card Camera Reader or Lightning to USB Camera Adapter, each sold for $29. Most people will be best off with the SD Card Camera Reader, which very quickly imports photos directly into the iPad’s Photos app from any SD card; the USB Camera Adapter is more cumbersome, but lets you connect either a camera or CompactFlash reader via USB.
It’s theoretically possible to go cheaper with unauthorized Lightning camera adapters, but dozens of customer reviews tell sad stories of defects and outright failures with these products. Some work with specific iOS devices and versions of iOS, only to fail later; others come out of the box broken. Based on the number of complaints I’ve read from users of the cheap adapters, I wouldn’t recommend them at this point.

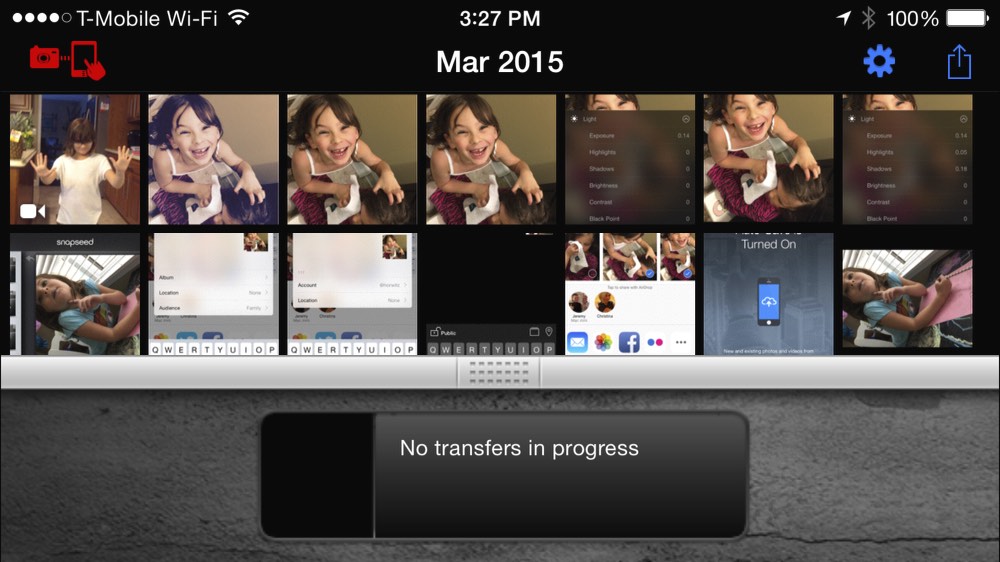
Wireless solutions are better. Out of all the photo transferring solutions I’ve tested for iOS, the one I keep coming back to is Eyefi’s SD cards — and for most people, I’d specifically recommend the version called Eyefi Mobi. Offered in 4GB ($30), 8GB ($40), 16GB ($60) and 32GB ($80) capacities, Mobi lets regular cameras share images over Wi-Fi, creating a Wi-Fi network anywhere you go and transferring photos using a free app. In my experience, setup is super-simple and the results are flawless. (I’ve just finished testing Eyefi’s brand-new professional-class version Mobi Pro ($100), which is reviewed here.)
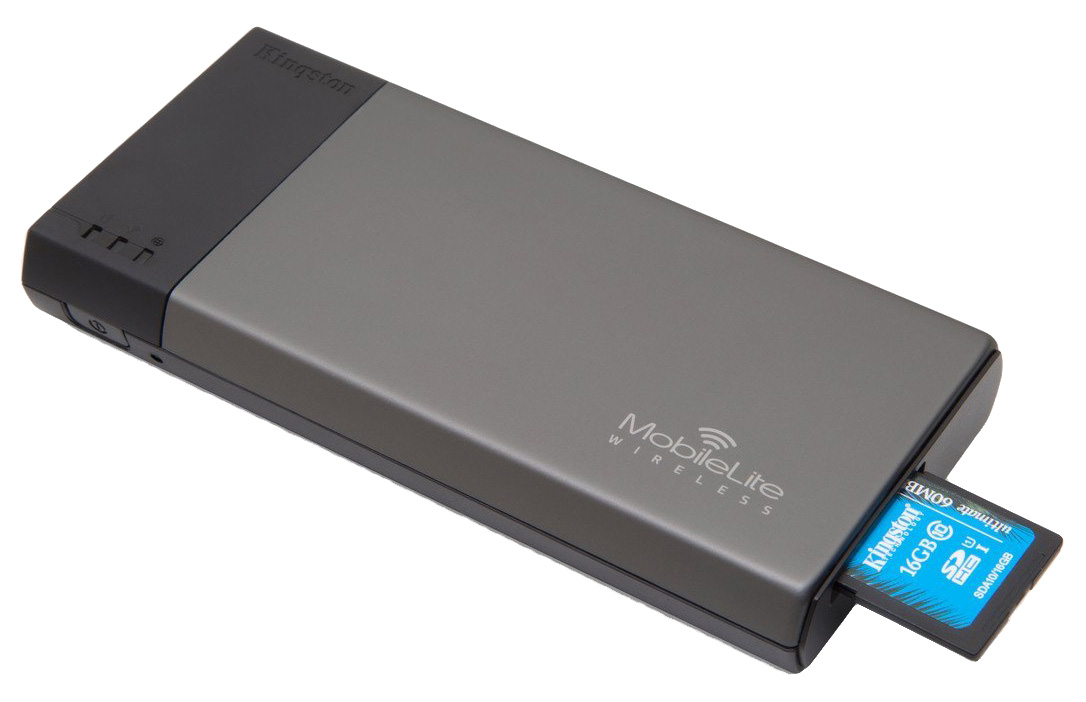
Another alternative is to use your existing SD card with a $40 Kensington MobileLite Wireless Flash Reader. Using an 1800mAh battery, a Wi-Fi chip, and an SD card slot, it enables you to transfer your camera’s images over Wi-Fi to your iPad or iPhone using a free Kensington MobileLite app; you can also transfer the SD card’s contents to a USB drive or flash drive with an integrated full-sized USB port. While it’s a roundabout solution compared with Eyefi cards, it does work.
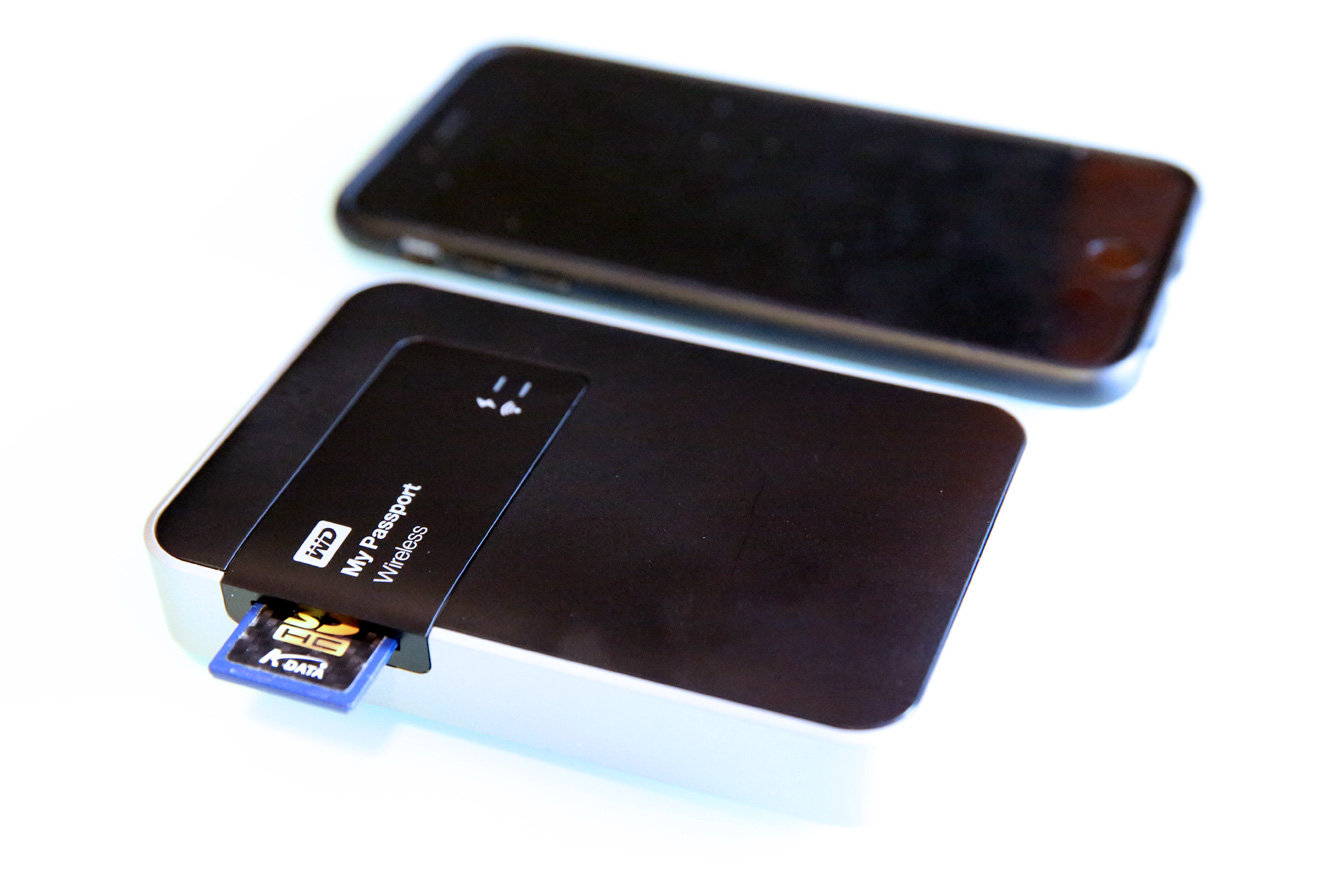
Last but not least, Western Digital sells 1TB ($160) and 2TB ($190) My Passport Wireless hard drives, each with 6-hour Wi-Fi battery life and an integrated SD card slot. Like Kensington’s MobileLite, My Passport Wireless offers a roundabout Wi-Fi solution — you need to transfer the SD card’s contents onto the hard drive before using the free WD My Cloud app to put them on your iPad or iPhone — but if you’re going to be working from the road for a while and want to continually back up your SD card to a hard drive, it may suit your needs.
If your camera has Wi-Fi built in, there’s a good chance that there’s an official app (such as Canon Camera Connect, Nikon Wireless Mobile Utility, or Sony PlayMemories Mobile) to wirelessly transfer photos to your iOS device. If not, or if you’re not satisfied with the limitations of the official solution, 2nd Nature’s $19 app ShutterSnitch is a professional-quality app that can quickly import photos, check lighting and exposure with large histograms, and automatically send images to FTP servers or online photo services. It’s not as intuitive or easy to set up as it should be, but it’s a powerful tool with support for all of the major wireless camera and card standards.
Editing Photos on iOS
There are thousands of photo editing apps for iOS, and because early iOS devices had mediocre built-in cameras and only moderately color-accurate screens, many of those apps focus heavily on adding filters and special effects rather than color accuracy. But the iPhone 6, iPhone 6 Plus, iPad Air and iPad Air 2 all have such excellent, color-accurate Retina displays that you can do nearly professional-caliber color correction on your shots before posting them online. I’m not going to dive into all of the editing options out there, but I do want to point out three tools I personally like and use.

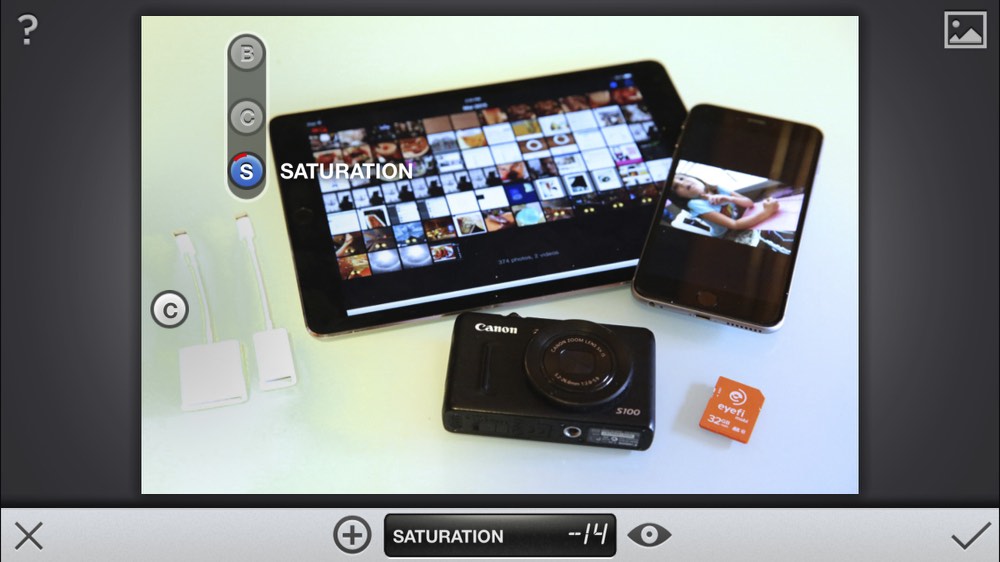
Apple’s free app Photos (included in iOS 8) lets you do a great job of color correction on an iPhone or iPad without downloading any other tool. Make sure the brightness on your device is turned up (temporarily) to maximum, select any photo, and hit the Edit button at the top right of the screen. Tap on the bottom-of-screen dial icon, then use the Light sliders (look for the bulletpoint and three line icon) to adjust Exposure, Highlights, and Shadows, bringing the bright, mid, and dark points to your preferred levels. Repeat with the Color sliders (mostly Saturation and Contrast) to make colors pop or fade. Hit “Done” in the bottom right hand corner, and your image should look markedly better, ready to share with the world.
![]()
These tools — and many more — are included in the awesome Pixelmator for iPad ($10), which goes beyond color correction and filtering to include retouching tools, such as repairing, smudging, and sharpening brushes, plus tools to add text, shapes, and multiple images to a single screen. It’s iPad-only for now, but much more powerful than Photos, and an excellent alternative to using Adobe’s Photoshop on a computer. See our full review here.
Last but not least, Google’s free app Snapseed is halfway between the others in features, letting you make far more precise and distinctive adjustments to images than Photos, but without the premium tools found in Pixelmator. It runs on the iPhone and iPad; I personally only keep it on my iPhone at this point, and jump into it mostly when I need to fix an image where one portion is seriously over- or under-exposed.
Sharing Photos From Your iPhone or iPad
You’re probably more than aware of your iOS device’s built-in photo-sharing options: the Mail and Messages apps are there for one-to-one or one-to-several person sharing, while iCloud Photo Sharing lets you quickly share new images with groups of family and friends. Of course, Facebook, Twitter, and Flickr are all easy to download, and sharing a photo to any of these services requires only two or three taps from the iOS photos app.
A new option — and one that has serious appeal to users frustrated by Apple’s monthly iCloud photo storage fees — is Amazon Photos. As yet another benefit of Amazon’s fantastic Amazon Prime 2-day shipping and streaming video service, Amazon Photos provides unlimited photo and home video storage, synchronizes to all of your iOS (and Amazon) devices, and works with computers and web browsers, as well. It can also auto-sync your iOS device’s photos and videos to Cloud Drive whenever a Wi-Fi connection is established. If you’re already an Amazon Prime customer, all you need is the Amazon Photos app for iOS; if not, I’d strongly recommend signing up for Amazon Prime, which is one of the best investments any online shopper can make.
Read More Of My How-To Guides
How-To: Choose the best external hard drive for your Mac (or iOS device!)
How-To: Boost your Mac’s speed and prolong its useful life with easy RAM upgrades
How-To: Now’s the right time to swap your old iMac’s hard drive for a fast new SSD
How-To: Upgrade the SSD in your MacBook Air or Retina MacBook Pro, boosting size & speed
How-To: Update your old MacBook, Mac mini, or Mac Pro hard drive with a fast SSD
FTC: We use income earning auto affiliate links. More.


Nice read. I’d be interested in an article that goes further on how to organize/clean up photos you’ve imported from an external camera. With the new iCloud Photos, this seems less than intuitive and one can find themselves running out of local and iCloud storage in a hurry!
iCloud photo is not a mandatory option for the upcoming Photos app. You will have the option to set local storage as the primary location for you images. I’d also recommend looking into Mylio as a Photos/iPhoto alternative (starts at $50p/y for unto 50K photos stored online) or SmugMug (starts at $40p/y for unlimited photos). Although the two are completely different in what they offer. Mylio is a direct iPhoto/Photos alternative; SmugMug is a Flickr alternative.
Apowersoft Phone Manager is most prevailing tool use to transfer and share photos from iPhone to iPad. As it is fully compatible with ios operating system, users can safely switch between them. Hope it is valuable to you.
http://www.apowersoft.com/transfer-pictures-from-iphone-to-ipad.html
I also suggest you to using a professional phone transfer tool from Jihosoft. As this tool enables you to quickly transfer photos as well as contacts, videos, whatsApp messages, etc between iPhone and iPad. And this tool is compatible with iOS 10 and iTunes 12.5.1
https://goo.gl/ue6I58
I have a CF card for my 5Dm3. Also, if you made allot of effort to create a perfect 22mb RAW file, pixelmator will not cut it. You need photoshop and a large screen to edit it.
As you probably already know, you can put an SD card into the 5DM3 and either mirror what’s recorded to the CF card, or create JPEGs. I personally use a 5DM3 with CF as a RAW backup for JPEGs on the SD card, which are easy to send to and edit on the iPad while in the field.
CF card here too. 5Dm2.
I used CF cards with my 5DM2 before moving to the 5DM3. Apple’s Lightning to USB Adapter, mentioned in the article, is the right way to go for CF transfers.
I don’t get what is Apple problem with a microSD slot.
It would be soooo much easier.
I use Toshibas Flashair SD Card. Works similar to eyefi mobi only half the price. Toshiba also provides apps for iPhone/iPad. Works great with my Canon EOS 60D.
Great article, Thanks !
For the transfer i like the wired adapter solution, easy and powerful. Wifi is o.k., but sometimes i had problems with a great number on files and a great filesize.
You forgot about VSCOcam, probably the best editing App for iPad/iPhone
Unfortunately, no true RAW processing/manipulation, only the embedded JPEG’s. I’ll stick with Lightroom on the home machine, not the crippled mobile version.
I believe there are apps that use bigger file sizes than JPEG. I take pictures on my 5S with ProCamera and Camera+ in TIFF format, which has a much larger file size than JPEG. The biggest problem is in fact how to move it to the iPad for post-processing, but I believe I just figured a way for doing that via Lightning.
1) excellent article
2) tip: I import my iPhone videos to my iPad with the Lightning – USB adapter Lightning – USB cable. If you have a lot of photos / videos on your iPhone it will take a while for the iPad to show your whole camera roll but it’s a great way to see your videos on the larger screen. And I only shoot video on my iPhone and never on my iPad.
Could you elaborate a bit on this? What is the exact cable setup to connect your iPhone to your iPad? I can’t find a lightning to lightning cable on the Apple Store.
He’s just using the USB adapter mentioned in the article and plugging an iPhone in to the other end. It works, and it works quite well. :)
Blablabla… Eye-Fi-Cards are f**cking slow in Memory Access, Transcend WiFi-SD is a far better choice. In My EOS 5D Mk3 i store the RAW-Image on CF an JPEG on LowRes on SD. That gives a pretty good speed using the iPad with Shoot & View. I gave away my Efe-Fi-Card for free, because it just hab an annoying performance. Never again Eye-Fi!
A WIFI cards write speed is also critical if you want to do rapid bursts, as when covering sports events. A fast SD card is essential for those types of shoots.
Wired card reader with a high speed sd card is fastest.
I would note that the app Frame Lab is good for combining hundreds of time lapsed shots to quickly create nice time lapse videos from a gopro/dslr.
I think you meant Kingston instead of Kensington. Pls fix.