Are you new to using HomeKit, Apple’s smart home platform, thanks to a well-timed Christmas gift? So, you’re in luck! In this article, we’ll be sharing some tips and tricks to help you get started with HomeKit and make the most of your smart home setup. From setting up your first HomeKit-compatible device to creating automations and using the Home app, we’ll cover everything you need to know to get started with HomeKit. We’ll also delve into some of the more advanced features of the platform, such as setting up HomeKit secure video and using the HomePod as a hub. Whether you’re a seasoned smart home user or new to the game, these tips and tricks will help you get the most out of your HomeKit setup.
HomeKit Weekly is a series focused on smart home accessories, automation tips and tricks, and everything to do with Apple’s smart home framework.
Table of contents
What is a Home hub in HomeKit?

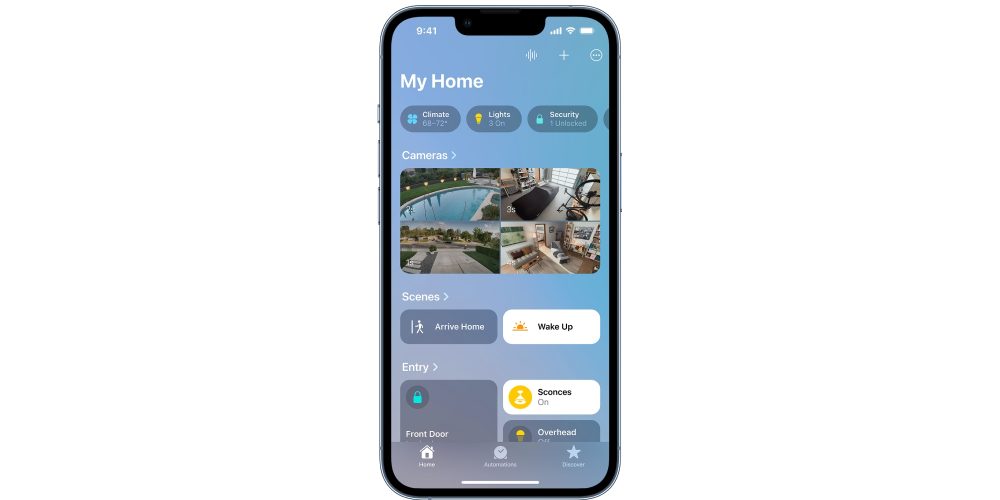
A Home hub with HomeKit is a device that acts as the central hub for your smart home system. It allows you to control and monitor your connected devices remotely, using your smartphone or tablet. With a Home hub, you can turn off the lights, adjust the thermostat, or check the status of your security cameras from anywhere, as long as you have an internet connection. Apple supports an Apple TV or a HomePod mini as a Home hub. If you have multiples, only one will serve as the Home hub while the others will remain in standby mode if the main goes offline. Having a Home hub is essential to having a great HomeKit experience.
Sharing your Apple HomeKit home with someone else
There are several reasons why you might want to share control of your Apple home with someone. For example, you may want to grant access to your smart home devices to a family member or trusted friend so they can control them while you are away. Obviously, sharing your home with a spouse or roommate is a clear reason you might want to share access. Here’s how to share your HomeKit environment with someone:
- Open the Home app on your device (iPhone, iPad, or Mac).
- Tap on the + button in the top right
- Enter the email address you want to invite (your iCloud family accounts appear automatically)
- Tap or click Send invite when ready to send the invitation
Update your HomePod mini
By default, HomePod and HomePod mini automatically install new software updates. However, you can manually check for updates in the Home app on your iPhone, iPad, or Mac. To do this, make sure your device is running the latest version of iOS, iPadOS, or macOS, then follow these steps:
- Open the Home app.
- Tap or click the “More” button, then select “Home Settings” > “Software Update.”
- If there is a new update available, select “Update.” If not, you can turn on automatic updates by selecting “HomePod” and ensuring the latest software will be automatically installed when available. “Software Update” also displays information about the current version of software installed on your HomePod.
- During the update process, a white spinning light will appear on the top of your HomePod. The update may take some time, so make sure your HomePod stays plugged in.
A lot of things are changing in the smart home world right now (Matter, Thread, etc.), and having your devices on the latest OS is a must to take advantage of the latest features.
Configure HomeKit Secure Video
HomeKit Secure Video is a feature of the HomeKit smart home platform that allows users to store and view video footage from their home security cameras in a secure manner. It uses end-to-end encryption to protect the footage from unauthorized access, and stores it in iCloud rather than on the camera itself.
The number of cameras that can be added to HomeKit Secure Video depends on the iCloud+ plan that you have: the 50 GB plan allows for one camera, the 200 GB plan allows for up to five cameras, and the 2 TB plan allows for an unlimited number of cameras.
One of the main benefits of HomeKit Secure Video is its integration with other HomeKit-enabled devices, which allows users to set up automations and triggers based on the video footage. For example, users can turn on the lights if motion is detected or receive an alert if an unusual event is captured. Check out this article I wrote a few years ago to see how these triggers helped prevent my car from getting stolen.
To use HomeKit Secure Video, you will need to enable it in the iCloud settings of your iPhone, iPad, or iPod touch. From there, you can add cameras to the Home app and choose when to stream and record options, as well as assign the cameras to specific rooms and create activity zones and face recognition alerts. The streaming and recording options will allow you to customize settings like only record when no one is at home, etc. For privacy-focused individuals, these settings are fantastic.
Creating HomeKit automations
A home truly becomes smart when you can have devices like your lights, blinds, locks, thermostat, motion sensors, and more working in concert automatically without having to issue commands or touch your iPhone.
With the Home app, Apple includes a nice user interface to quickly and easily create Automations that help you get the most out of your HomeKit devices.
On iPhone or iPad, choose the Automation tab in the bottom center of the Home app. Chose an option for what will trigger your Automation (e.g., time of day, motion sensor, people arriving or leaving, etc.). Choose what HomeKit devices are involved and how they should respond (turn off, on, etc.) to the Automation being triggered. When finished, tap Done in the top right corner.
Creating HomeKit scenes
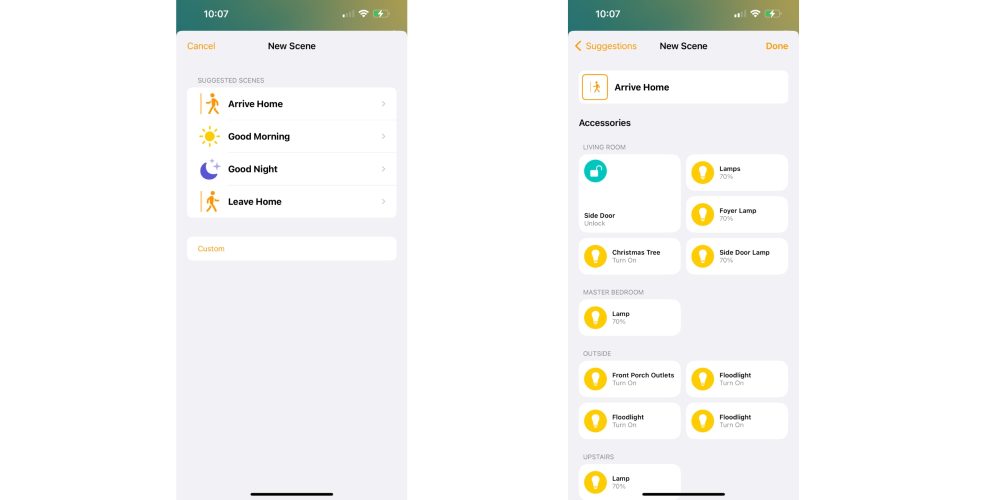
HomeKit Scenes are a useful feature that allows you to control multiple devices and accessories at once with a single command. For example, you can create a “Good Morning” scene that turns on the lights, starts the coffee maker, and adjusts the thermostat to your preferred temperature without needing to individually control each accessory.
To create a Scene in HomeKit, follow these steps:
- Open the Home app, and tap the “+” button in the top right corner.
- Select “Add Scene” from the options.
- If you want to make a custom scene, tap on Custom.
- Name your Scene and choose an icon or image to represent it (tap on the existing icon to change).
- Tap on Add Accessories
- Find the devices you want to automate with the scene and set the desired state.
- Repeat the process for each device or accessory you want to include in the Scene.
- When you’re finished adding actions, tap “Done” to save the Scene.
You can then activate the Scene by tapping it in the Home app, or you can use Siri to say, “Hey Siri, turn on the Good Morning scene.” You can also set up automations to trigger a Scene at a specific time or when certain conditions are met. For example, you could set up a Scene to turn off all of your lights and lock your doors when you leave the house or at a certain time of day. Scenes are a powerful tool for streamlining your HomeKit setup and making it easier to control multiple devices at once. If you get really into scenes, check out the Wemo controller for configuring a quick way to trigger scenes without needing to have access to an iOS device.
Set up NFC automations within HomeKit
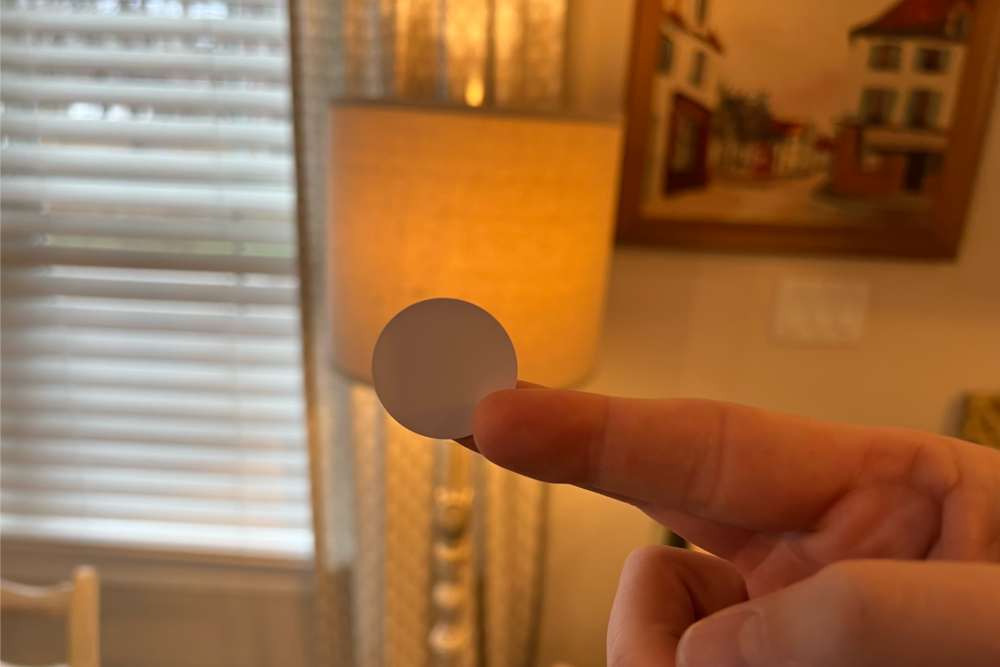
There are various ways to interact with HomeKit, including using the Home app on iOS or macOS, using Siri on a HomePod or Apple Watch, and using NFC tags. NFC tags are an underutilized technology that can be used to build HomeKit automations quickly and easily, and they can be very cost-effective at less than $1 per automation. In fact, since learning how to use NFC tags, I have found them to be a convenient way to use HomeKit, as they offer faster access than the Home app but are more reliable than Siri. It is worth noting that NFC tags have the potential to see wider use in the coming years, similar to how QR codes were underutilized for a decade. If you don’t have any, here is a link to purchase some low cost onces.
You might be thinking that the Home app is the best place to create NFC automations for HomeKit, but you’ll actually start in the Shortcuts app. To begin, look for the Automation tab at the bottom of the Shortcuts app > Choose Create Personal Automation.
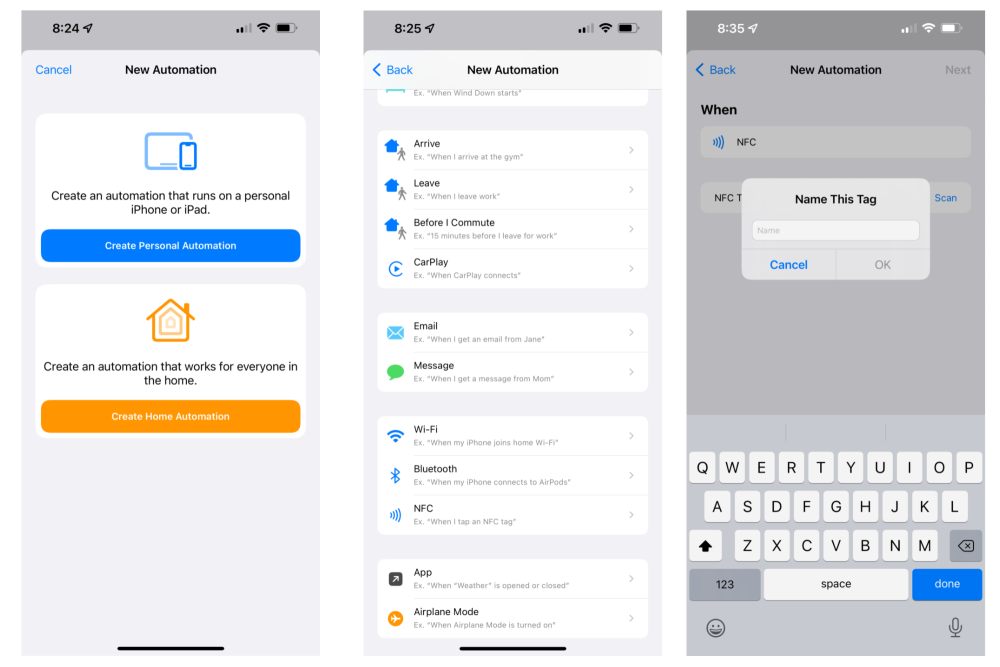
Next, look for the option When I tap an NFC tag. On the next screen, tap on scan. Then take one of your NFC tags, put it up to your iPhone (on iPhone 13, it’s near the camera). You’ll then have the opportunity to name it. I chose the name of the automation I plan to run when I tap on it.
Next, choose Add Action. Next, tap on the Apps tab, and choose Home, choose the Take Control of Your Home option. Next, tap on Set Scenes and Accessories. Find your Accessory/Scene and then set if you want it to come on or off. Then, you can finalize the HomeKit automation with the NFC tag. One thing to note, I would turn off the Ask Before Running for the vast majority of automations.
Solving the no response error in HomeKit
In HomeKit, the “No Response” error typically indicates that a device or accessory is not responding to commands or requests. This can happen for a number of reasons, such as a connectivity issue or a problem with the device itself.
Here are some steps you can try to troubleshoot the “No Response” error:
- Check the device’s power source and make sure it is turned on and functioning properly.
- Check the device’s connectivity. Make sure it is within range of your home’s Wi-Fi network and that it is properly connected to the network.
- Restart the device. Sometimes, simply restarting the device can resolve the issue.
- Check for updates. If the device has a firmware update available, try installing it to see if that resolves the issue. Some devices can be updated within the Home app, but others will require you to download the manufacturer app first.
- Remove and re-add the device. If none of the above steps work, you may need to remove the device from HomeKit and then add it again. This can sometimes resolve the issue. You’ll likely need to “reset” the device first. This process will vary per device.
If you continue to experience the “No Response” error after trying these steps, it may be a problem with the device itself and you may need to contact the manufacturer for further assistance.
Looking to add a few more devices?

Buying smart home products can be an addiction as once you go down the rabbit hole of automating your home, you constantly are looking for more ways to automate your home. Here are a few of my favorite products:
- Eve Energy – great for automating lamps and other traditional appliances
- Fibaro flood sensor – ideal for putting under sinks to detect water leaks
- August lock – an easy way to convert your existing deadbolt into a smart lock so it can work with HomeKit
- abode alarm system – a HomeKit-compatible alarm system where almost all accessories can be exposed within HomeKit for automations and monitoring
- Onvis motion sensor – HomeKit motion sensors are great for automating lights based on activity in the home
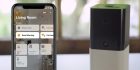
- Starling Home Hub – an easy way to add all Google Nest products to HomeKit including thermostats, cameras, and more
- HomeKit light bulb – quickly convert existing light fixtures to HomeKit with HomeKit-enabled light bulbs.
Wrap-up
If you want to become an expert in HomeKit, the best way to do so is to try out new products, explore new shortcuts, and experiment with different automations. There are always new devices and features being released, and the best way to learn about them is to get hands-on experience. So don’t be afraid to try out new things and see what works best for you. Whether you’re a beginner or an experienced user, there’s always something new to discover with HomeKit. So, keep learning and exploring, and you’ll be a HomeKit expert in no time!
FTC: We use income earning auto affiliate links. More.


Comments