A term used to describe non-Apple machines featuring x86-64 processors that run macOS. Hackintosh machines allow for deeper customization than traditional Mac machines, and oftentimes provide more power per dollar spent. Hackintosh machines can be difficult to install, maintain, or upgrade, however.
“Hackintosh is (almost) dead,” proclaims a new blog post from Aleksandar Vacić – and the Apple Silicon transition is partially to blame. As Vacić writes, Apple has “completely removed all traces of driver support” for Wi-Fi and Bluetooth cards key to the Hackintosh world.
Hackintoshes – PCs tweaked to run macOS with workarounds have been around for a while. But as Apple only wants its software to run on its own devices, it’s become more difficult over time to actually use them as functional machines. Now a new type of Hackintosh appears to be gaining some traction that may be useful for research and educational purposes, virtual Hackintoshes. Interestingly, a video of an iPad running macOS has just surfaced as the latest virtual Hackintosh.
If the upcoming iMac Pro or refreshed Mac Pro aren’t in your sights, then perhaps you might consider a Hackintosh build? We’ve covered several builds over the years, and found that they provide, by a large margin, the best bang for the buck when it comes to performance.
Today, UniBeast, one of the most popular automated tools for putting together a Hackintosh machine, was updated to version 8.0 for macOS High Sierra. That means that you can, with relative ease, build a super-fast machine running the latest version of macOS. Expand Expanding Close
When you think of Hackintosh build, you may generally think of an Intel-powered rig in a big and bulky PC enclosure. That’s not the case for friend of the site Dom Esposito’s build, which took over a month to put together. His Ryzen-powered Hackintosh is neatly nestled inside of a custom Power Mac G5 case, providing a unique take on a Hackintosh build both on the inside and outside. Expand Expanding Close
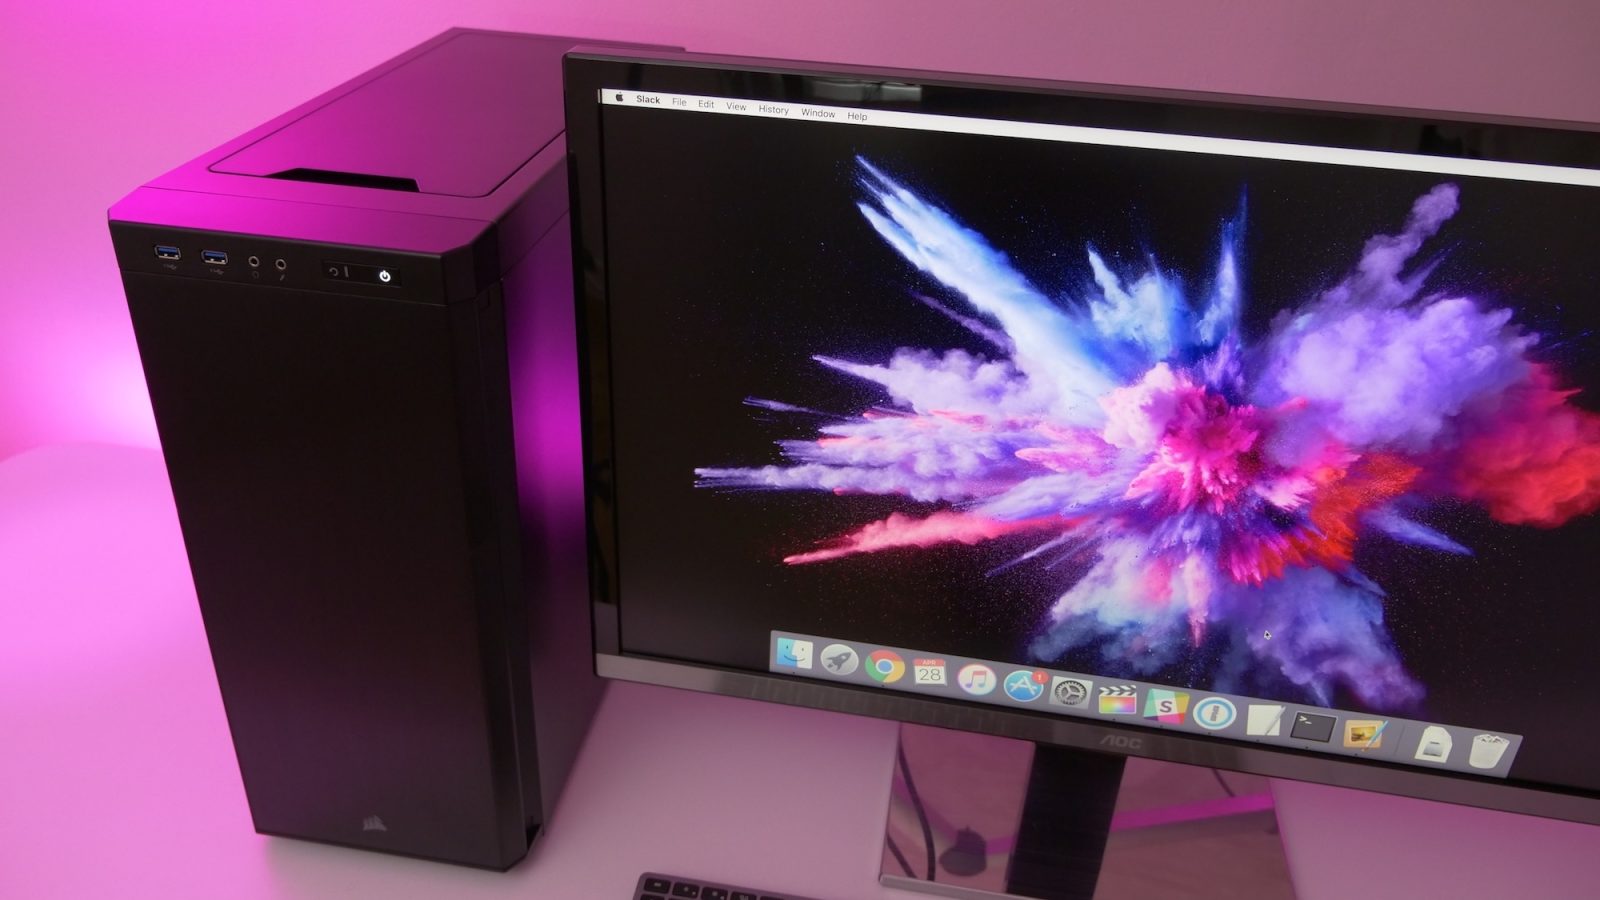
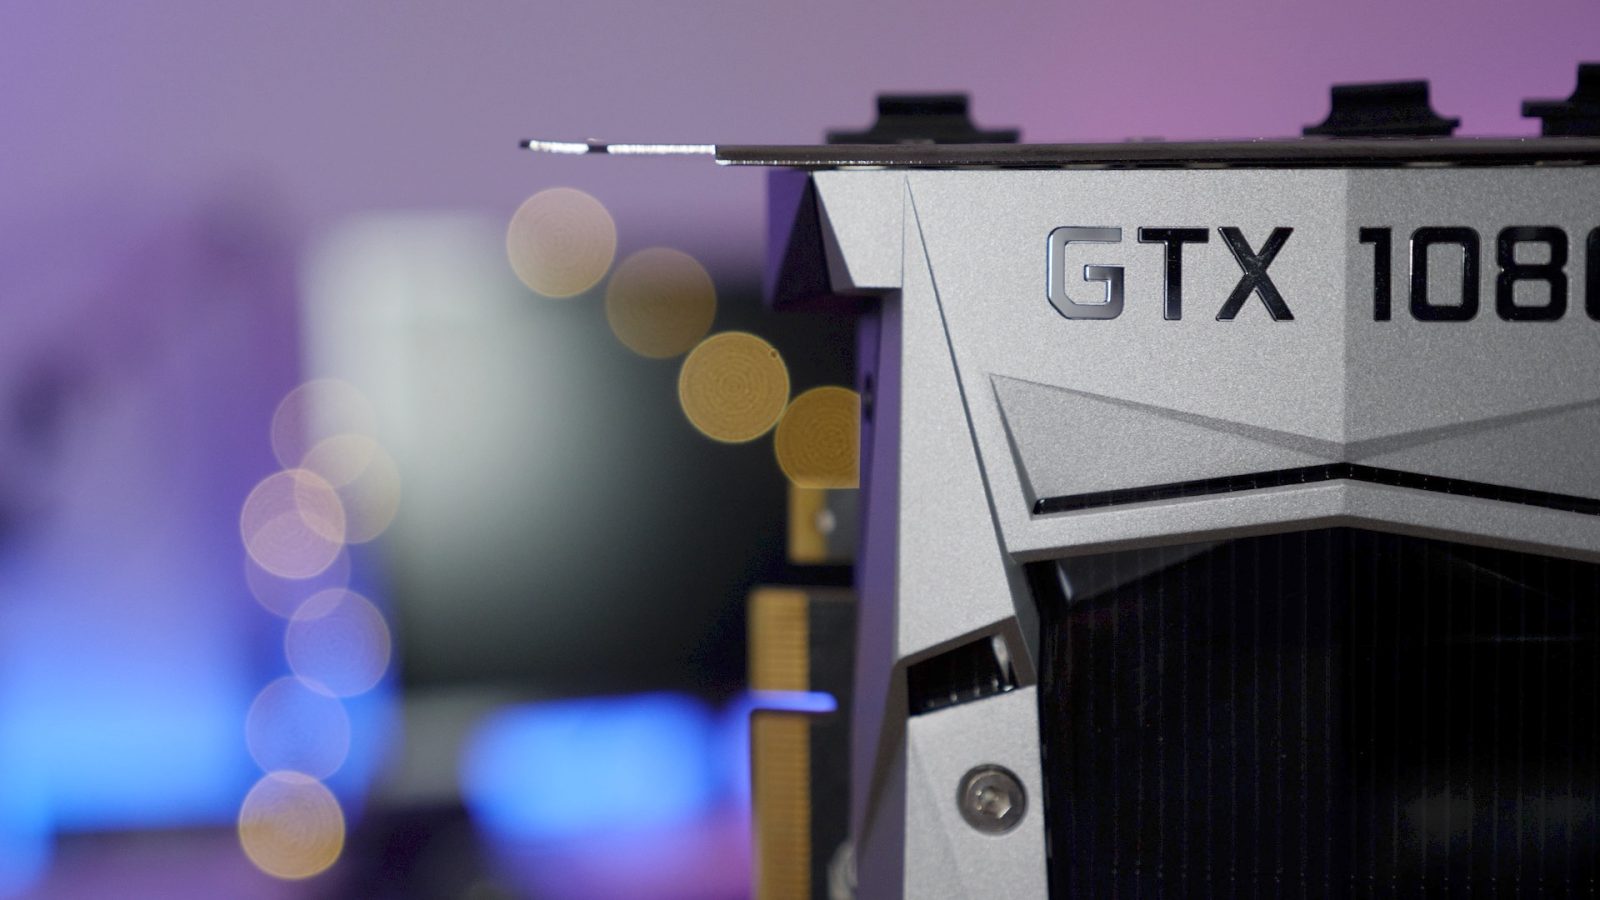
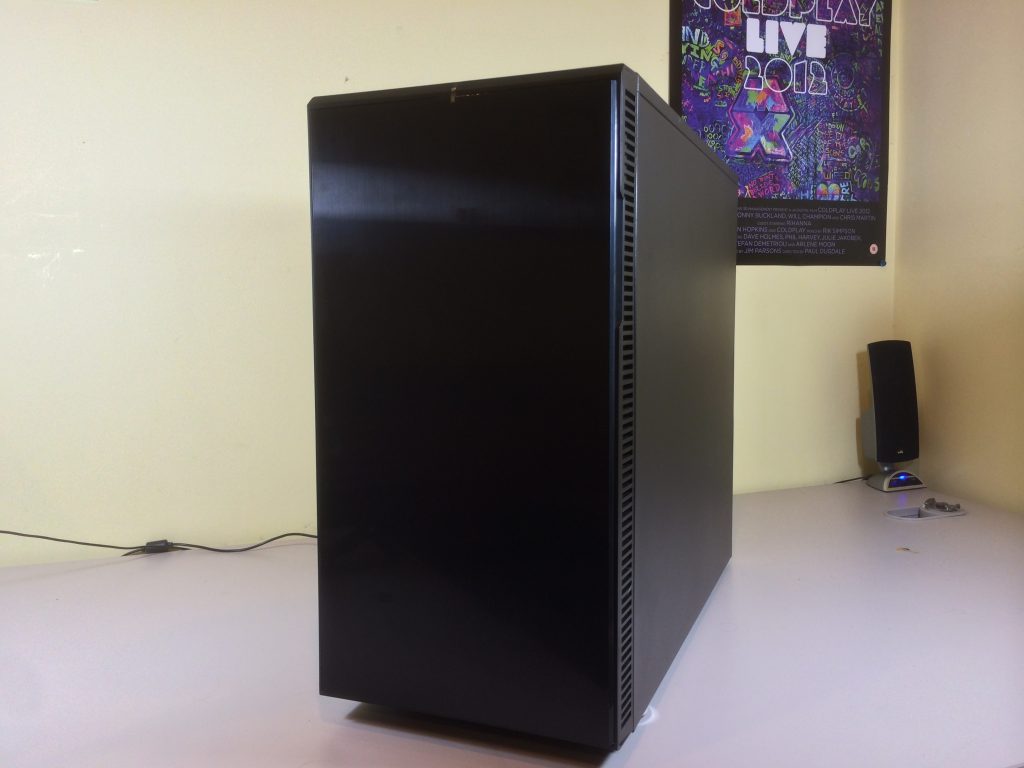
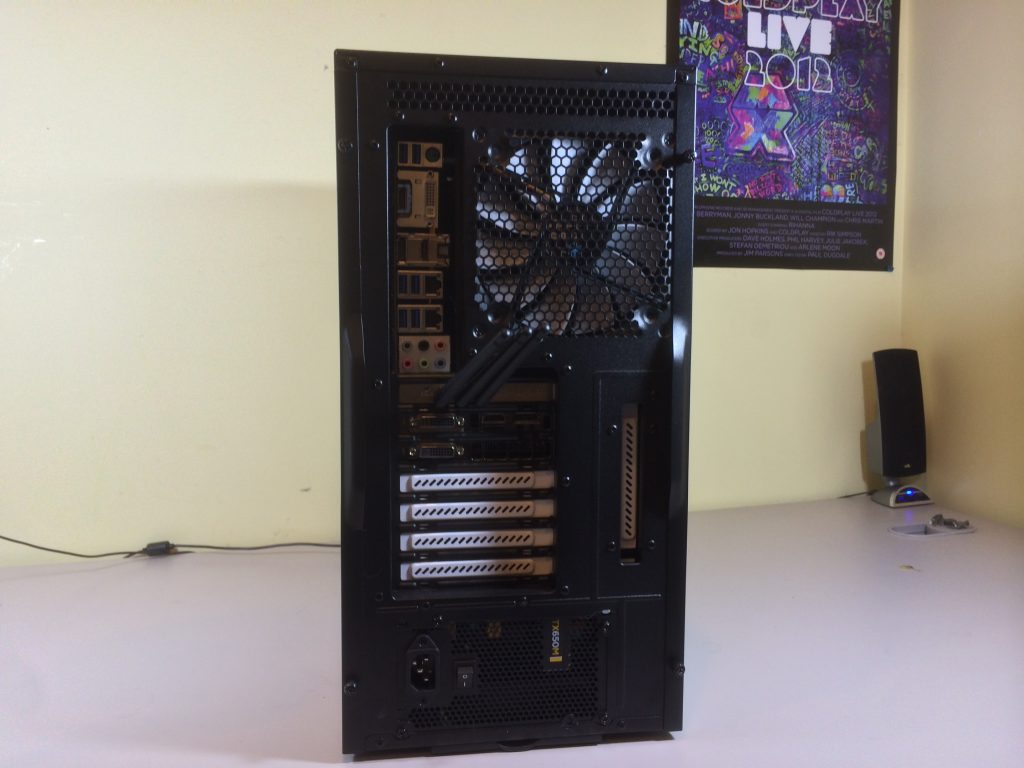
If you’re looking to build a Hackintosh that can serve as a competent Windows gaming rig on the side, then a build powered by an Nvidia GPU is a good choice. In our most recent Hackintosh build, we paired an Intel i7 6700k with Nvidia’s fastest gaming GPU, the 1080 Ti.
The results weren’t all that surprising. Performance was good in a macOS environment even when using Nvidia’s beta web drivers. Performance was a lot better, though, in a Windows environment, where Pascal GPUs can really thrive.
If you’re interested in building a Hackintosh solely for video editing, however, then an Nvidia-powered GPU option might not be the best choice. Sure, Nvidia GPUs with their CUDA cores are generally superior for editing in an Adobe workflow, but if you’re building a Hackintosh machine solely for video editing, chances are you’re interested in running Final Cut Pro X.
A few days ago we posted about the hardware used and performance benefits of my most recent Hackintosh build. In today’s tutorial, I’ll step through the entire install process in full unabridged detail.
While it might seem a bit daunting to go through the Hackintosh setup process for the first time, once you understand the basics, it’s not so difficult. Have a look at our hands-on video for more details. Expand Expanding Close
In a previous article, posted shortly after Nvidia announced its new Pascal Mac drivers, I briefly discussed my plans to build a new Hackintosh. I’ve been planning and working on the machine for over a week, and I’m finally at the point where I can share the results of my journey.
This isn’t my first Hackintosh build, but it’s the first build where I decided to go about it without the assistance of the excellent tools over at tonymacx86. I’ve been long interested in building a Hackintosh using just the Clover EFI Bootloader, and that’s exactly what I did for this build.
Going about it this way allowed me to learn more about the process, and helped me to see that the entire premise, while tedious at times, is actually fairly straightforward. In this initial post, I’ll talk about some of my reasoning behind my hardware choices, and share some initial experiences and benchmark results. Expand Expanding Close
The Hackintosh community is probably best described as a group that doesn’t love Apple’s hardware options for pros but would prefer not to give up macOS for Windows or another alternative.
They design their own custom PC builds, and work together to come up with the necessary hacks to get macOS and the software they need running on the machines. Who better to ask what Apple should include in its upcoming modular Mac Pro than the pros it has pushed away?
To find out what Hackintoshers want in the new machine, and maybe what would help bring back some pros that Apple has lost in recent years, we’ve talked to the moderators at one of our favourite Hacktinosh communities, tonymacx86.com.
We also got some input from our own resident Hackintosh enthusiast (and YouTuber) Jeff Benjamin, and some other pros and gamers that have made the jump from Apple’s pro machines to a Hackintosh.
I’m currently in the process of building a new Hackintosh rig for 2017, so imagine how surprised and happy I was to hear that Nvidia is working on beta drivers for its GPUs with the latest Pascal architecture. Up until today, I had just settled on being relegated to a Radeon RX 480, or a Maxwell-era Nvidia card.
Not having Pascal drivers for the Mac certainly didn’t diminish the Hackintosh community, but it was significantly limiting in both options and creativity.
With today’s announcement, the Hackintosh just got exponentially more appealing. Nvidia’s announcement is positive for a variety of reasons: there’s the prospect of using an eGPU setup with a MacBook Pro, along with future prospects of Nvidia cards powering future Mac Pro hardware.
But on the immediate horizon, the announcement is most promising for Hackintosh builders. With this in mind, I wanted to share the build that I’m currently working on in this first part of a multi part series. Expand Expanding Close
Anyone not happy with the latest MacBook Pro options might be interested in a Hackintosh project posted to Github for the Dell XPS 13. Dell describes the machine, which offers Thunderbolt 3/USB-C ports, as ‘the smallest 13-inch laptop on the planet.’
In part I of our Hackintosh tutorial, we discussed our choice of hardware and the reasons behind those decisions. The main goal was to create a machine that had enough power to meet the Oculus Rift hardware requirements.
In this follow-up tutorial, we’ll show you the entire software install process needed for completing the build. Watch our 18+ minute step-by-step tutorial and witness this Hackintosh come to life. Expand Expanding Close
Back at the beginning of March, Oculus CEO Palmer Luckey made controversial statements about Apple’s hardware, specifically the inability of any Mac in Apple’s entire lineup of computers to handle the graphics needs of the upcoming Oculus Rift. At one point in time, Oculus had support for OS X in the pipeline; in fact previous Rift dev kits supported Macs. As time went on, however, it was decided that the Oculus Rift would be Windows-only, at least initially.
It’s with Luckey’s comments, and the lack of initial OS X support in mind, that I’ve decided to put together a Hackintosh machine that meets the minimum requirements outlined by Oculus, yet can still run OS X. In theory, this machine could support the Oculus Rift if the necessary software was made available for OS X. It can run the Rift now if you install a Windows partition on it… Expand Expanding Close
Ever since the Mac Pro was released in December, we’ve faced an onslaught of 4k displays. We reviewed Seiki’s budget offering last year, and while we liked it overall, it did have more than its fair share of set backs. For instance, you could only use the full 4k resolution at 30Hz, which meant that there would be noticeable lag when using the display as a monitor. Despite the low refresh rate, the display was still a great deal at its then $450 price point (now down to $390) and truly got us excited for the potential of 4k. At CES this year, we also saw a variety of 4k displays, some of which were priced for budget-minded customers, and some of which were high-end. Noticeably missing from CES, however, was Apple’s frenemy supplier/competitor Samsung.
Samsung, at the end of May, unveiled its take on an affordable 4k display. Samsung’s U28D590D is a 28-inch 4k monitor that supports full 4k resolution at 60Hz via a DisplayPort 1.2 connection. There are also two HDMI ports, but they’ll only do 4k at 30Hz, like the Seiki. The big selling point of the Samsung monitor, aside from doing 4k at 60Hz, is that it costs just $646 on Amazon. This puts it far below any currently available 4k monitor with 60Hz capabilities. I purchased the Samsung U28D590D on Amazon while it was priced at $666 and have been using it as my primary display for the past week. How does it compare to the Seiki? Is 4k all it’s hyped up to be? Let’s discuss.
It’s no secret that Apple’s Late 2013 Mac Pro looks strikingly similar to a (really futuristic, shiny, insanely great) trash can; take a look for yourself. You can even replace the Trash icon on your OS X Dock with a… Mac Pro. Let’s just agree there’s a certain…resemblance.
That inspired one Apple fan to build a Hackintosh based on the new Mac Pro design using, yes, an actual trash can (specifically, an Authenics Lunar <–check scale) for the casing. The result isn’t exactly as powerful as the Mac Pro sold today by Apple; this specific build lacks Thunderbolt support and its processor is a Haswell i3 that you might find in a much cheaper PC.
Nevertheless, the final product is down right fascinating to see. Check it out below: Expand Expanding Close
Over the years, building ‘Hackintosh’ computers has become both a lot easier and more popular. For those unfamiliar, a Hackintosh is essentially a machine running OS X on non-Apple approved and manufactured hardware. There are many reasons to build a Hackintosh instead of buying a Mac directly from Apple. They can be more expandable, faster, have more features and configurations, run quieter and can be a great learning experience. One of the biggest reasons to go down the road of building your own, however, is price. It’s no secret that Apple charges a premium for its products, especially if you don’t need some of the hardware (Thunderbolt for example). And thanks to the ongoing growth of the Hackintosh community, the process has become very easy over the past few years.
Back in 2011, Seth took a stab at building a Hackintosh. He originally intended on it being an affordable, baseline model without many bells and whistles. He ended up building a $750 ‘beast’ that competed with the best iMacs of the day, though. Now, it’s my turn to make an attempt at building a Hackintosh, but with an added twist. I am building one capable of performing on par with the highest-end Macs and capable of powering a 4k monitor. And, I want it took look ultra-sleek on the outside and be absolutely silent. I don’t want to be able to hear the hard drive, fans, or anything else –essentially nonexistent in my office. Most of all, I want to do it on a budget of about $1500, not including a 4k display.
Let me preface this with something, though: I have never built a computer, Windows or OS X. In fact, up until this project, I was pretty clueless as to what went into building a computer. So if I am able to successfully build this machine, pretty much anyone can. My best friend for this project was easily tonymacx86.com, which we have praised in the past for its clear breakdown of compatible parts and software guides.
Let’s start by discussing the parts that I decided to use for this build.
How the new Ivy Bridge CPUs look to match up to Intel’s previous generation Sandy Bridge platform. Benchmarks include both stock and over clocked Core i7 3770K and Core i7 2600K. Plus a look at how the new chips may affect the next round of Mac upgrades.
Lifehacker has posted a nifty guide to building a Hackintosh, Mini style. This Hackintosh is very similar to Apple’s Mac Mini in price but more burly in specs. Hackintoshes offer a great way to learn about the innards of computers and how they work.
The end product ran up a price tag of $599.65, which is a very fair price for what you’re getting.
OPTIONAL: OCZ Agility 120GB SSD$199.99 (note: this is optional and not included in the total cost of the machine)
The squad over at Lifehacker used tonymacx86’s CustoMac Mini tool and a good suite of hardware. While this isn’t as small as a Mac Mini, it is very close and is a lot faster. Check out Lifehacker’s video above on how to set this up and visit their post for a list of hardware. We have to warn you, this isn’t for every computer user, because you need to know how to build your own computer and do a little tinkering.
If a Hackintosh Mini isn’t for you, check out tonymacx86’s guide to making a Sandy Bridge Hackintosh. Intel’s Sandy Bridge processor is rumored to be included in many of the new Macs. Why not go ahead and build one on the cheap? Tonymacx86 has all the answers.